We followed this on a fresh DigitalOcean server (2 vCPU, 4 GB, $24 a month) and kept the result: the live InvoiceFlow demo runs on it. The repo's docs/deploy/coolify.md has every detail; this is the path.
1. A server with Coolify
- Create an Ubuntu server with at least 2 vCPU and 4 GB of memory. With the app running, ours used about 2 GB.
- Point your domain at it: an A record for
app.yourdomain.comto the server's IP. - Install Coolify with its one-line installer. It took 135 seconds.
- Open Coolify on port 8000 and create the admin account right away (the first person to open it becomes the owner). Coolify then shows a setup wizard; Skip setup is fine.
2. The resource
- Projects, + Add, Resource, and pick your private repository (through Coolify's GitHub App, or a deploy key).
- Build Pack: Docker Compose, Base Directory
/deploy, Docker Compose Location/docker-compose.yml.
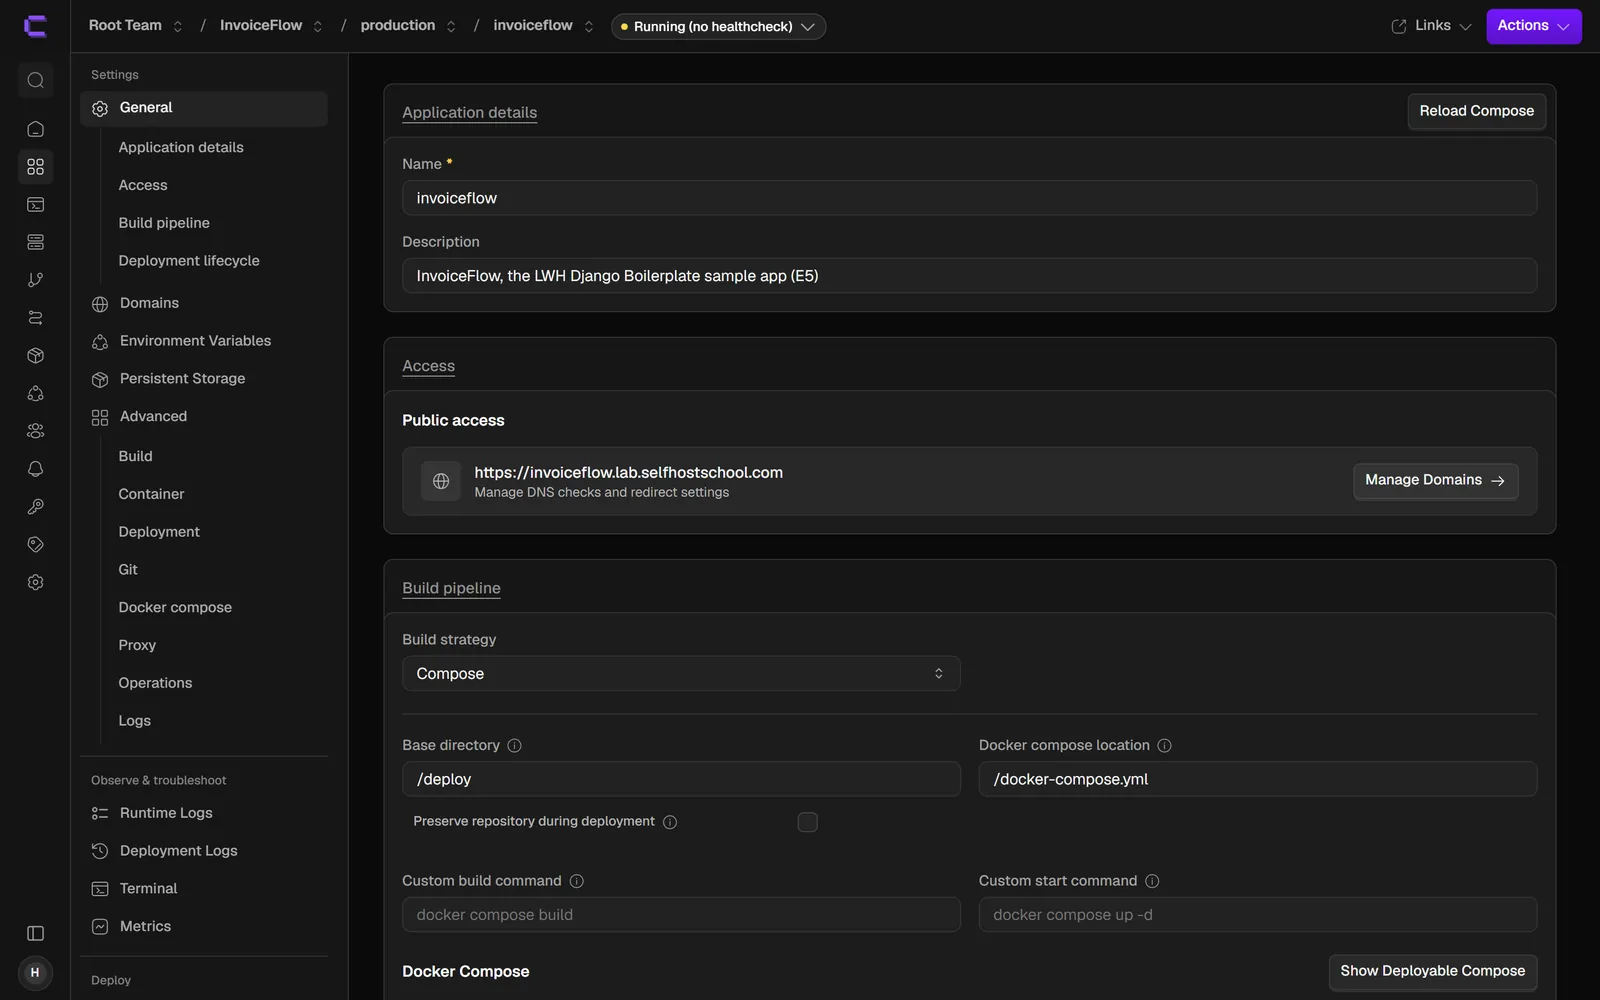
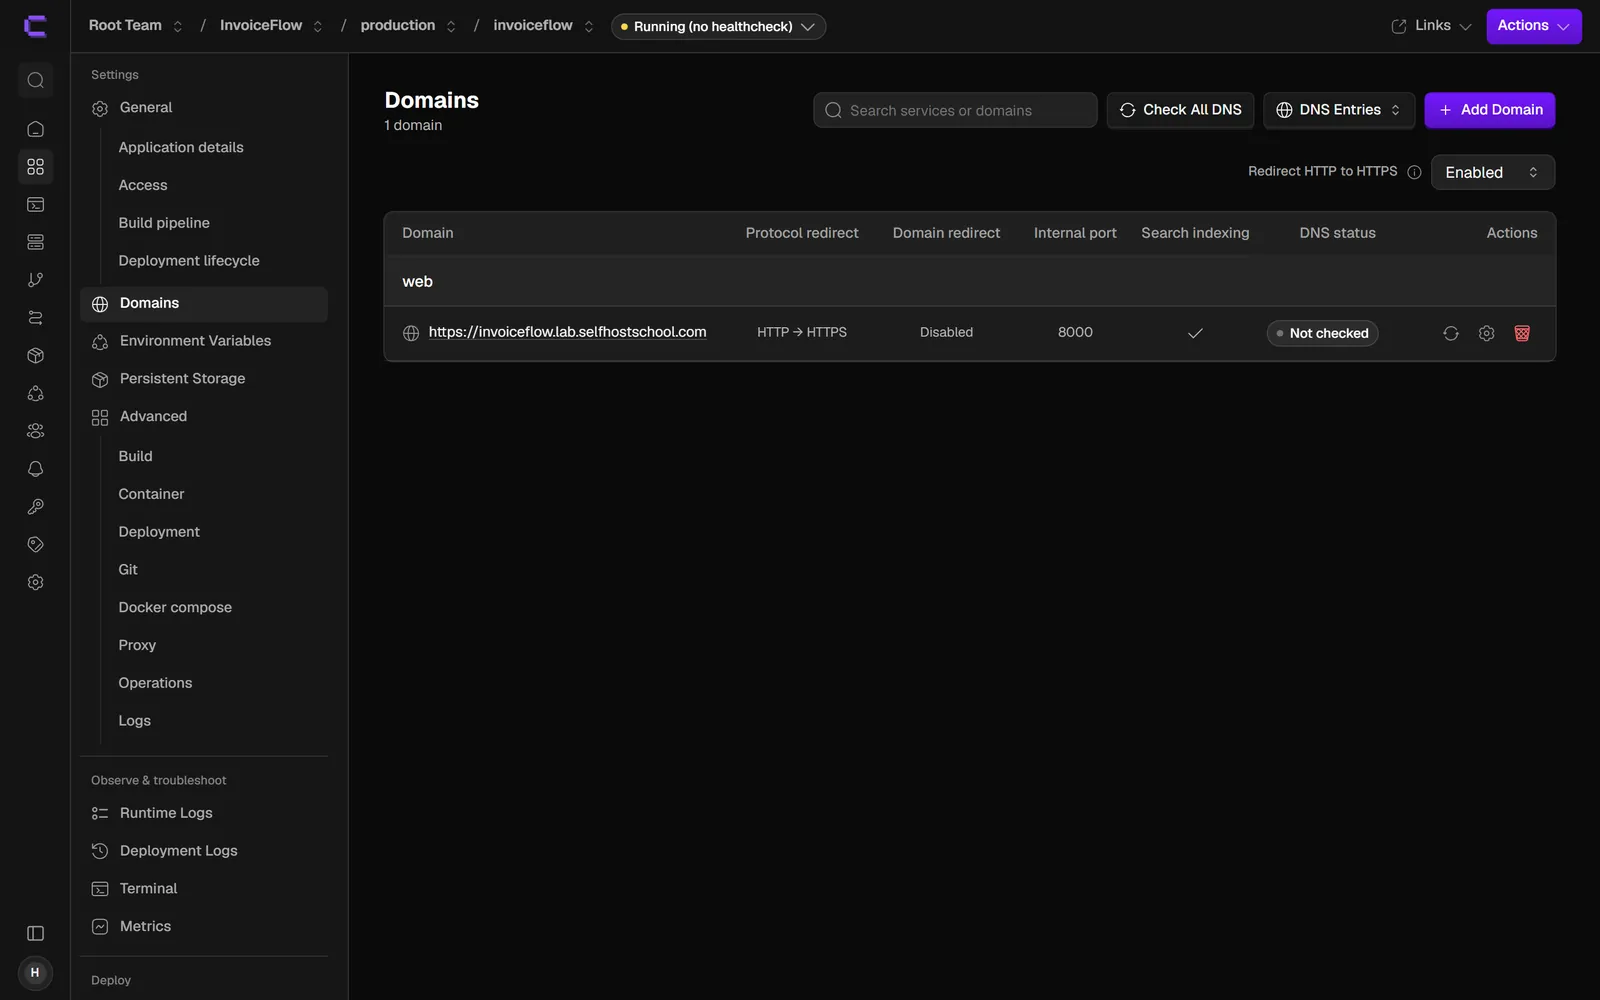
- On the web service, Domains:
https://app.yourdomain.com:8000. The:8000is the port inside the container; visitors use normal HTTPS.
3. Environment variables
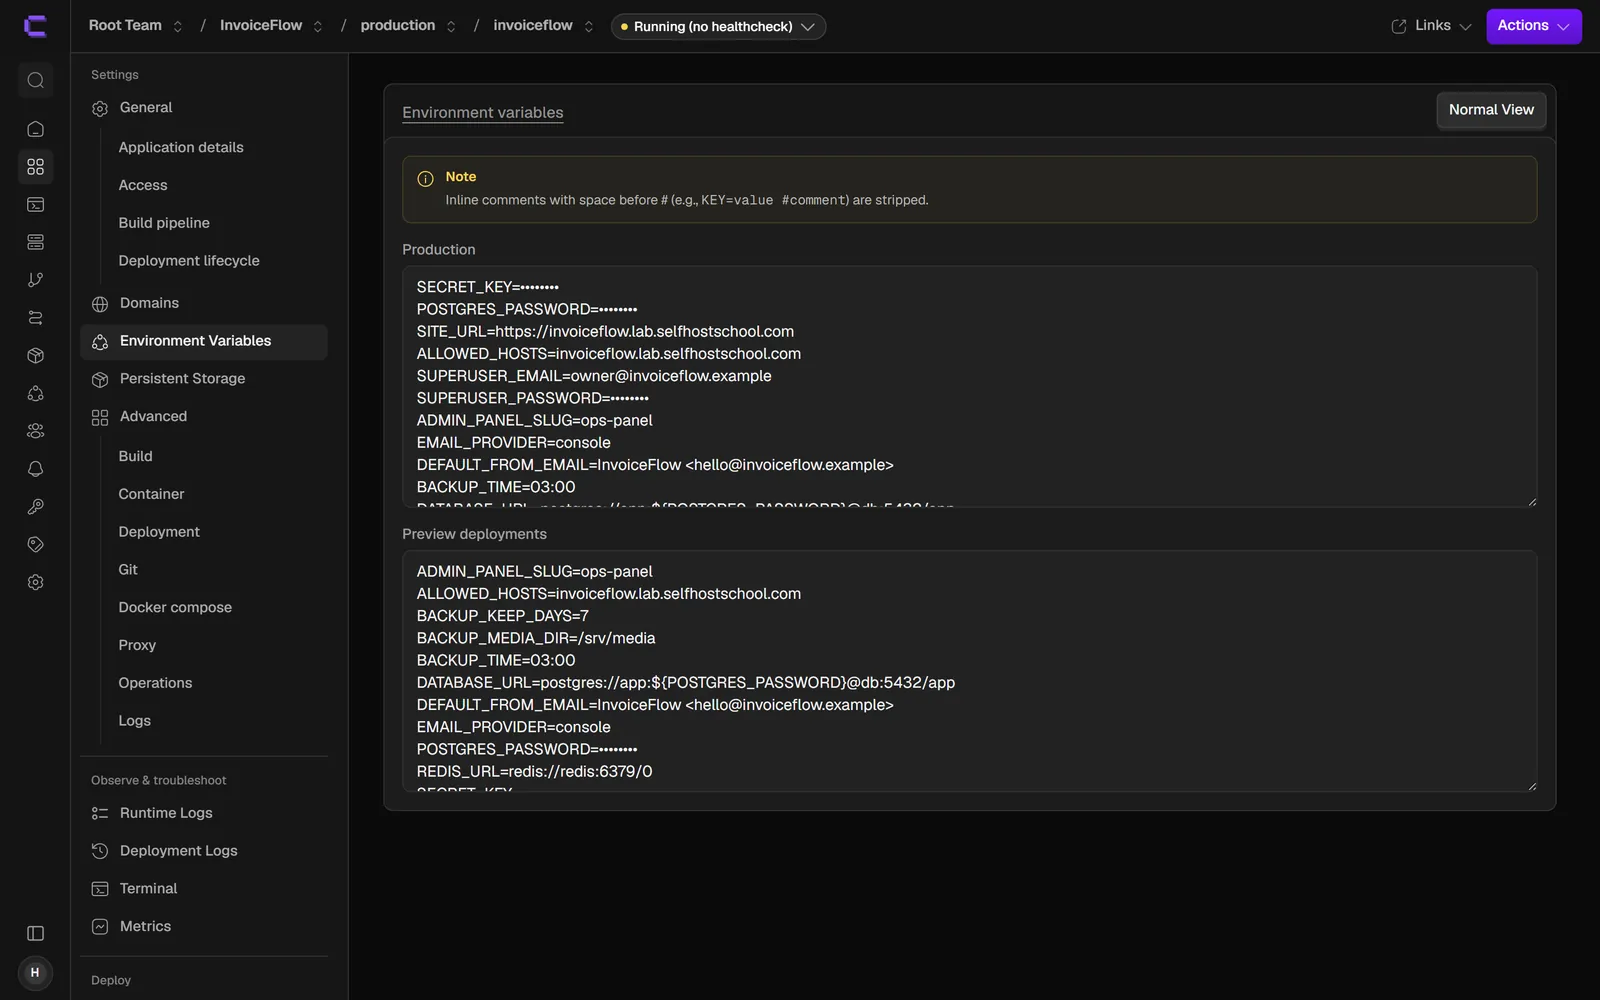
Environment Variables, Developer view. Four are required; the containers refuse to start without them:
| Variable | Value |
|---|---|
SECRET_KEY |
a long random string; in your project folder: uv run python -c "import secrets; print(secrets.token_urlsafe(64))" |
POSTGRES_PASSWORD |
another random string |
SITE_URL |
https://app.yourdomain.com |
ALLOWED_HOSTS |
app.yourdomain.com |
Then: SUPERUSER_EMAIL and SUPERUSER_PASSWORD (your owner account), ADMIN_PANEL_SLUG (a private path for the panel instead of /panel/), EMAIL_PROVIDER with its key, DEFAULT_FROM_EMAIL, and BACKUP_TIME=03:00 for nightly backups.
Set up email before you invite anyone
Without an email provider, emails are only written to the worker's log. Nobody can confirm their address, so nobody can sign up. Set EMAIL_PROVIDER=resend with RESEND_API_KEY (or SMTP) before you share the link.
4. Deploy
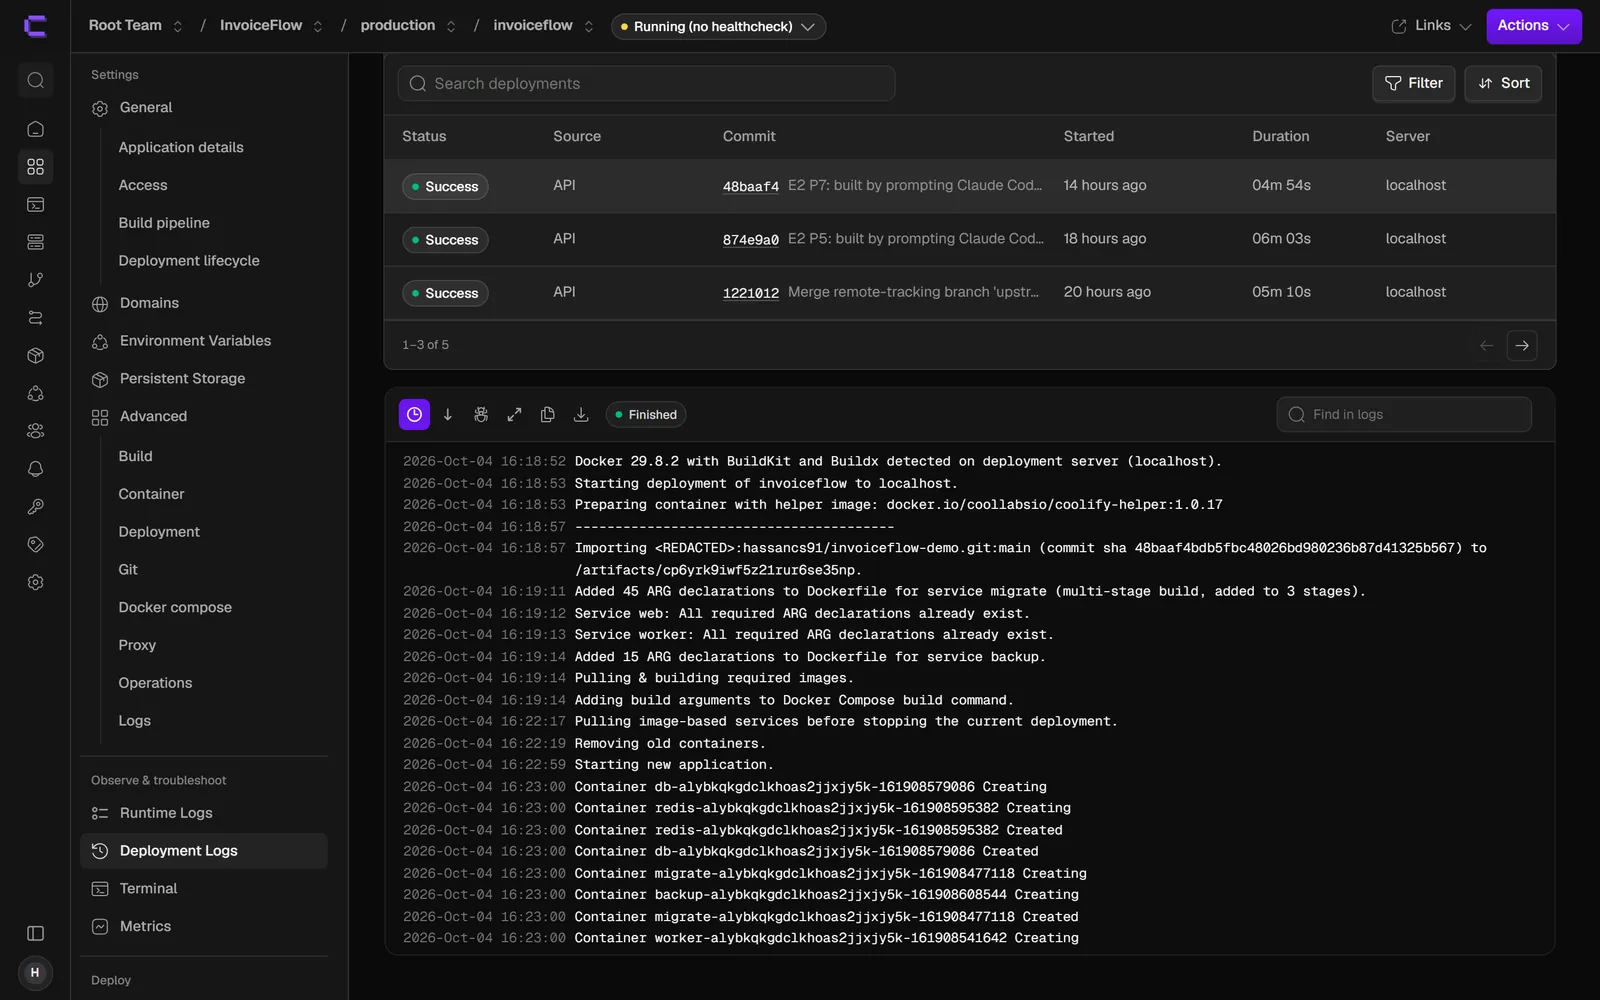
Click Deploy. Coolify builds the image, starts Postgres and Redis, runs migrate (which creates your owner account), then starts the web server and the worker. Our first deploy took 343 seconds. The status then reads Running (no healthcheck); that label is normal for a Compose app.
Check it:
https://app.yourdomain.com/health/ready/answers{"status": "ok", ...}.- Sign in with
SUPERUSER_EMAIL, set up two-factor, and open/YOUR-ADMIN-PANEL-SLUG/. - Panel, Settings, General: your site name (see Make It Yours).
5. Stripe and AI in production
- Stripe: live keys in the environment, a webhook endpoint for
https://app.yourdomain.com/billing/webhooks/stripe/with the seven events, its signing secret, then the plans in the panel and Sync all to gateway. The steps are at the end of Sell It With Stripe. - AI:
ANTHROPIC_API_KEYin the environment, redeploy, then panel, AI: switch it on and set a monthly budget.
6. Every later deploy
Push to your repository, then Redeploy in Coolify, or from your computer:
uv run poe deployIt triggers Coolify and waits until the new release answers healthy. It needs COOLIFY_WEBHOOK and COOLIFY_TOKEN in your local .env; give the token both Deploy and Read (Coolify's form unticks Read when you tick Deploy, and without Read the script cannot follow the deploy).
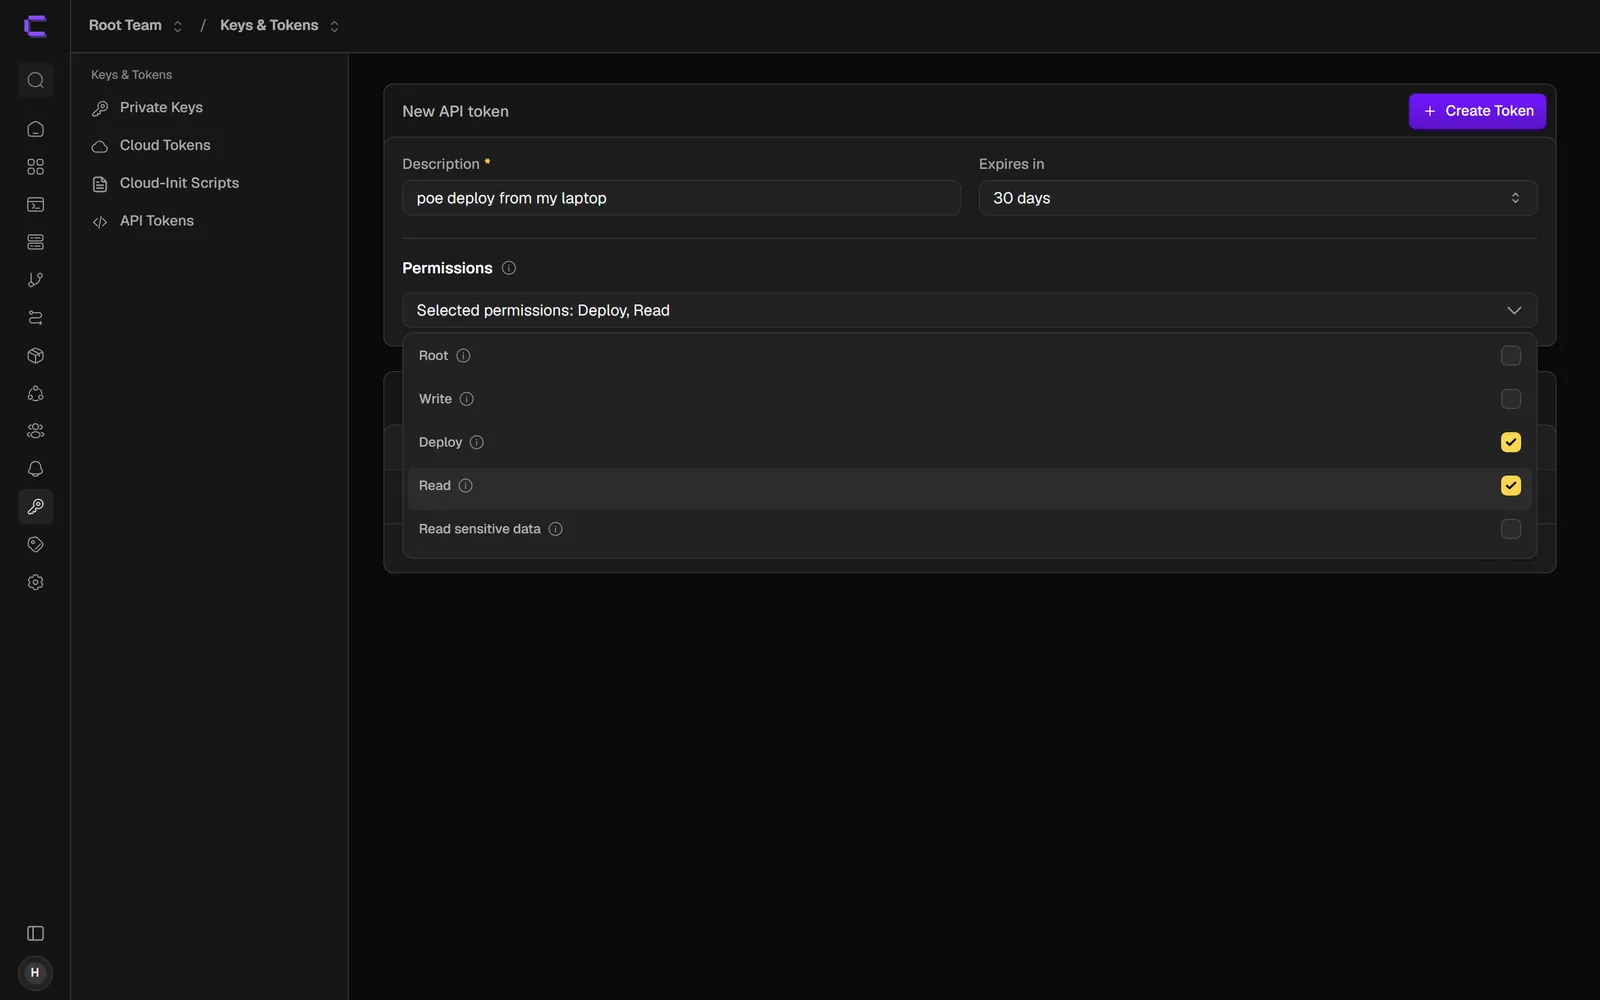
Measured on our server: a redeploy took about 5 to 6 minutes, and the site was down for 103 seconds of it, because Coolify recreates the whole stack and runs migrate before the web server starts. For deploys without downtime, see the repo's docs/deploy/zero-downtime.md.
Where are migrate's messages?
Not in the deployment log, and not in Runtime Logs once the migrate container has finished. Right after a deploy, open Servers, localhost, Terminal and run docker logs $(docker ps -a -q --filter name=migrate- | head -1).
7. Backups
With BACKUP_TIME=03:00, a backup container saves the database and the uploaded files every night and keeps 7 days. We tested the restore for real: deleted a user, ran restore_db.sh, and the user was back. The steps are in the repo's docs/deploy/backups.md.
No Coolify?
On any server with Docker, Caddy gives you HTTPS with one command (docs/deploy/vps-caddy.md). On a fresh droplet it was up, with a real certificate, in 193 seconds.
Next: Where Everything Is.