Self-Host WordPress on Your Own VPS: 3 Tiers, Deployed and Measured
 Hasan Aboul Hasan
Published 2026-08-11
Hasan Aboul Hasan
Published 2026-08-11
Most "self-hosted WordPress" guides end with you buying shared hosting. This one puts WordPress on a VPS you own, three ways, each one deployed for real and benchmarked on the same $24 box: Coolify's one-click template (fine, slow-ish), a custom tuned image (fixes the 2 MB upload wall, does NOT make it faster, I measured), and nginx with FastCGI caching (11 → 1,852 requests per second). Real numbers, real gotchas, copy-paste configs.
- WordPress running on your own VPS with HTTPS, deployed through Coolify
- A custom WordPress image with your PHP limits and WP-CLI baked in, served from a private registry on the same box
- An nginx FastCGI page cache serving anonymous pages in under 5 ms
- The measured numbers for every tier, so you know exactly what each upgrade buys you
Your WordPress domain (optional)
Type the domain you'll put WordPress on. Every copyable block on this page updates to use it, so you can paste with no edits. The value stays in your browser only, nothing leaves this page.
Value stays in your browser only, nothing leaves this page.
What "self-hosted WordPress" actually means
Search for "self-hosted WordPress" and the top results explain the difference between WordPress.com and WordPress.org, then tell you to buy a shared hosting plan and click the Softaculous installer. That is renting, with extra steps.
The real version is simpler to say: WordPress running on a server you control. Your VPS, your Docker containers, your database, your files. Nobody meters your pageviews, nobody charges per site, and when something is slow you can actually see why.
I did the full run for this guide on a fresh DigitalOcean droplet: 2 vCPU, 4 GB RAM, Ubuntu 24.04, with Coolify as the panel. Three setups, from lazy to tuned, each one deployed, broken, fixed and benchmarked. The numbers and the error messages in this guide are from that box, not from other people's blog posts.
💰 Is self-hosted WordPress free?
The software is free. The server is not, but it is flat: the 2 vCPU / 4 GB droplet I tested costs $24/month and runs WordPress next to everything else you self-host. A quiet blog fits on a $6 box. No per-site fee, no visit limits, no plan upgrades. That is the actual difference from managed hosting.
What you need
Two things before the fun part:
- A VPS with Coolify installed. If you don't have one yet, my Coolify starter guide takes you from zero to a working panel. The short version is one command on a fresh Ubuntu box:
curl -fsSL https://cdn.coollabs.io/coolify/install.sh | bash
On my droplet the install took about a minute and reported Coolify v4.1.2. Then open http://your-server-ip:8000 and register your admin account immediately. A fresh Coolify serves its registration page to whoever finds it first, and bots find new servers in minutes, not days. I measured that on an earlier build: first uninvited SSH attempt 2 minutes 35 seconds after boot.
- A domain (or a subdomain) pointed at the server's IP. You'll set it on the WordPress service so Coolify's proxy can issue the SSL certificate.
How much server does WordPress actually need? Measured on my box: the WordPress container idles at ~120 MB and peaks near 180 MB under load. MySQL is the real RAM consumer, 450 to 540 MB in every tier. With Coolify's own containers on top, the whole stack used about 1.7 GB. So 2 GB total is a workable floor for one site, and 4 GB leaves room for the rest of your stack. Still picking a provider? The VPS directory has the live comparison. And if you want the full own-your-stack setup, server hardening to backups, that is exactly what I teach in Self Hosting 2.0.
Tier 1: the one-click template
Coolify ships WordPress templates in its service catalog. In your project, click + New resource and type "wordpress" in the search:
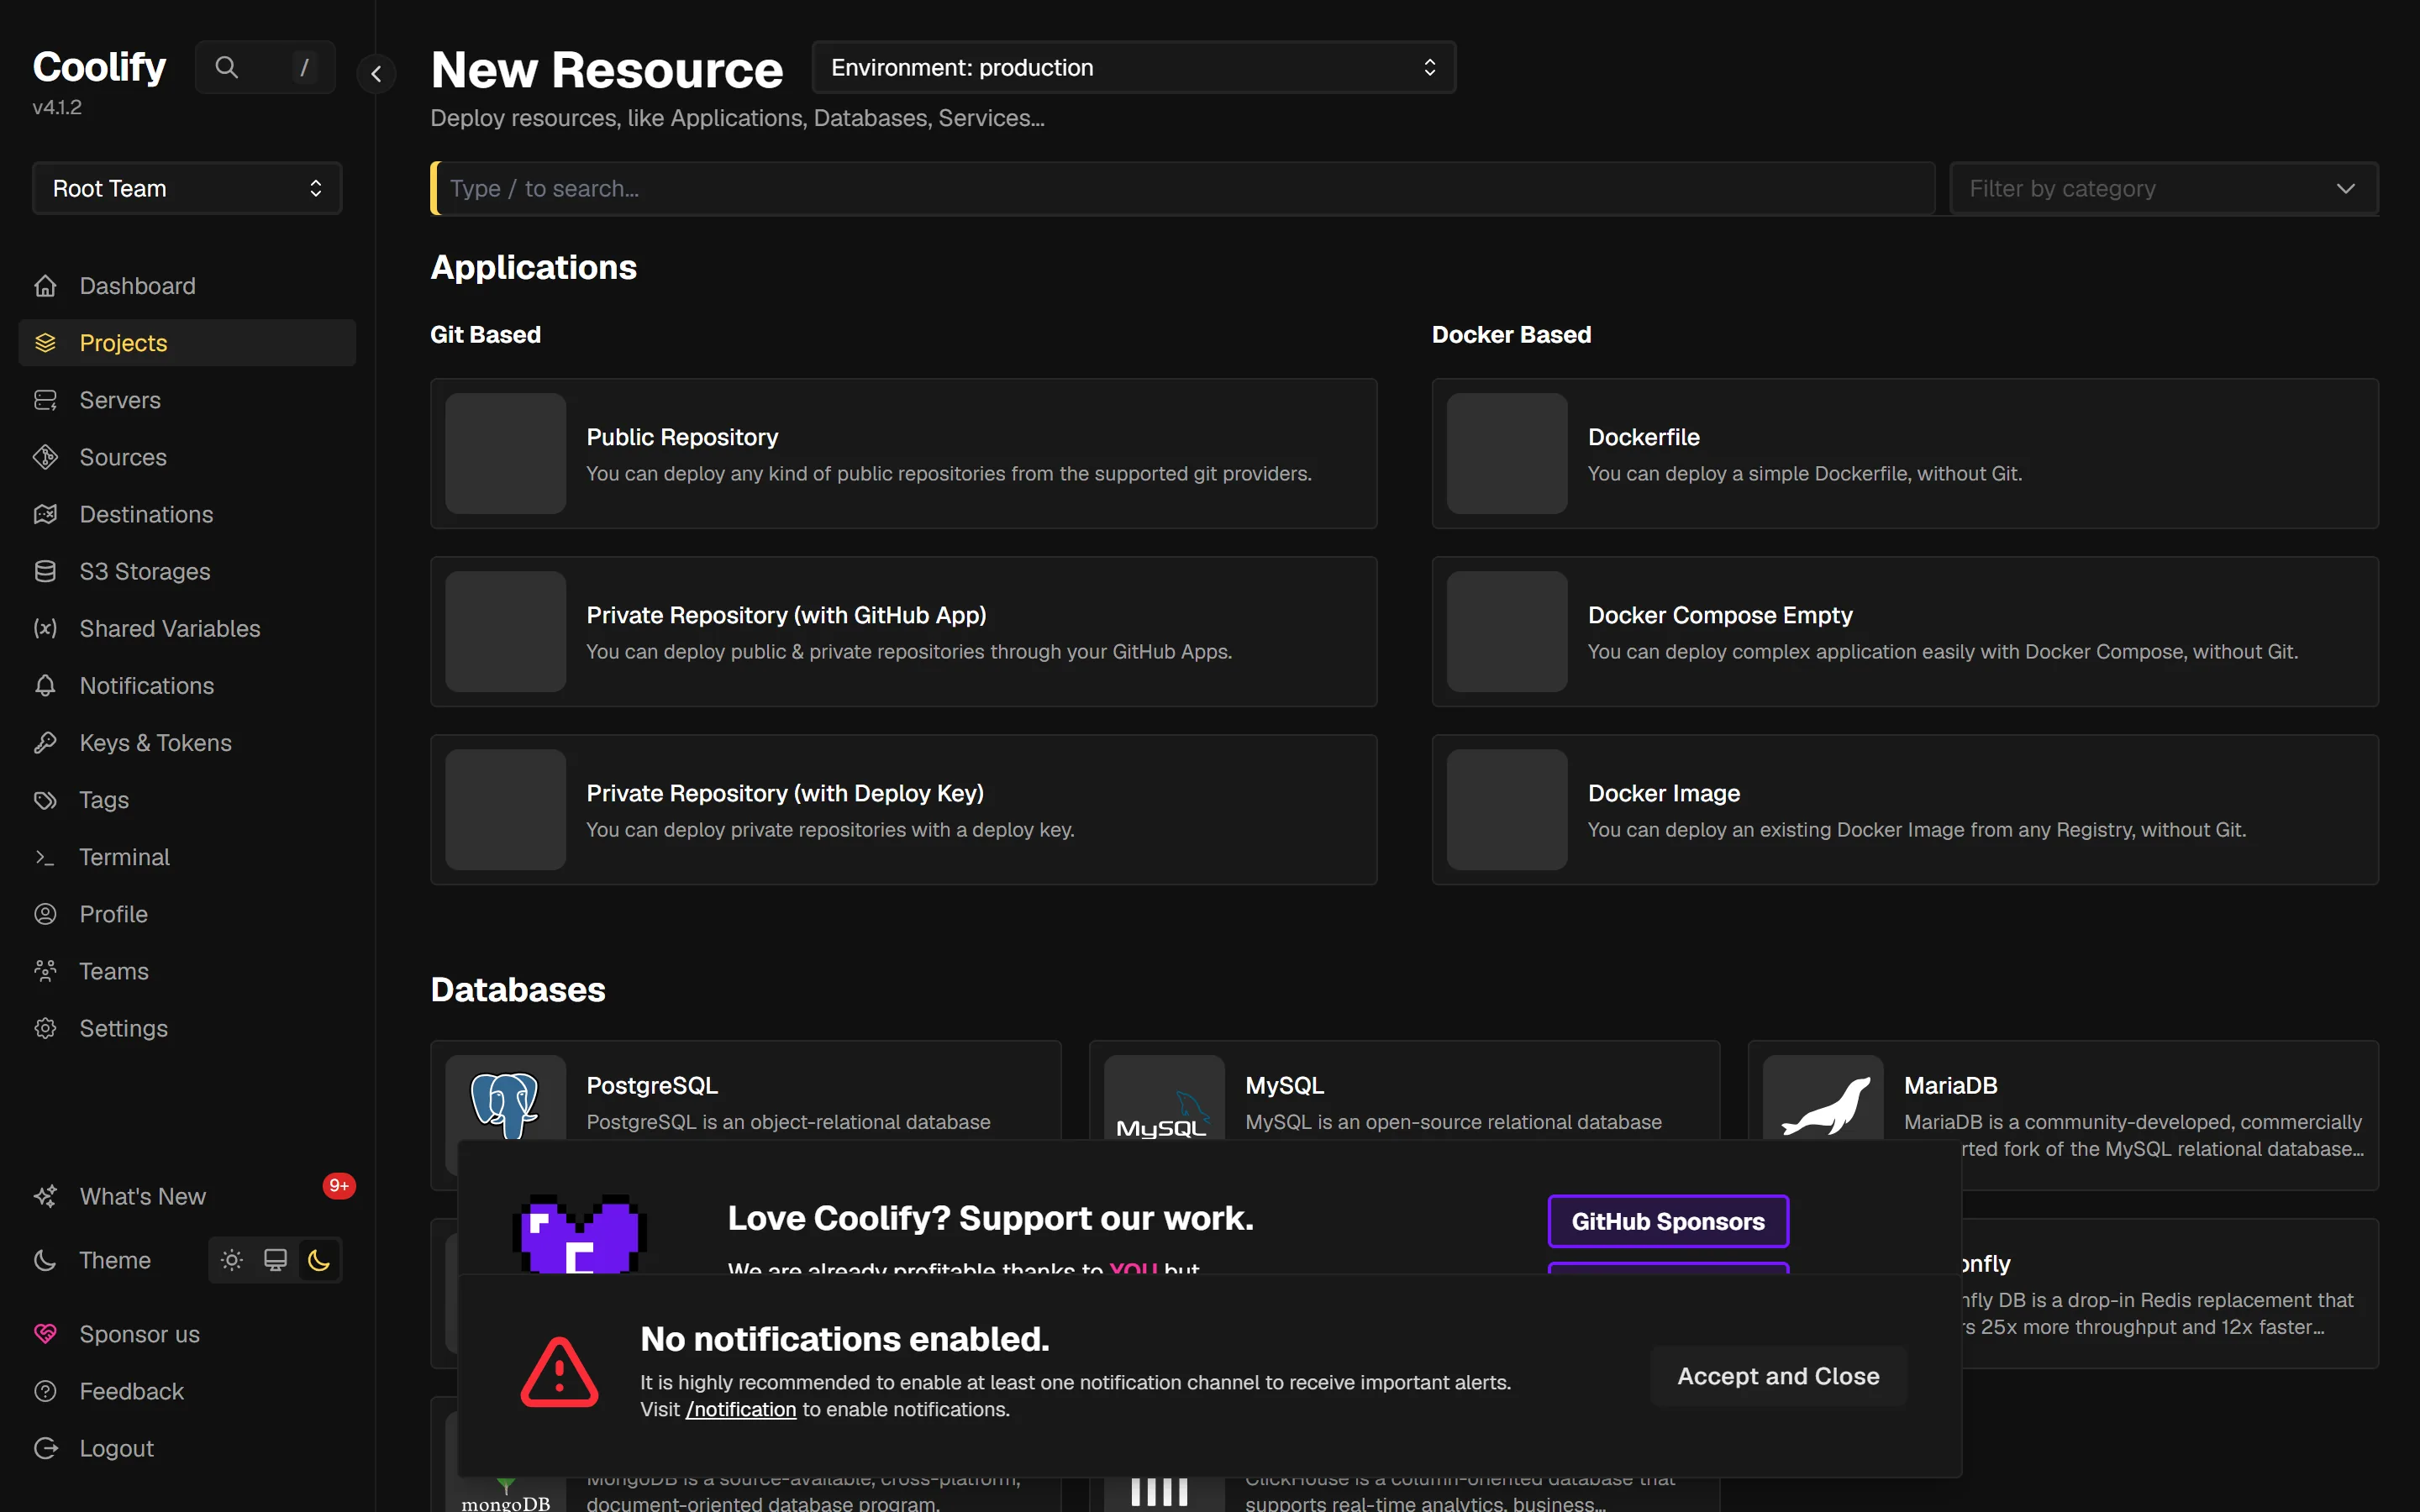
One click and Coolify generates the whole stack. This is the compose it wrote on my instance, and it is worth reading because it explains what you got:
services:
  wordpress:
    image: 'wordpress:latest'
    volumes:
      - 'wordpress-files:/var/www/html'
    environment:
      - SERVICE_FQDN_WORDPRESS
      - WORDPRESS_DB_HOST=mysql
      - WORDPRESS_DB_USER=$SERVICE_USER_WORDPRESS
      - WORDPRESS_DB_PASSWORD=$SERVICE_PASSWORD_WORDPRESS
      - WORDPRESS_DB_NAME=wordpress
    depends_on:
      - mysql
  mysql:
    image: 'mysql:8'
    volumes:
      - 'mysql-data:/var/lib/mysql'
    environment:
      - MYSQL_ROOT_PASSWORD=$SERVICE_PASSWORD_ROOT
      - MYSQL_DATABASE=wordpress
      - MYSQL_USER=$SERVICE_USER_WORDPRESS
      - MYSQL_PASSWORD=$SERVICE_PASSWORD_WORDPRESS
The SERVICE_* variables are Coolify magic: it generates the database user and passwords for you and wires them into both containers. You never type a database credential. That part is genuinely good.
Set your own domain (the part everyone misses)
Coolify assigns the new service a random sslip.io domain based on your server IP. Before you deploy, open the wordpress application inside the service and replace it with your real domain:
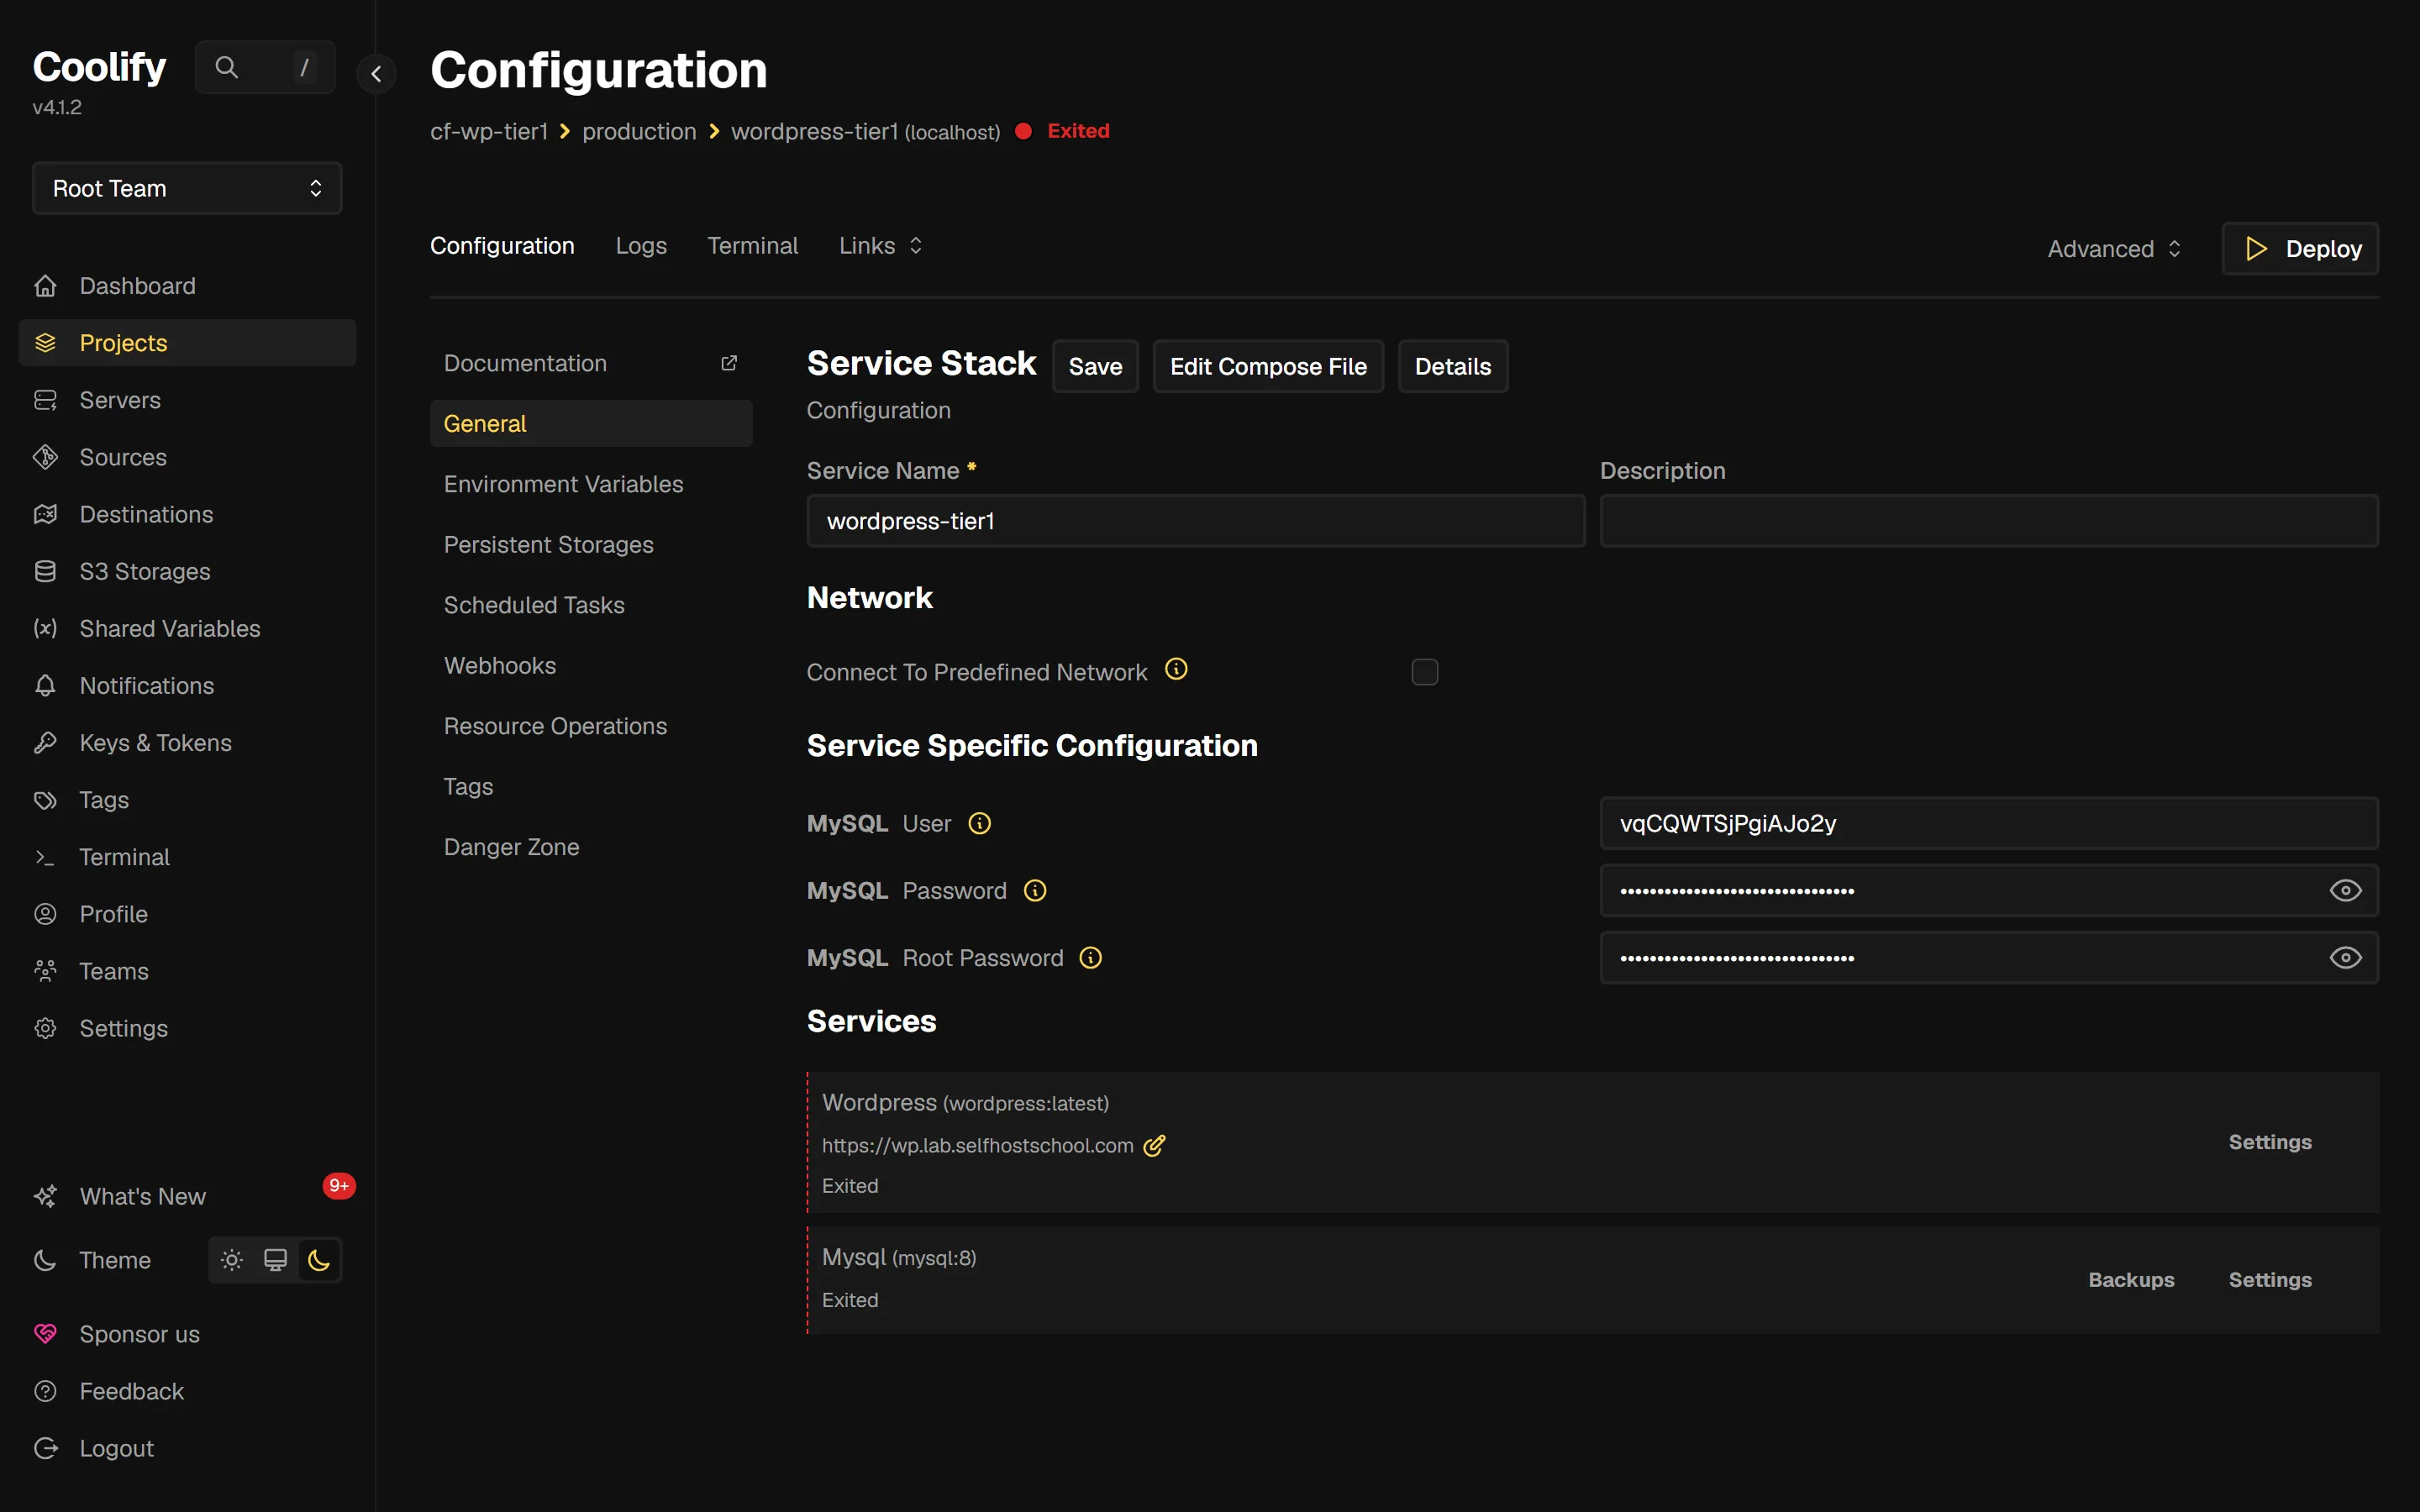
https://wp.example.com as the domain on the wordpress app, then deploy.With the domain set and DNS pointing at the box, deploy. Coolify's proxy picks up the route and issues the Let's Encrypt certificate on its own. My deploy went from click to running (healthy) in under two minutes, and https://wp.example.com answered with the WordPress install wizard, valid certificate included.
The wizard is 60 seconds: pick a language, set the site title, create your admin user. Use a real password. Done. WordPress is live on your own server.
I script my deployments through Coolify's REST API, and the template deploy works fine that way too, with one exception: v4.1.2 has no API endpoint to change a template service's domain. Set the domain in the UI. Two minutes in the browser beats fighting an endpoint that isn't there.
What the stock template actually gives you
Here is where every other guide stops and this one starts. I opened a shell in the deployed container and dumped the effective PHP config, from the web server's side, not the CLI:
| Setting | Stock value | What it means for you |
|---|---|---|
upload_max_filesize | 2M | A theme zip or a phone photo fails to upload |
post_max_size | 8M | The real ceiling for any single request |
memory_limit | 128M | Fine for a blog, tight for heavy plugins |
max_execution_time | 30 | Long imports and backups get killed |
| opcache | enabled, 128 MB, 4,000 files | Already on! More on this below |
| WP-CLI | absent | No command-line WordPress management |
That measured on wordpress:latest, which was WordPress 7.0.2 on PHP 8.3.33 with Apache the day I ran it. Two of those rows deserve a closer look.
First, the 2 MB wall is real and you hit it fast. The media uploader states it right on the page:
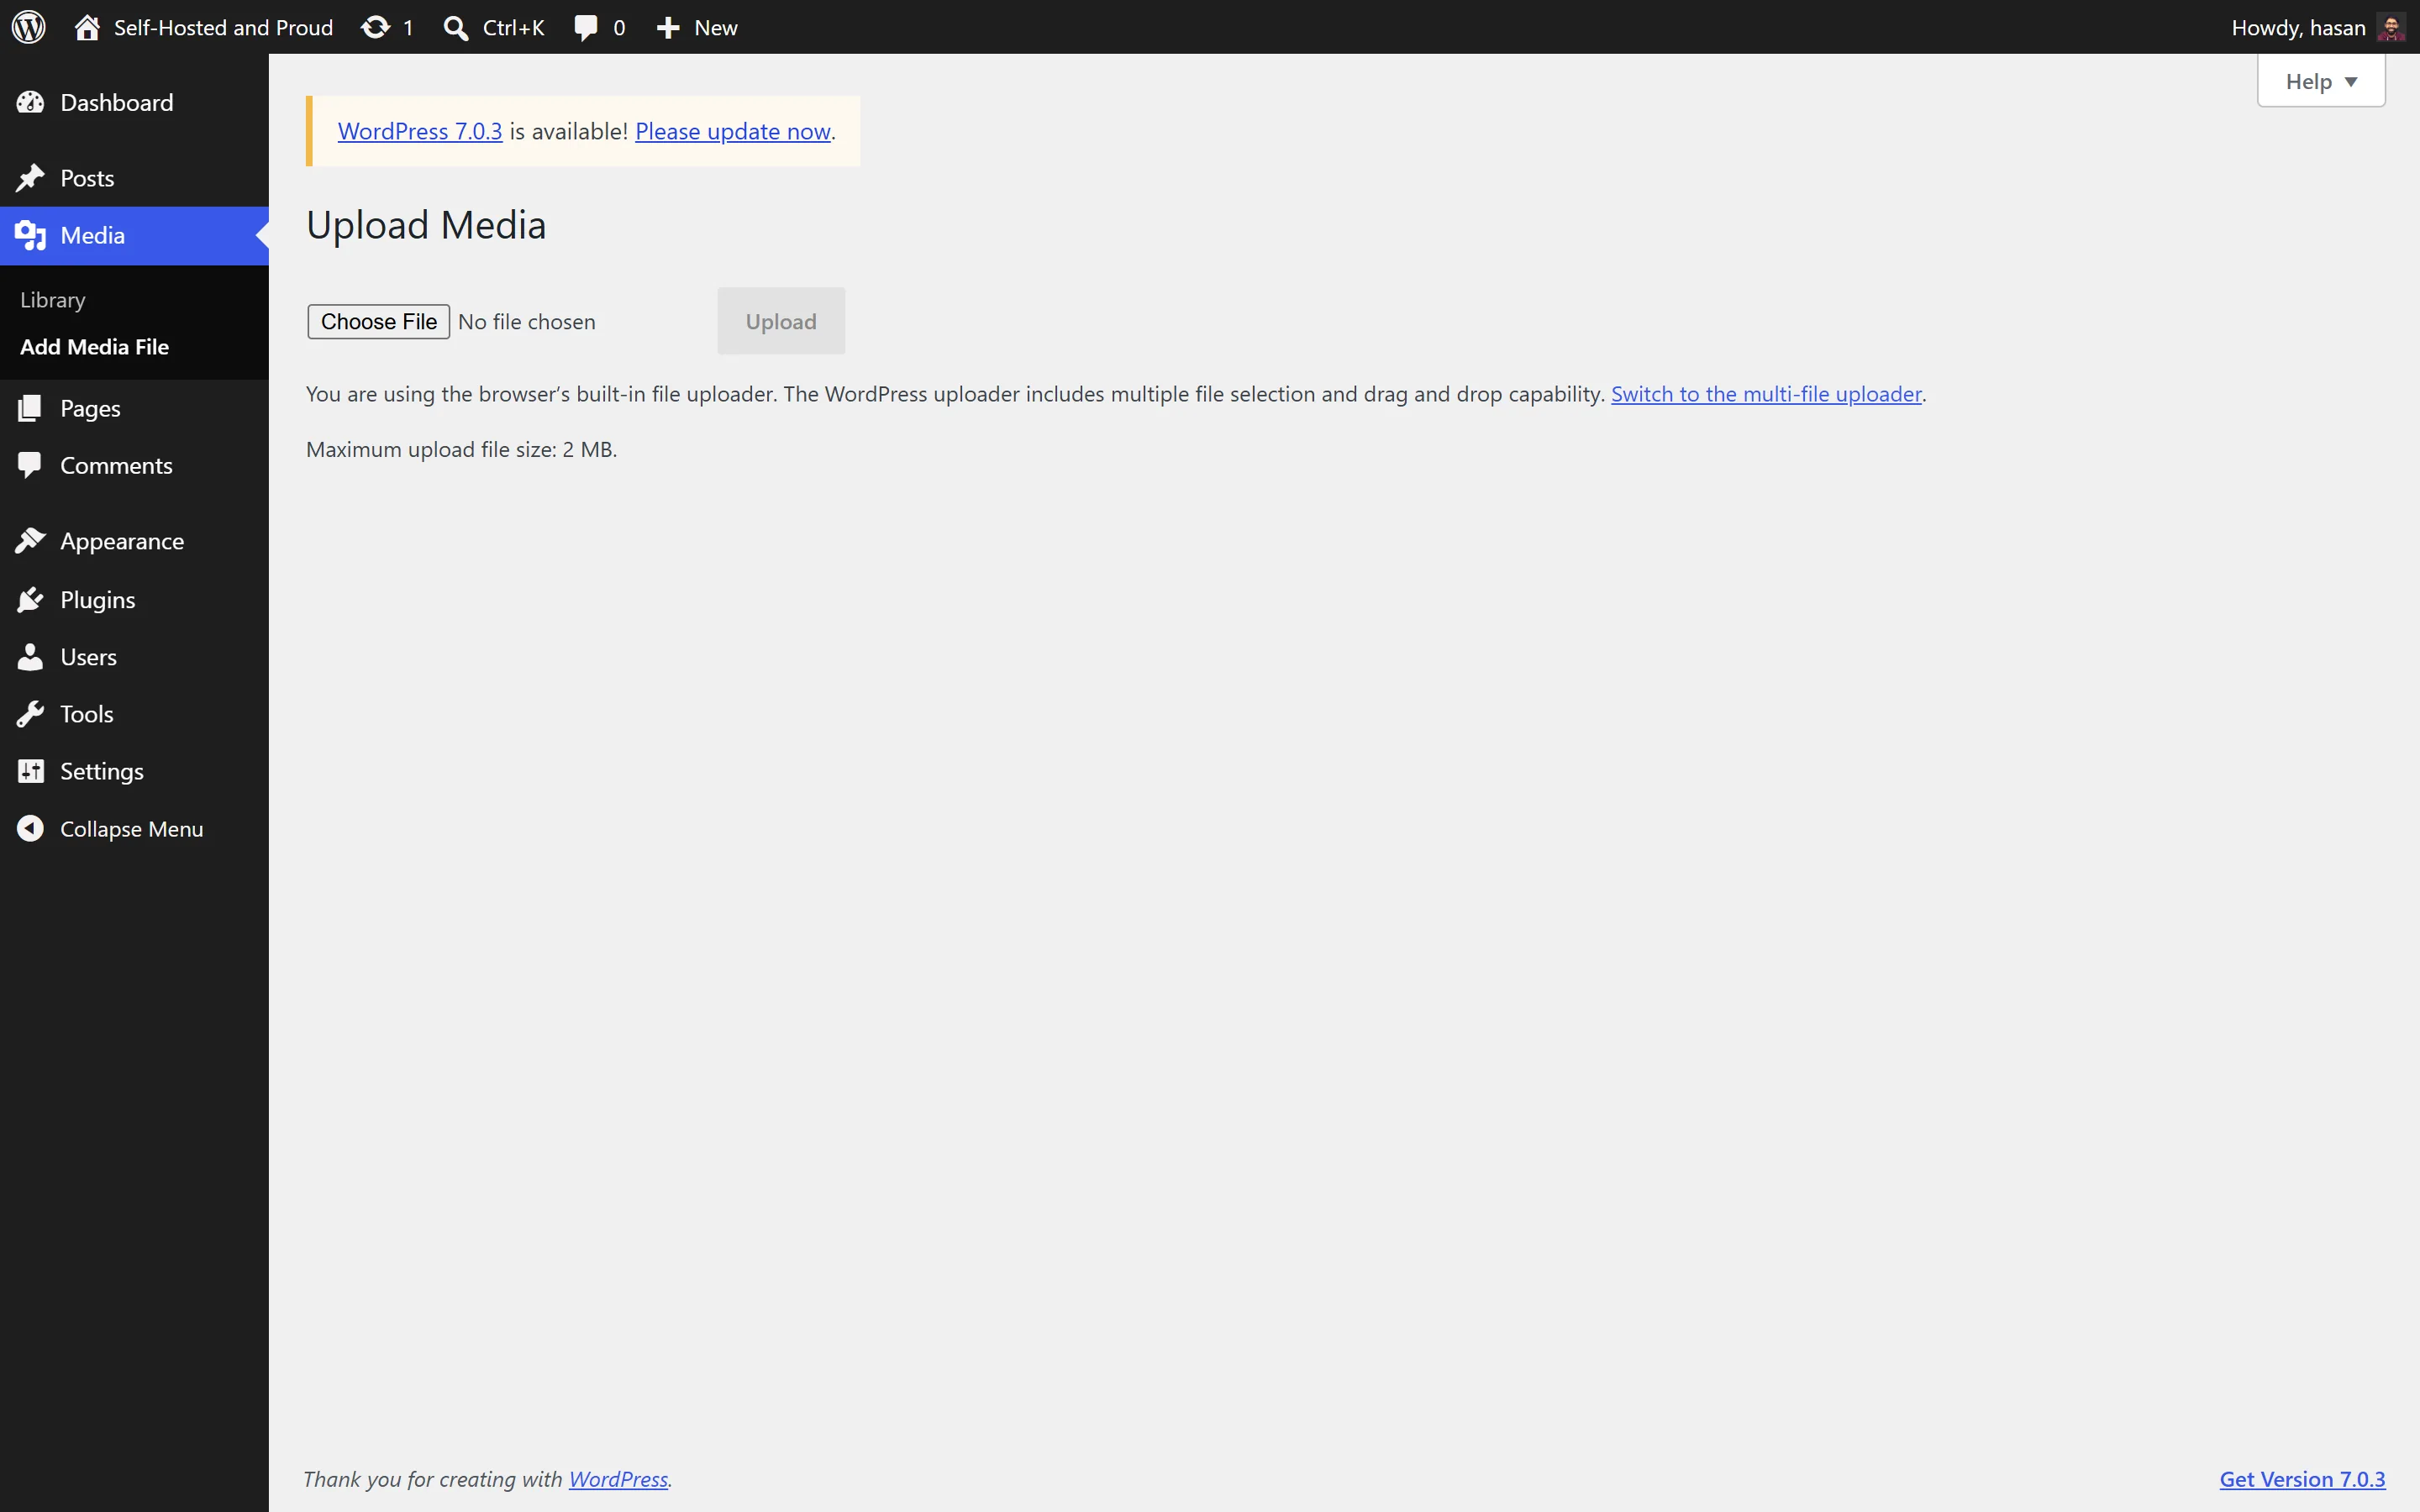
I uploaded a 4.9 MB PNG to see the exact failure. This is the full response, verbatim:
Read that error again. It names php.ini. There is no wp-admin setting for this, no plugin that truly fixes it. The limit lives in the PHP runtime inside the container, which is why tier 2 exists.
Second, the opcache row. Half the "speed up WordPress" articles on the internet tell you to enable opcache. On the official Docker image it is already enabled, with sane defaults, out of the box. I checked from inside the running container. Keep that in mind when we get to the benchmarks.
Tier 1 baseline: the numbers
I benchmarked from a second droplet in the same region, through the real HTTPS path a visitor takes. Sequential requests first, then sustained load with wrk:
- TTFB p50: 174 ms on the front page, anonymous
- Sustained: ~11.3 requests/second (3 runs: 11.6 / 10.4 / 11.8), with latency around 840 ms at 10 concurrent connections
- Under load: the WordPress container pegs both CPU cores. RAM stays modest (~180 MB)
Eleven requests per second is not bad for a personal blog. It is also the sound of two CPU cores rendering every single page with PHP, every single time. Remember that number.
Tier 2: your own WordPress image
Tier 2 fixes every functional wall from the table above with one Dockerfile. This is the container version of a rule I teach across the whole self-hosting stack: don't patch a running box, rebuild the image so every deploy is your deploy.
FROM wordpress:latest

COPY cf-tuning.ini /usr/local/etc/php/conf.d/zz-cf-tuning.ini

RUN curl -fsSL -o /usr/local/bin/wp \
      https://raw.githubusercontent.com/wp-cli/builds/gh-pages/phar/wp-cli.phar \
 && chmod +x /usr/local/bin/wp \
 && wp --info --allow-root
The COPY line drops your tuning file into PHP's config directory, and the RUN line bakes in WP-CLI, which the official image ships without. Save this next to it as cf-tuning.ini. Every value is a measured stock default, raised on purpose:
memory_limit = 256M
upload_max_filesize = 64M
post_max_size = 64M
max_execution_time = 120
max_input_vars = 3000

opcache.memory_consumption = 192
opcache.interned_strings_buffer = 16
opcache.max_accelerated_files = 16229
opcache.revalidate_freq = 60
opcache.jit = tracing
opcache.jit_buffer_size = 64M
The opcache lines are headroom, not magic: the stock 4,000-file cap is close to what WordPress core alone uses, so a plugin-heavy site starts evicting. 16,229 files and 192 MB means it never thinks about it. The zz- prefix on the filename matters, config files load alphabetically and yours has to load last.
The trap: Coolify deletes local images
Here is the part that cost me an hour, so it costs you nothing. The obvious move is to build the image on the VPS and reference it in the compose:
docker build -t cf-wp-tuned:7.0.2 .
Two separate things kill it. Coolify's deploy tries to pull the image, finds no registry called cf-wp-tuned, and aborts: "pull access denied for cf-wp-tuned, repository does not exist". Worse, Coolify runs automatic Docker cleanup (on by default), which prunes any image no running container uses. My freshly built image was deleted minutes after the failed deploy. A locally built image on a Coolify box is living on borrowed time.
The fix is beautifully self-hosted: run your own registry. It is one container, it binds to localhost only so nothing is exposed to the internet, and its storage is a volume, which image cleanup never touches. On my box Docker pushed to 127.0.0.1:5000 with zero TLS or daemon configuration, loopback addresses get a pass that remote registries don't:
docker run -d --restart=always --name cf-registry \
  -p 127.0.0.1:5000:5000 \
  -v cf-registry-data:/var/lib/registry registry:2

docker build -t 127.0.0.1:5000/cf-wp-tuned:7.0.2 .
docker push 127.0.0.1:5000/cf-wp-tuned:7.0.2
Now create a new Coolify service, but instead of a template pick Docker Compose and paste the same stack with one changed line:
services:
  wordpress:
    image: '127.0.0.1:5000/cf-wp-tuned:7.0.2'   # was: wordpress:latest
    volumes:
      - 'wordpress-files:/var/www/html'
    environment:
      - SERVICE_FQDN_WORDPRESS
      - WORDPRESS_DB_HOST=mysql
      - WORDPRESS_DB_USER=$SERVICE_USER_WORDPRESS
      - WORDPRESS_DB_PASSWORD=$SERVICE_PASSWORD_WORDPRESS
      - WORDPRESS_DB_NAME=wordpress
    depends_on:
      - mysql
  mysql:
    image: 'mysql:8'
    volumes:
      - 'mysql-data:/var/lib/mysql'
    environment:
      - MYSQL_ROOT_PASSWORD=$SERVICE_PASSWORD_ROOT
      - MYSQL_DATABASE=wordpress
      - MYSQL_USER=$SERVICE_USER_WORDPRESS
      - MYSQL_PASSWORD=$SERVICE_PASSWORD_WORDPRESS
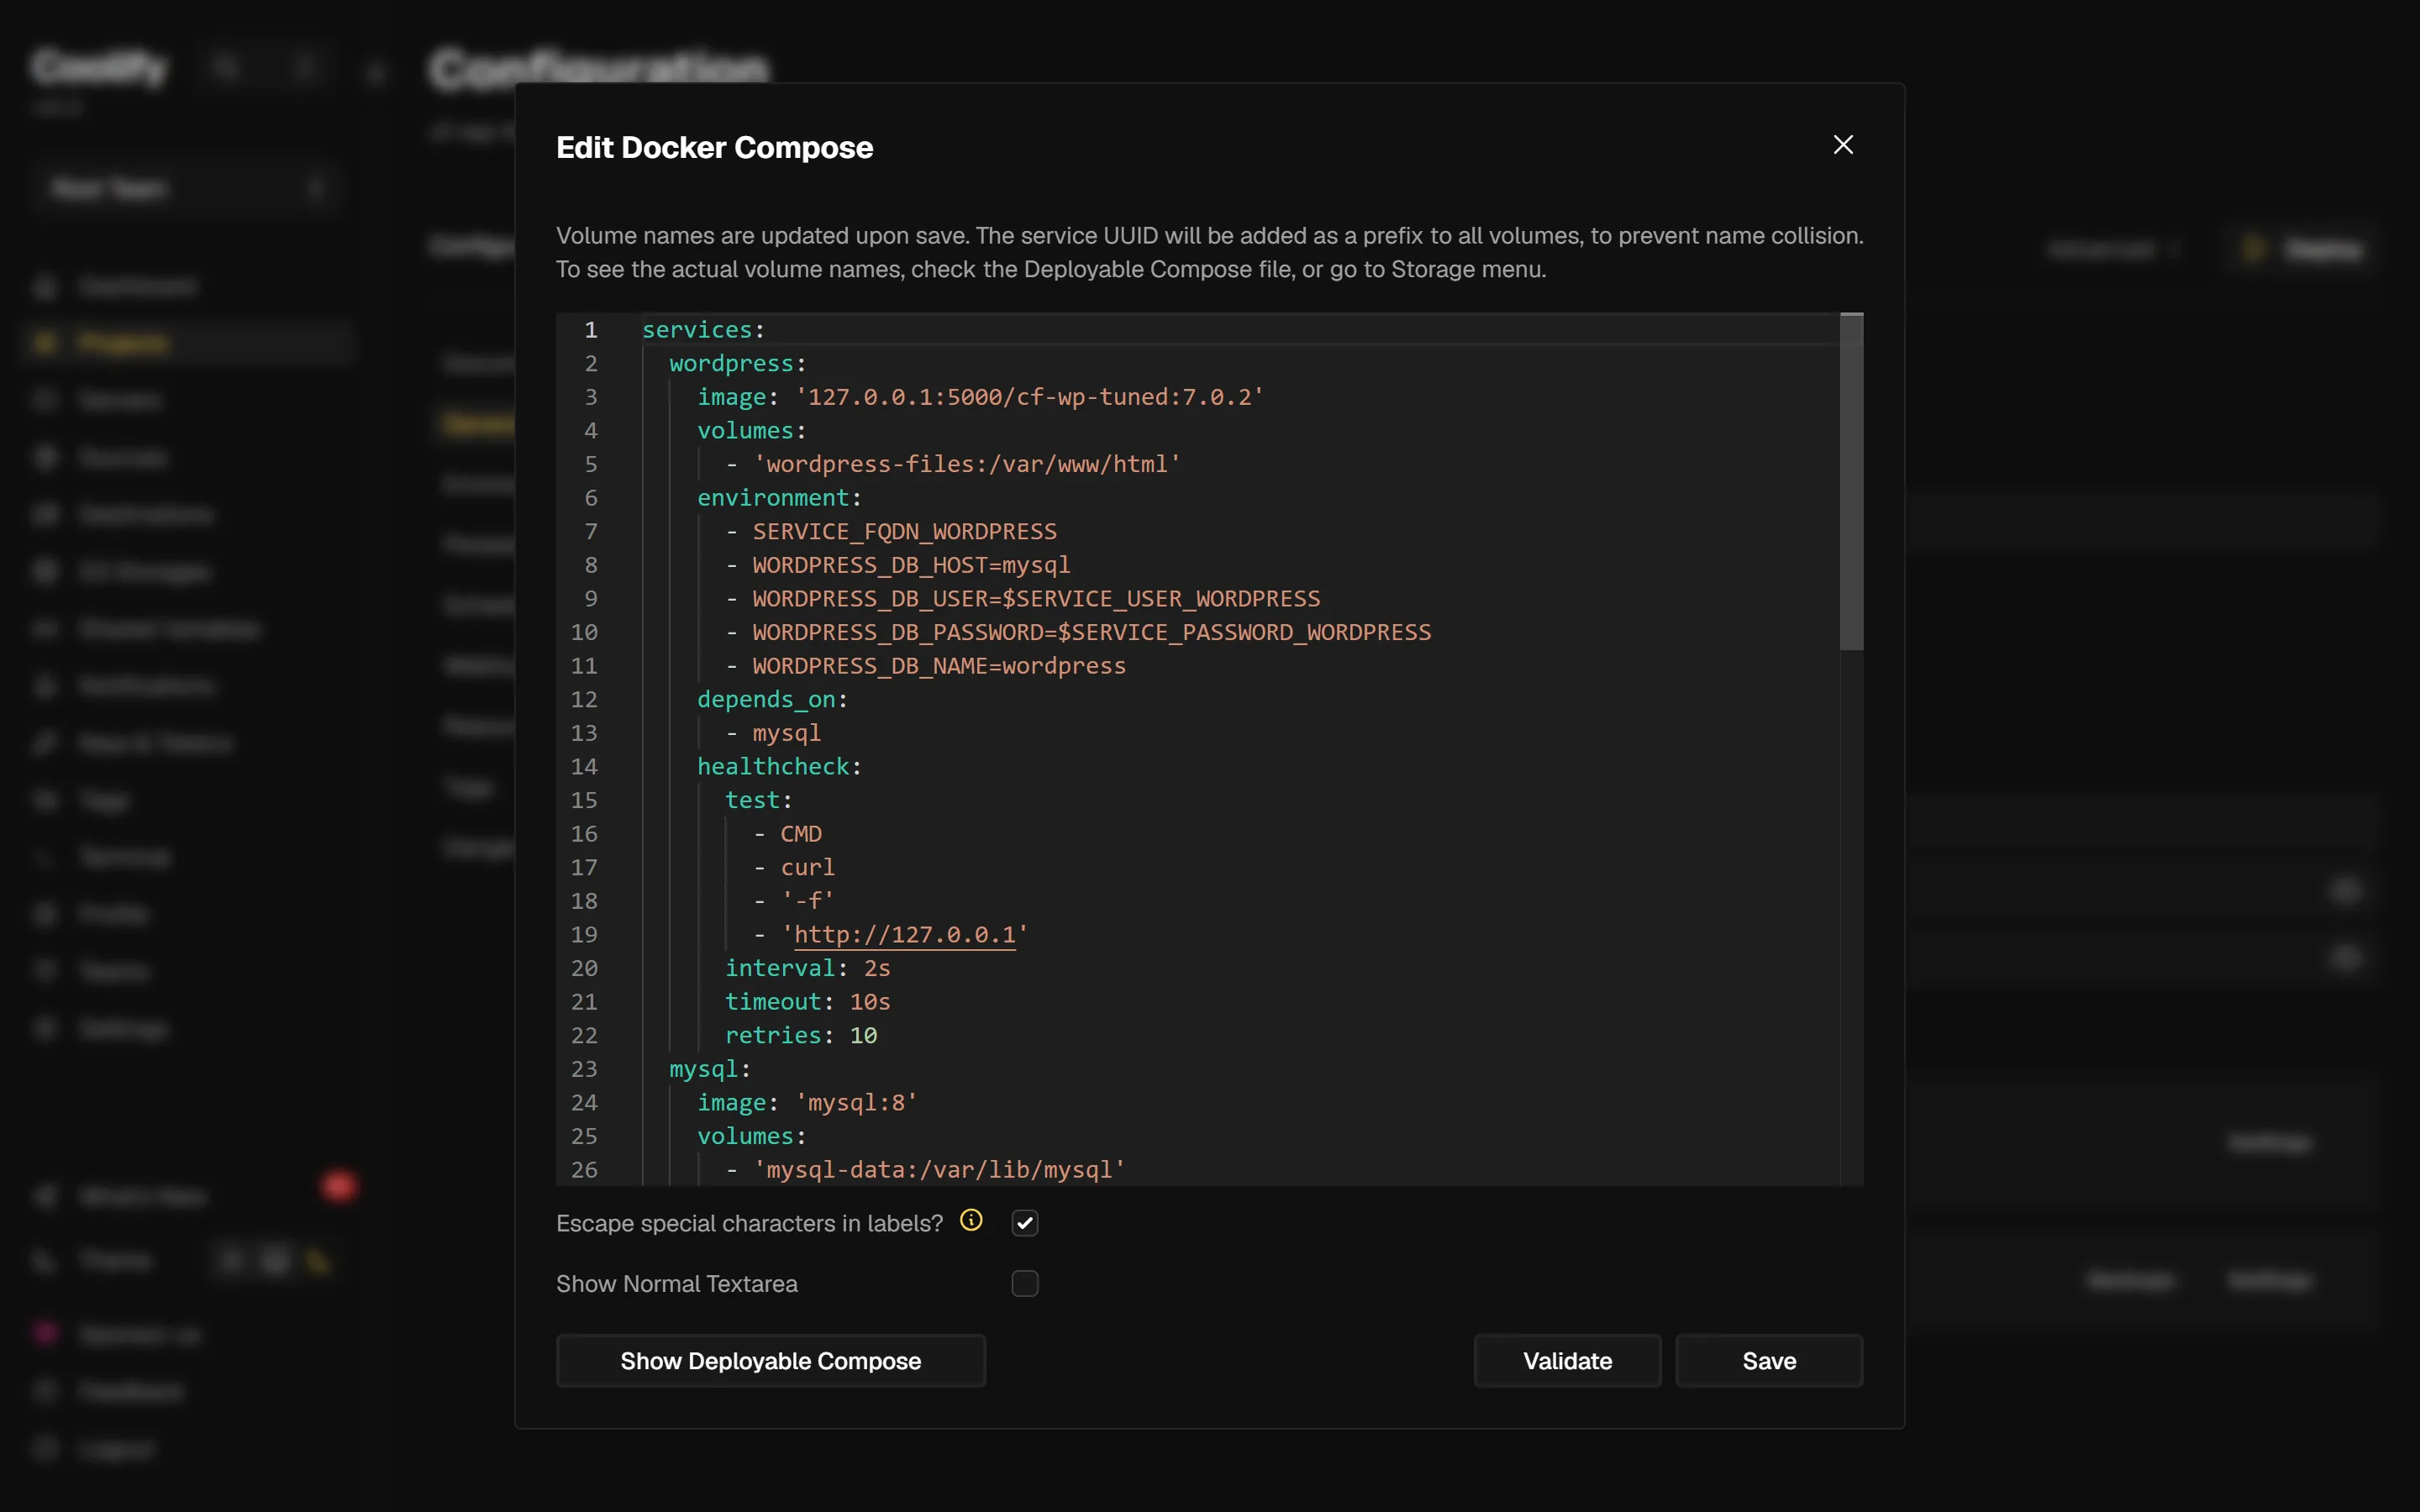
Set your domain, deploy, run the wizard. Or skip the wizard entirely, because you have WP-CLI now:
docker exec -u www-data $(docker ps -qf name=^wordpress) \
  wp core install --url=https://wp.example.com \
  --title="My Site" --admin_user=admin \
  --admin_password=CHANGE-ME [email protected] \
  --skip-email --path=/var/www/html
That -u www-data is not decoration. I ran WP-CLI as root once during testing and it created a root-owned uploads/ directory. The next media upload failed with "The uploaded file could not be moved to wp-content/uploads", because Apache runs as www-data and can't write into root's folder. If you already hit this: chown -R www-data:www-data on wp-content/uploads fixes it.
Proof the tuning is live, from Site Health inside wp-admin:
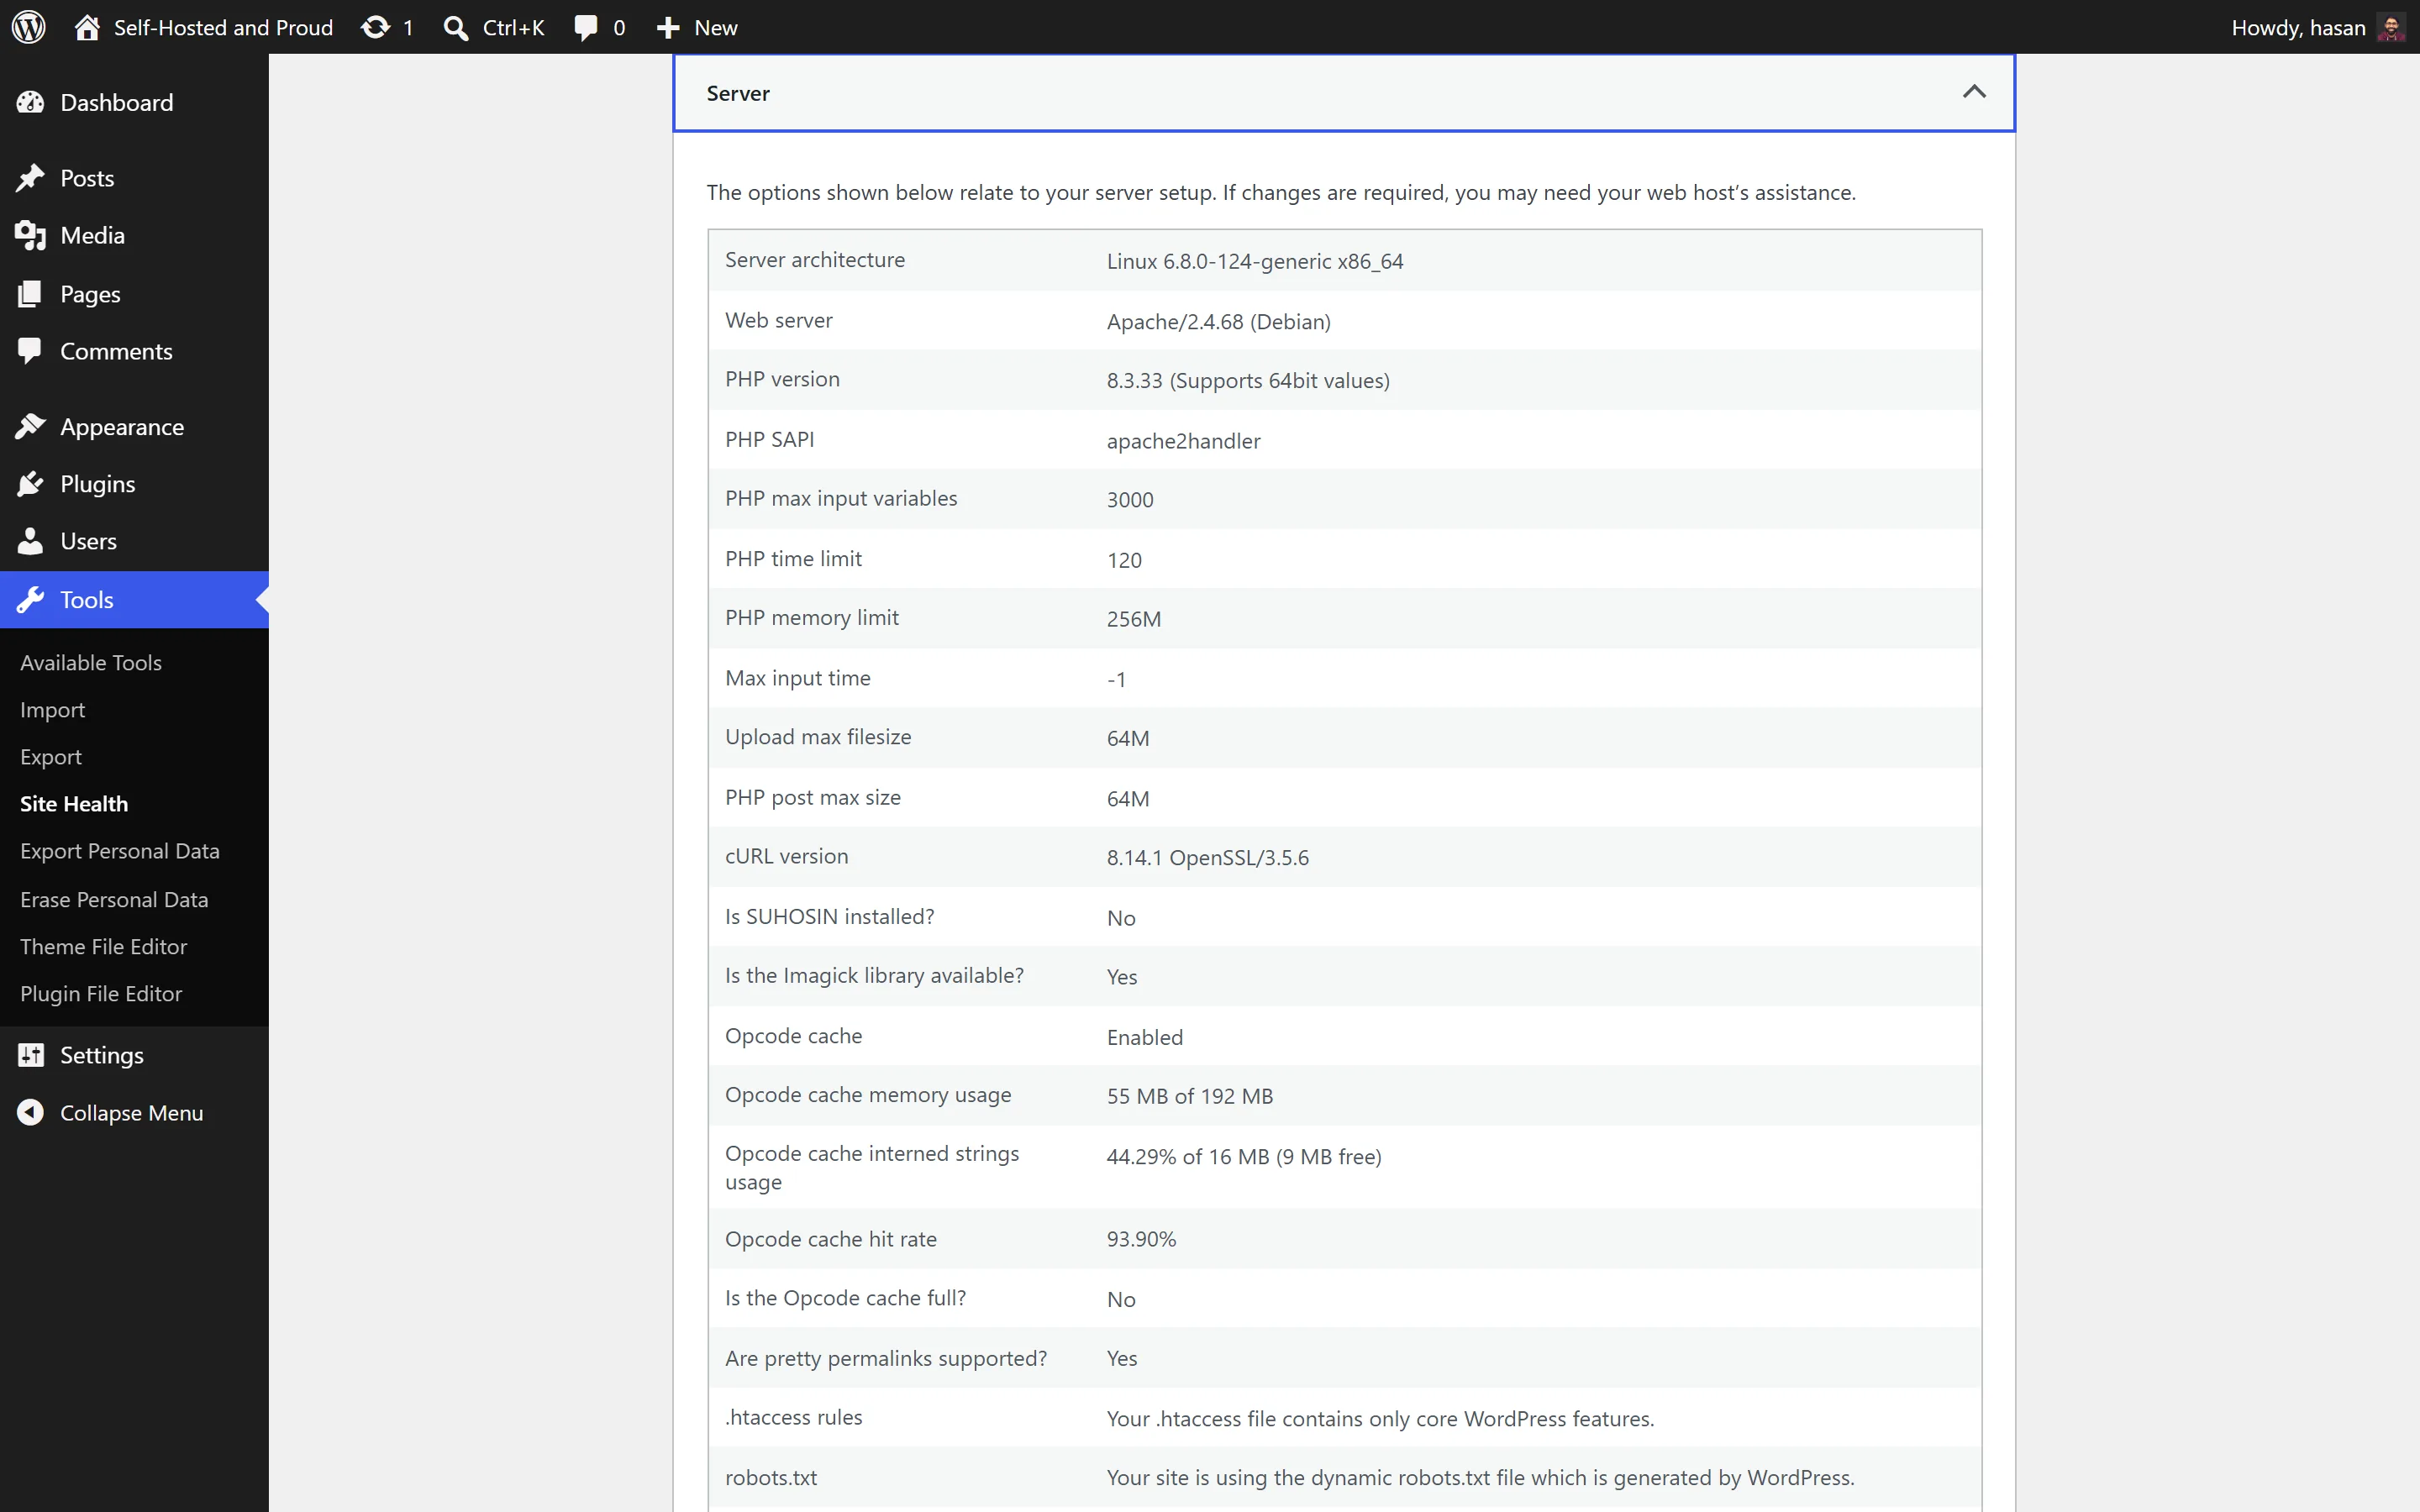
The same 4.9 MB PNG that got rejected on tier 1 uploaded in 4.4 seconds, thumbnails generated and all.
The honest tier-2 numbers
Now the part the tuning articles never measure. Same box, same benchmark, tuned image:
- TTFB p50: 176 ms (tier 1: 174 ms)
- Sustained: ~11.4 requests/second (tier 1: ~11.3)
Statistically identical. The php.ini tuning, the bigger opcache, even the JIT: none of it made a default WordPress site measurably faster. It could not have, because opcache was already on and the bottleneck is PHP rendering the page on two small cores.
Tier 2 is a capability upgrade: real uploads, real memory headroom, WP-CLI, opcache room for the day you have 40 plugins. It is not a speed upgrade. Speed lives in tier 3.
Tier 3: nginx + FastCGI cache
The insight that changes everything: your front page does not change between visits. Rendering it with PHP for every anonymous visitor is two CPU cores doing the same work thousands of times. A page cache does the work once and serves the saved copy from nginx, which is what nginx is unreasonably good at.
Tier 3 swaps Apache for nginx + PHP-FPM and adds two caches: nginx's FastCGI page cache for anonymous traffic and a Redis object cache for the dynamic paths. Build the FPM variant of the tuned image first. Save this as Dockerfile.fpm, it is tier 2's Dockerfile with only the base image changed:
FROM wordpress:fpm
COPY cf-tuning.ini /usr/local/etc/php/conf.d/zz-cf-tuning.ini
RUN curl -fsSL -o /usr/local/bin/wp \
      https://raw.githubusercontent.com/wp-cli/builds/gh-pages/phar/wp-cli.phar \
 && chmod +x /usr/local/bin/wp && wp --info --allow-root
docker build -f Dockerfile.fpm -t 127.0.0.1:5000/cf-wp-tuned-fpm:7.0.2 .
docker push 127.0.0.1:5000/cf-wp-tuned-fpm:7.0.2
Then the full tier-3 compose. The nginx config ships inside the compose file itself (the configs: block), so this stays a single paste into Coolify:
configs:
  nginx_conf:
    content: |
      fastcgi_cache_path /var/cache/nginx levels=1:2 keys_zone=WORDPRESS:100m inactive=60m max_size=256m;
      fastcgi_cache_key "$$scheme$$request_method$$host$$request_uri";

      server {
        listen 80;
        server_name _;
        root /var/www/html;
        index index.php;
        client_max_body_size 64m;

        set $$skip_cache 0;
        if ($$request_method = POST) { set $$skip_cache 1; }
        if ($$query_string != "") { set $$skip_cache 1; }
        if ($$request_uri ~* "/wp-admin/|/xmlrpc.php|wp-.*.php|/feed/|sitemap(_index)?.xml") { set $$skip_cache 1; }
        if ($$http_cookie ~* "comment_author|wordpress_[a-f0-9]+|wp-postpass|wordpress_no_cache|wordpress_logged_in") { set $$skip_cache 1; }

        location / {
          try_files $$uri $$uri/ /index.php?$$args;
        }

        location ~ \.php$$ {
          try_files $$uri =404;
          include fastcgi_params;
          fastcgi_pass wordpress:9000;
          fastcgi_param SCRIPT_FILENAME $$document_root$$fastcgi_script_name;
          fastcgi_param HTTPS on;

          fastcgi_cache WORDPRESS;
          fastcgi_cache_valid 200 301 302 60m;
          fastcgi_cache_bypass $$skip_cache;
          fastcgi_no_cache $$skip_cache;
          add_header X-FastCGI-Cache $$upstream_cache_status;
        }

        location ~* \.(css|js|png|jpg|jpeg|gif|ico|svg|woff2?)$$ {
          expires 30d;
          add_header Cache-Control "public, immutable";
          try_files $$uri =404;
        }
      }

services:
  nginx:
    image: 'nginx:1.27-alpine'
    environment:
      - SERVICE_FQDN_NGINX
    configs:
      - source: nginx_conf
        target: /etc/nginx/conf.d/default.conf
    volumes:
      - 'wordpress-files:/var/www/html'
    depends_on:
      - wordpress
  wordpress:
    image: '127.0.0.1:5000/cf-wp-tuned-fpm:7.0.2'
    volumes:
      - 'wordpress-files:/var/www/html'
    environment:
      - WORDPRESS_DB_HOST=mysql
      - WORDPRESS_DB_USER=$SERVICE_USER_WORDPRESS
      - WORDPRESS_DB_PASSWORD=$SERVICE_PASSWORD_WORDPRESS
      - WORDPRESS_DB_NAME=wordpress
    depends_on:
      - mysql
  mysql:
    image: 'mysql:8'
    volumes:
      - 'mysql-data:/var/lib/mysql'
    environment:
      - MYSQL_ROOT_PASSWORD=$SERVICE_PASSWORD_ROOT
      - MYSQL_DATABASE=wordpress
      - MYSQL_USER=$SERVICE_USER_WORDPRESS
      - MYSQL_PASSWORD=$SERVICE_PASSWORD_WORDPRESS
  redis:
    image: 'redis:7-alpine'
    volumes:
      - 'redis-data:/data'
Docker Compose treats $name inside the file as a variable to substitute, including inside the inline nginx config, and Coolify substitutes anything it doesn't recognize with an empty string. My first deploy crashed with "invalid number of arguments in set directive" because $skip_cache reached nginx as nothing at all. $$ escapes it. If you ever inline a config that uses dollar variables, this is the trap.
Deploy it, set the domain on the nginx app this time (nginx is the one the proxy routes to), install WordPress with WP-CLI as before, and confirm the cache is doing its job:
$ curl -sI https://wp.example.com/ | grep -iE 'HTTP|X-Fastcgi-Cache'
HTTP/1.1 200 OK
X-Fastcgi-Cache: MISS

$ curl -sI https://wp.example.com/ | grep -iE 'HTTP|X-Fastcgi-Cache'
HTTP/1.1 200 OK
X-Fastcgi-Cache: HIT
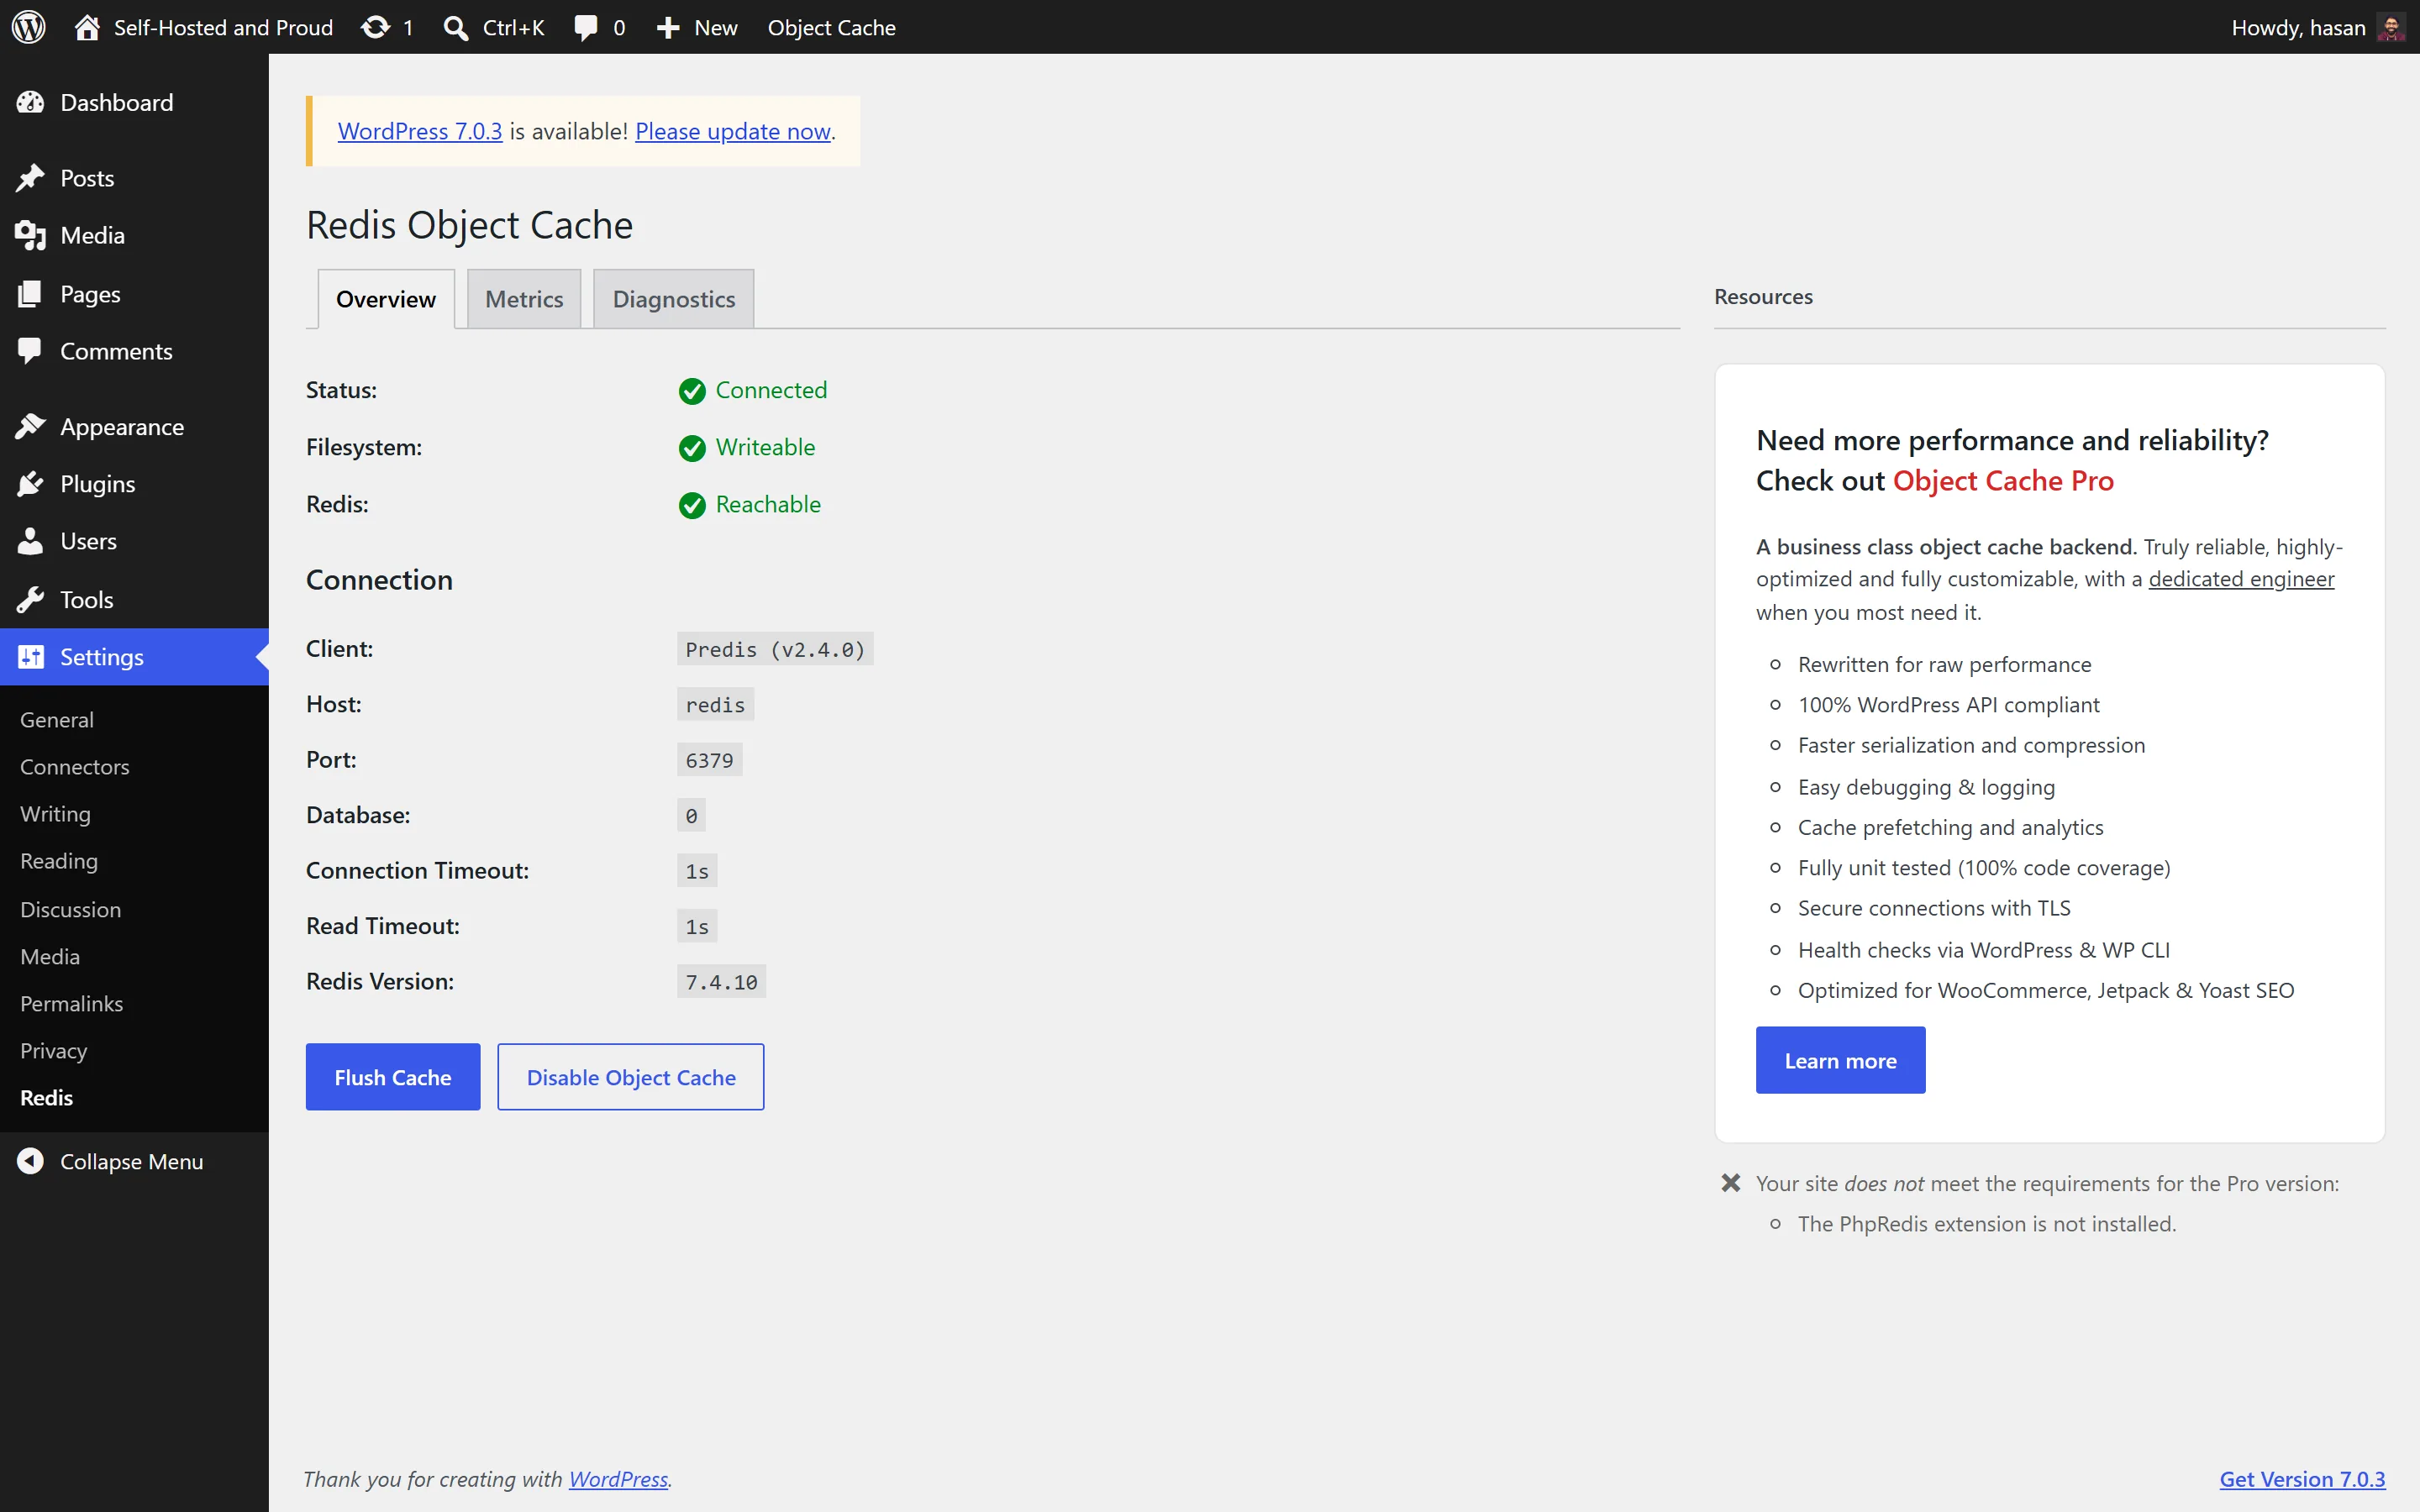
First request renders and saves, second serves the copy. Last piece, the Redis object cache for everything the page cache skips:
C=$(docker ps -qf name=^wordpress)
docker exec -u www-data $C wp plugin install redis-cache --activate --path=/var/www/html
docker exec -u www-data $C wp config set WP_REDIS_HOST redis --path=/var/www/html
docker exec -u www-data $C wp redis enable --path=/var/www/html
The numbers, side by side
Same droplet, same benchmark protocol, all three tiers. This is the chart I wish any of the guides I read had:
Same 2 vCPU / 4 GB box. Three tiers, measured.
WordPress front page, anonymous visitors, over HTTPS through Coolify's proxy
Requests per second
higher is better · wrk, 10 connections, mean of 3×30s
Time to first byte, p50
lower is better · curl, 30 sequential requests
Load generated from a second droplet in the same region. Tier 3 latency under load: 4.9 ms p50, 25.7 ms p99. The same page that took 840 ms under load on tier 1.
Three honest caveats, because a chart without them is marketing:
- The 164× is for anonymous, cacheable traffic. Logged-in users bypass the page cache by design. I measured those too: 115 ms p50 on tier 3, which is still faster than tier 1's anonymous pages, thanks to FPM and the object cache.
- Tier 1 and 2 fall over under real concurrency. At 50 parallel connections the stock tier stopped answering inside 10 seconds for most requests. Tier 3 at the same load: 8.5 ms median. If you ever get a traffic spike, this is the difference between a slow site and a down site.
- The first uncached request still costs 176 ms. A cache does not make PHP faster, it makes PHP rarer.
The security reality
A month before writing this, I left a brand-new droplet exposed on purpose and read the logs. Within 12 hours the HTTP scanners had probed 138 different paths hunting for /.env files, and among the first things they tried was /wp-config.php. Nobody knew that server existed. WordPress is what those scanners are built for, for a boring reason: it is the most installed CMS on the web, so every generic bot speaks fluent wp-login.
The setup in this guide already covers more than it might look like:
- The database is not on the internet. MySQL has no published port; it talks to WordPress on Docker's internal network only. Same for Redis, and the registry binds to 127.0.0.1.
- wp-config.php is not readable. The web server serves PHP output, not PHP files, and the tier-3 nginx config 404s anything that isn't a real file under the docroot.
- Credentials are generated. Coolify invented the database passwords; they were never in your shell history or a note file.
What is left is the box itself: key-only SSH, a firewall, and knowing the two ports Coolify exposes that ufw does not see. That is its own guide: Secure Your Coolify VPS. Read it before you point real traffic here. And inside WordPress: keep the plugin count low, keep them updated, and turn off xmlrpc if you don't use it (the tier-3 config already skips caching it, and the scanners hit it constantly).
Keeping it updated
WordPress core and plugins update from wp-admin like always, files live on the volume. The container images are yours to update, and with the registry pattern it is deliberate instead of accidental:
docker pull wordpress:latest
docker build -t 127.0.0.1:5000/cf-wp-tuned:NEW-VERSION .
docker push 127.0.0.1:5000/cf-wp-tuned:NEW-VERSION
Then bump the tag in the Coolify compose and hit Deploy.
Tag with the WordPress version you pulled (check with docker exec <container> wp core version) so a rollback is a one-line change back. I could not time a core update for this guide honestly: the image I deployed was already the current release the day I measured. In my experience across this stack, the pattern from my other self-hosted services holds: the upgrade is a tag change and seconds of downtime, and the honest cost of self-hosting is attention and backups, not upgrade pain.
FAQ
Is self-hosted WordPress free?
The software is free and open source. What you pay for is the server and the domain. My whole test ran on one $24/month droplet that can host WordPress next to your other apps, and a $6 to $12 VPS carries a low-traffic blog. No per-site fee, no visit limits.
Is a VPS better than managed WordPress hosting?
Managed hosting sells convenience: updates, backups and support are somebody else's job, priced per site, forever. A VPS gives you one flat bill, room for everything you run, and full control. With Coolify the setup gap is small, tier 1 here is about 15 minutes. The honest trade: backups and updates become your job.
How much RAM does WordPress need?
Measured: the WordPress container idles around 120 MB and peaks near 180 MB under load. MySQL takes 450 to 540 MB. With Coolify included my whole stack used about 1.7 GB, so 2 GB is a workable floor for one site and 4 GB leaves room to grow.
Do I really need the custom Docker image?
For speed, no. I measured the stock template and the tuned image at the same requests per second. You need it the day you hit a wall the stock image builds in: 2 MB uploads, 128M memory, no WP-CLI. Until then, tier 1 is a fine place to live.
Does page caching break logged-in users or WooCommerce?
The tier-3 nginx config skips the cache for logged-in cookies, POST requests, query strings and wp-admin, so dynamic stays dynamic. Logged-in requests measured 115 ms p50 on my box. A store needs additional skip rules (cart, checkout, sessions), which deserves its own writeup.
What about backups?
Everything is in two Docker volumes: WordPress files and MySQL data. Back both up off the box, on a schedule. Coolify can schedule database backups, and a nightly volume copy to S3-compatible storage covers the files. Do one test restore before you trust any of it.
What this is part of
WordPress is one service. The pattern in this guide, deploy it with Coolify, own the image, put a cache in front, measure instead of guessing, is the same one I use for analytics, automation, email, storage, all of it on boxes I control. That system is what Self Hosting 2.0 teaches end to end: picking the VPS, hardening it, running your whole stack on it, and the backup discipline that makes it boring. If this guide saved you an afternoon, the course saves you the year of trial and error.
Related
Get the free Vibe Engineering Blocks guide
The exact building blocks I use to ship real products with AI — yours as a free PDF.
Questions & Discussion
Ask a question about this guide →Have a question? Ask it in the community — it's tagged #guide and linked back here. Reading is open to everyone; posting needs a free account.
Loading questions…