Coolify Says "Server Is Not Reachable" After You Hardened Your VPS
 Hasan Aboul Hasan
Published 2026-07-27
Updated 2026-08-11
Hasan Aboul Hasan
Published 2026-07-27
Updated 2026-08-11
You did the responsible thing. You made a normal user instead of living as root, you turned on 2FA, you enabled the firewall. Then Coolify stopped talking to your server.
This is the most common way people break a working Coolify box, and I have to own part of it. I teach this hardening in my Self Hosting 2.0 course, and my own Coolify install guide ends by telling you to lock down SSH keys and 2FA. Follow that literally and you kill the Coolify panel!
So I took a real server, broke it five separate ways on purpose, and wrote down the exact error each one gives. Then I hardened the same box properly and proved Coolify still connects. Everything below is output from that run, not advice.
Coolify logs into your server over SSH, as root, on port 22, using one
key file it holds on disk. Five common hardening steps cut that one line. The fix is almost
never to undo your security: it is to keep root reachable by key only, exempt root
from 2FA with a Match User root block, and use ufw allow on port 22
instead of ufw limit.
- The exact error string each of the five breaks produces, so you can name yours in about a minute
- A server where root password login is refused and your own user needs a 2FA code
- A firewall and fail2ban that protect you without rate-limiting your own panel
- Coolify still showing reachable and validated on that same hardened box
- A recovery path for the case where you are already locked out
- What you need: a VPS running Coolify v4 and root SSH access. Every command here runs on that server, as root.
- Tested on: Ubuntu 24.04. Paths and the socket-activation behaviour below are specific to it.
- What can go wrong: every command in this guide edits live SSH. A bad edit locks you out of your own server. Before you change anything, open a second terminal and log in. Leave it open. That one habit is the difference between a 30-second undo and a provider console session.
Start here: which one did you do?
Coolify shows you this, and it is almost useless on its own:
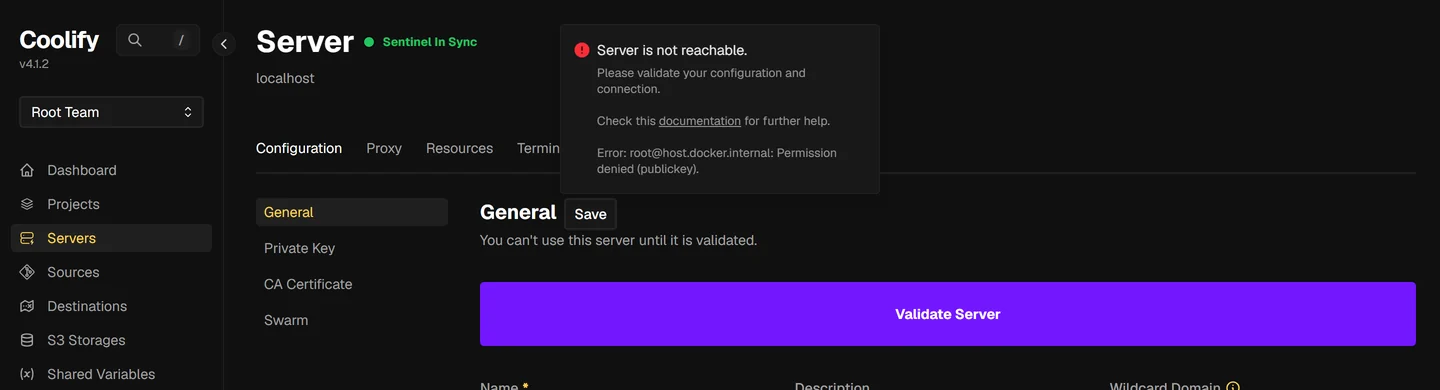
Server is not reachable. Please validate your
    configuration and connection. Error: [email protected]: Permission denied (publickey).
First question: can you still get into the server yourself? Everything in this section runs on the server, so you need a way in. If your own SSH is dead too, do not start here. Jump to if you are already locked out, get back in, then come back.
Almost certainly you can still get in, because the hardening you did was aimed at root, not at you. Log in as the normal user you made, the one you copied your keys to:
ssh deploy@YOUR_SERVER_IP
Everything below needs root. You are not logging in as root, you are becoming root
after you are already inside, which still works even with PermitRootLogin no set.
That distinction is the whole reason you are not locked out:
sudo -i
Now you have a root shell. Coolify keeps its private key in a folder on the server. This
prints the file it is using, plus a .lock file you can ignore:
ls /data/coolify/ssh/keys/
Now make the same connection Coolify makes, using that key. Replace the filename with the one
you just saw. -vvv turns on verbose output, and IdentitiesOnly=yes stops
SSH from quietly trying your own keys instead, which would hide the problem. If it works, the
last line is OK:
ssh -i /data/coolify/ssh/keys/ssh_key@YOUR_KEY_NAME -o IdentitiesOnly=yes -vvv root@localhost 'echo OK'
Then read the server's own log. The client message alone cannot tell two of these five apart, and the log is the only thing that can:
tail -30 /var/log/auth.log
Now match what you got:
| What you see, and what the server log says | Cause |
|---|---|
Permission denied (publickey)log says ROOT LOGIN REFUSED FROM ... |
Break 1 root login disabled |
Permission denied (publickey)log says Connection closed by authenticating user root ... [preauth], with no REFUSED line |
Break 5 Coolify's key gone from root |
Permission denied (keyboard-interactive), and partial success in the -vvv output |
Break 2 2FA applies to root |
Connection refused, but only sometimeslog says [UFW BLOCK] |
Break 3 ufw limit on port 22 |
Connection refused, every single timelog says nothing at all |
Break 4 SSH moved off port 22 |
The table gives you one cause per error, but most people who land here did their whole hardening checklist in one sitting: new user, 2FA, firewall, all before the first restart. So expect to go round more than once.
Fix one, then run the same test command again. If the error changes, that
is progress, not a failed fix: you just uncovered the next one underneath. Keep going until
the test prints OK. Only then go back to Coolify and validate the server.
If you set up fail2ban, it is watching. I locked myself out during this test, retried from my laptop, and my own jail banned me for an hour. Port 22 went from Permission denied to timing out completely, which looks like a totally different problem. Diagnose from the server, not by hammering the door.
Why Coolify needs root SSH at all
Coolify manages every server over SSH. Not just remote ones: the machine Coolify itself runs on is just another server in its list, reached the same way.
How Coolify actually reaches your server
The same path is used even when Coolify manages the machine it is running on.
The Coolify app
Runs in Docker on your VPS. Holds one private key on disk.
/data/coolify/ssh/keys/ssh_key@<id>Your server, as root
The matching public key sits in root's authorized_keys.
/root/.ssh/authorized_keysCoolify is a machine holding one root key. It cannot type a password, it cannot enter a 2FA code, and it cannot switch to your new user. Every hardening step that blocks root, adds a second factor, moves the port, or rate-limits port 22 cuts this exact line.
You can see it in the panel itself. Open your server in Coolify and look at the User and Port
fields: root and 22.
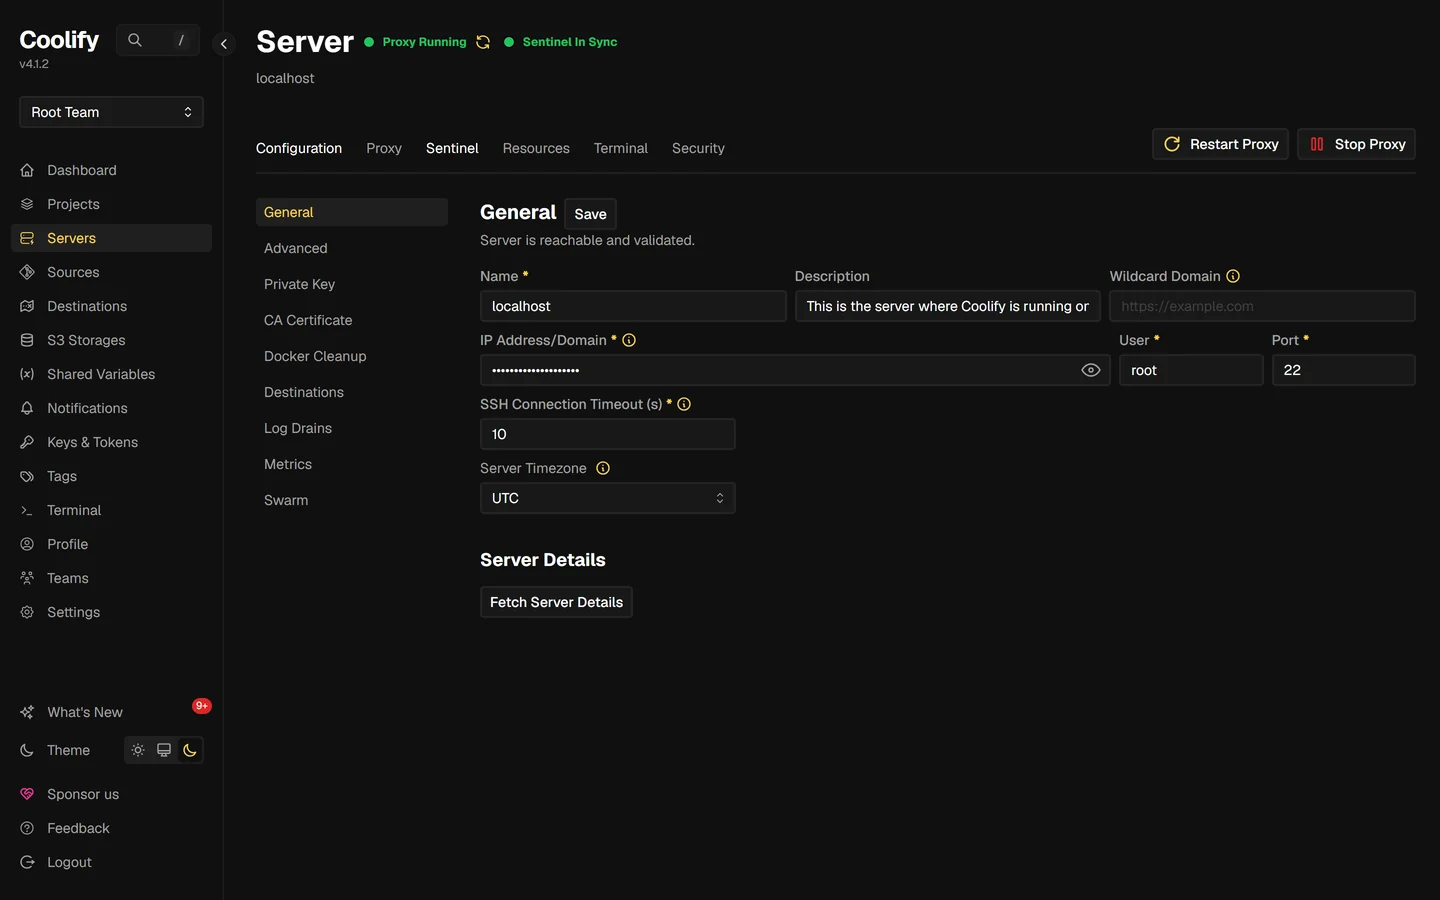
root, port 22.Coolify is a machine holding one root key. It cannot type a password, it cannot enter a code from your phone, and it does not know about the nice new user you made. That is the whole story.
One useful thing I confirmed: the Coolify installer does not touch your
sshd_config. I compared the file before and after installing and there was no
difference at all. It only appends its public key to /root/.ssh/authorized_keys. So
nothing here is Coolify breaking itself. It is always something done afterwards.
Break 1: you disabled root login
The most common one. Every VPS hardening tutorial says to do it. The line goes in your main SSH config file:
PermitRootLogin no
Then you apply it, and that is the moment Coolify dies:
systemctl restart ssh
The panel drops the green Proxy Running badge and tells you the server has to be validated before you can use it:
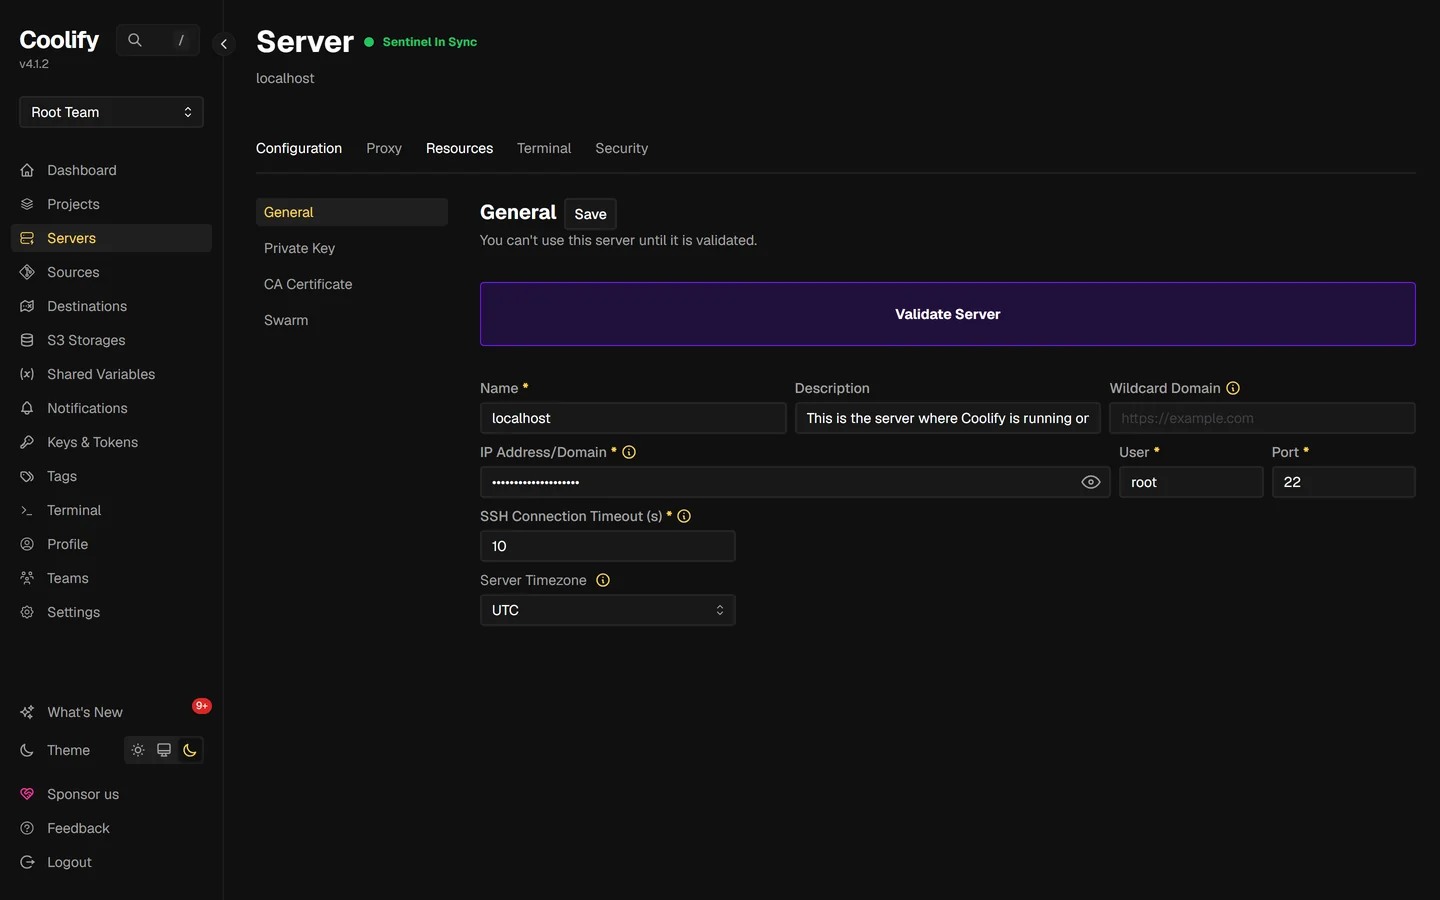
On the server you get Permission denied (publickey). The verbose log is the
confusing part: it shows the correct key being offered and still refused. So the key is fine.
The log line that actually names the cause is this one:
In /var/log/auth.logsshd[13684]: ROOT LOGIN REFUSED FROM ::1 port 45408
The fix
Disabling root passwords is not the same as disabling root keys. You want the first, not the second. Change the line to this:
PermitRootLogin prohibit-password
PasswordAuthentication no
Apply it the same way:
systemctl restart ssh
Root can still log in with a key, never with a password. That kills password brute-forcing, which is what the tutorial was trying to achieve in the first place. Coolify's own documentation recommends the same value.
After you set prohibit-password, the command sshd -T prints it
back as without-password. Those are the same setting. The man page calls
without-password a deprecated alias. Your edit did work.
Break 2: you turned on 2FA
You installed libpam-google-authenticator (the package that adds phone-code login
to SSH), scanned the QR code, and added the lines the tutorial gave you:
KbdInteractiveAuthentication yes
AuthenticationMethods publickey,keyboard-interactive
Now every SSH session needs a code from your phone. Coolify does not have a phone.
This one is easier to identify, because the error is different:
What you'll seeroot@localhost: Permission denied (keyboard-interactive).
And with -vvv you see the giveaway. The key works, and then the server asks for
something else:
In the -vvv outputAuthenticated using "publickey" with partial success.
debug1: Authentications that can continue: keyboard-interactive
partial success appears in no other failure in this guide. If you see it, this is your problem.
The fix
Keep 2FA for yourself, exempt root. You do that with a Match block, which is an
"only for this user" section of the config. Everything after a Match line applies
only to whoever it matches, so a Match block has to go at the very end of the file.
Put it in the middle and every setting below it silently becomes root-only:
AuthenticationMethods publickey,keyboard-interactive

Match User root
    AuthenticationMethods publickey
Apply it, then check it resolved the way you meant. sshd -T -C user=NAME asks sshd
what rules it would actually apply to that user, which is the only way to be sure a Match block
did what you think:
systemctl restart ssh
sshd -T -C user=root | grep -i authenticationmethods
sshd -T -C user=deploy | grep -i authenticationmethods
With 2FA still installed and enforced, that gives two different answers. Root is key-only, your own user still has to produce a code:
What you'll seeauthenticationmethods publickey
authenticationmethods publickey,keyboard-interactive
Your user gets a code prompt. Coolify gets in with its key.
Break 3: you added a firewall limit rule
This is the sneaky one. Coolify's own troubleshooting docs say a LIMIT rule on
port 22 accounts for about 90% of "connection unstable" reports. Almost every hardening tutorial
tells you to run it. On the server, as root:
ufw limit 22/tcp
That looks harmless. It is not, because limit expands into a rate limit that
blocks a source IP after 6 connections in 30 seconds, and Coolify opens a lot of connections.
I ran 20 connections from inside the Coolify container to the host, three times: with no
firewall, with the limit rule, and after switching to allow.
The error here is Connection refused, not a permission problem. And here is why it
fools people: the block clears after the window. Wait half a minute, test once by hand, and it
works perfectly. So you conclude the server is fine and the panel is buggy.
The fix
Swap the limit rule for a plain allow rule:
ufw delete limit 22/tcp
ufw allow 22/tcp
You still want brute-force protection, just not one that counts Coolify as an attacker. Use fail2ban for that, which bans on failed authentications rather than on connection rate. There is a ready-to-paste config in the safe recipe below.
Break 4: you moved the SSH port
You set Port 2222 and never told Coolify. It keeps dialling 22, so it gets:
What you'll seessh: connect to host localhost port 22: Connection refused
The tell for this one is what is missing. Nothing arrives on port 22 at all, so sshd never logs a rejection. An empty log during a failure is itself the diagnosis.
The fix
Tell Coolify the new port. Open your server in Coolify, change the Port field next to User, press Save, then validate the server:
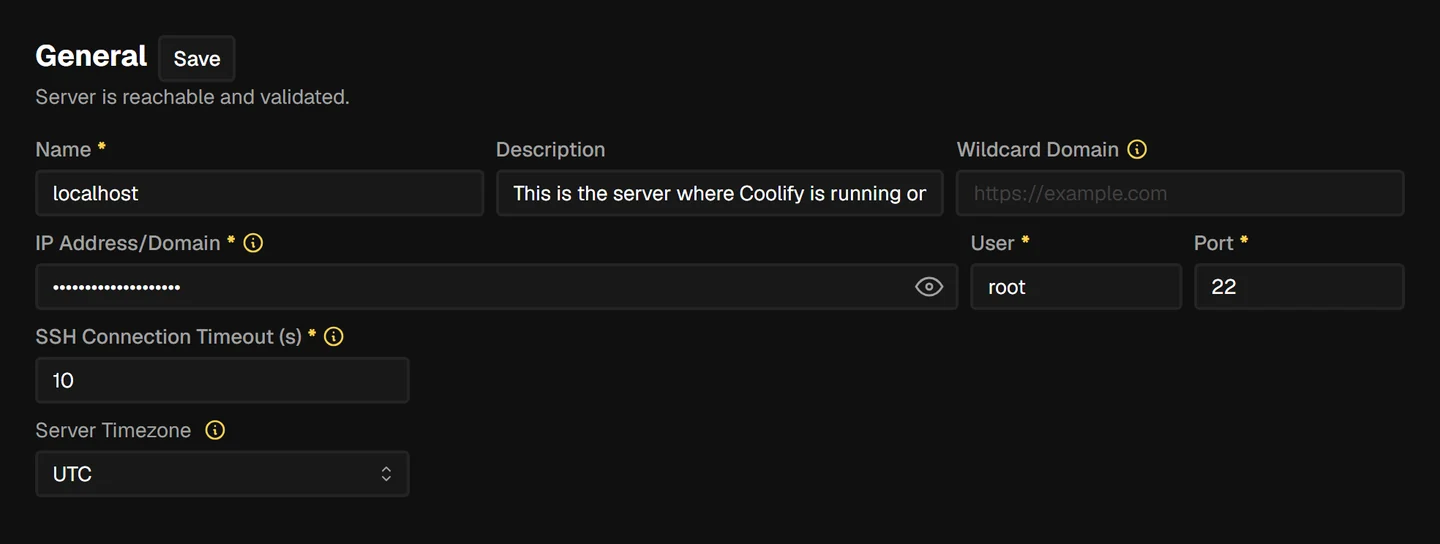
User and Port, top right. Change
the port here, press Save, then validate.And open the new port in your firewall, or you have simply moved the problem:
ufw allow 2222/tcp
The Ubuntu 24.04 trap: your port change may not have happened
This one deserves its own heading, because it makes people think the port change failed for
some other reason. On Ubuntu 24.04, sshd is socket-activated: systemd holds the
network port open and hands connections to sshd, instead of sshd opening the port itself. So the
port number lives in a systemd unit called ssh.socket as well as in
sshd_config, and the systemd one wins.
I tested exactly this. Set Port 2222 in sshd_config, change nothing
else, restart, and look at what is actually listening:
sshd -T | grep -i '^port'
ss -ltn | grep -E ':(22|2222)'
The two answers disagree, and that is the whole trap. sshd agrees with your edit. The listener never moved:
What you'll seeport 2222
LISTEN 0  4096  0.0.0.0:22   0.0.0.0:*
LISTEN 0  4096     [::]:22      [::]:*
Nothing is listening on 2222 at all. Restarting ssh.socket as well changes
nothing, because the socket unit still carries the old port:
systemctl cat ssh.socket | grep ListenStream
What you'll seeListenStream=0.0.0.0:22
ListenStream=[::]:22
To really move the port you have to override the socket unit too, then reload systemd:
[Socket]
ListenStream=
ListenStream=2222
The empty ListenStream= line is not a typo. It clears the inherited value first,
and without it you end up listening on both ports. Then apply and confirm:
systemctl daemon-reload
systemctl restart ssh.socket
ss -ltn | grep -E ':(22|2222)'
Honestly, my advice is to leave SSH on port 22. Moving it stops log noise, not attackers, and on 24.04 it costs you two config files that have to agree.
Break 5: you moved your keys to the new user
This is the exact move that started this guide. You created a proper sudo user, copied your
keys over, and cleaned up root's authorized_keys. Sensible on any normal server. On a
Coolify box you just deleted the one credential Coolify had.
And here is the part that sends people round in circles on GitHub: this produces the identical client error to Break 1.
# ssh -i /data/coolify/ssh/keys/ssh_key@... root@localhost
root@localhost: Permission denied (publickey).

# tail /var/log/auth.log
sshd[13684]: ROOT LOGIN REFUSED FROM ::1 port 45408
# ssh -i /data/coolify/ssh/keys/ssh_key@... root@localhost
root@localhost: Permission denied (publickey).

# tail /var/log/auth.log
sshd[16437]: Connection closed by authenticating user root ::1 port 34874 [preauth]
Same command. Same error. Two completely different causes. The client cannot tell them apart, so you have to read the server log: only the first one says ROOT LOGIN REFUSED.
The fix
Put Coolify's key back on root. Coolify's FAQ tells you to cat a
.pub file at /data/coolify/ssh/keys/[email protected].
On 4.1.2 that file does not exist. The installer creates that name and the app
replaces it within about a minute with ssh_key@<id>, so following the official
fix gives you No such file or directory.
Instead, derive the public key from the private key Coolify actually holds. Run this as root
on the server. ssh-keygen -y reads a private key and prints its matching public key,
and the >> appends that line to root's authorized keys:
KEY=$(ls /data/coolify/ssh/keys/ | grep -v '\.lock$' | head -1)
ssh-keygen -y -f "/data/coolify/ssh/keys/$KEY" >> /root/.ssh/authorized_keys
Then prove it worked before you go back to the panel:
ssh -i "/data/coolify/ssh/keys/$KEY" -o IdentitiesOnly=yes root@localhost 'echo OK'
Can Coolify just run as a non-root user?
On paper yes. On the current release, no — and I am changing my answer here, because I re-tested it and the result did not survive.
Coolify does document the setup. Its non-root user page asks for two things: an SSH key for the user, and one line in sudoers. It also calls the feature experimental and says in its own words that this "is not the most secure way to set up a non-root user".
your-non-root-user ALL=(ALL) NOPASSWD: ALL
I built exactly that on a fresh Coolify 4.3.9 box — that line, an SSH key, and nothing
else. Coolify's own connection check reported the server as healthy
({"uptime":true,"error":null}), which is the trap: the panel tells you it
worked. Then I tried the two things anybody actually does with a server.
Restarting the proxybash: line 2: cd: /data/coolify/proxy/: Permission denied
Deploying anything at alltee: /data/coolify/applications/<uuid>/.env: Permission denied
Neither is something you can fix from the outside, because both live inside Coolify.
The proxy one is the more interesting of the two. Coolify rewrites its own commands to add
sudo when the server user is not root — but it keeps a list of bash keywords it
refuses to prefix, and cd is on that list. Printing the commands it actually sends
when you press Restart Proxy:
What Coolify sends, as a non-root usersudo mkdir -p /data/coolify/proxy//dynamic && sudo sudo chown -R coolifyuser:coolifyuser ...
cd /data/coolify/proxy/          ← no sudo, by design
sudo docker compose pull
sudo docker compose up -d --wait
Meanwhile /data/coolify is mode 700 and owned by uid 9999,
which is the user Coolify's own process runs as inside its container. So your new user cannot
walk into that folder, and the single command that would need sudo to get there is
the single command that never receives it. (The doubled sudo sudo is theirs. I left
it as printed.)
The deployment failure is a known bug rather than a subtlety: the sudo lands on
echo while the privilege is needed by tee at the end of the pipe. It was
filed as issue 5199 in February 2025, and it was still open, and still reproducing, when
I ran this in August 2026.
Two things I expected to matter and did not. The docker group is a red herring
here — I ran it with the group and without, and the failures are identical either way. And
loosening the folder so the user can get in (chmod o+rx /data/coolify, which no
documentation asks for) fixes the proxy restart and leaves every deployment broken. There is no
combination that survives both.
And it does not buy the security it looks like it buys
Look again at the line the documentation requires. Passwordless sudo to everything means the account can simply become root:
Proof, not an instruction$ sudo -u coolifyuser sudo -n id
uid=0(root) gid=0(root) groups=0(root)
And if you add the docker group on top, as most write-ups tell you to, there is a second door to the same room. The daemon runs as root, so anyone who can talk to it owns the host:
Proof, not an instruction$ docker run --rm -v /etc:/host alpine head -2 /host/shadow
root:*:16176:0:99999:7:::
daemon:*:20619:0:99999:7:::
That is the whole file of password hashes, read by the account that was supposed to be the safer one. So the honest answer is not "don't" and not "yes, it's safer". It is: the account is root with extra steps, and on 4.3.9 the extra steps do not work. Keep root, reachable by key only. That is the recipe below, and it passed every test I could think to run at it — install a resource, restart the proxy, restart Coolify itself, reboot the box.
There is a specific way this goes wrong that is worth naming, because a lot of guides tell
you to finish the job with a recursive chown and chmod on
/data/coolify. Do not. Those two commands take the folder away from uid 9999,
and Coolify rewrites its SSH key there on every deployment, so every deployment
starts failing. You will see this:
In the Coolify logschmod(): Operation not permitted in app/Helpers/SshMultiplexingHelper.php on line 388
Deployment failed: SSH keys storage directory is not writable.
The chmod -R 755 half has a second victim: it makes
acme.json world-readable, Traefik refuses to use it, and every site on the box
quietly loses HTTPS. Put it all back:
chown -R 9999:root /data/coolify
chmod -R 700 /data/coolify
chown root:root /data/coolify/proxy/acme.json
chmod 600 /data/coolify/proxy/acme.json
docker restart coolify
Then set the server's SSH user back to root in Coolify and press Validate. One
more thing while you are here: for as long as that folder sat at 755, every
secret in it — database passwords, environment files, Coolify's own private key —
was readable by any account on the box. Rotate anything that matters.
The hardening that does not break Coolify
This is the whole recipe. It is what the lab server is running now.
Open a second terminal and log into the server before you touch anything. Leave it open. Do not close it until the very last check passes.
An SSH session that is already open is not re-checked when the rules change. That open terminal keeps working even if your new config locks out every new connection, and it is how you undo a mistake in 30 seconds instead of hunting for your provider's web console. I prove this in the recovery section.
Step 1: write the SSH rules to a drop-in file
Do not edit /etc/ssh/sshd_config directly. Here is why, and it catches a lot of
people.
Ubuntu's server image ships a folder called /etc/ssh/sshd_config.d/. Files in
there are called drop-ins: small config files that get pulled into the main one.
The main file pulls them in with one line, and that line comes before every setting in it. On a
stock 24.04 image it is line 12, under the comment header:
The first real setting in /etc/ssh/sshd_configInclude /etc/ssh/sshd_config.d/*.conf
Two things matter about that. First, it sits at the top, so the drop-ins are read before anything else in the main file. Second, SSH keeps the first value it sees for a setting and ignores every later one. Most config files work the opposite way, where the last line wins, which is exactly why this catches people out.
Put those two together and you get the thing everyone trips on: if a drop-in sets something, editing that same setting in the main file does nothing. Your change is in the file, the file is valid, sshd just never reaches it. That is the whole explanation for "I set it and restarted and nothing changed".
It also works in your favour. A setting in your own drop-in is read before the main file, so it wins. That is why we add a file instead of editing one. A stock Ubuntu 24.04 image ships two drop-ins already:
ls /etc/ssh/sshd_config.d/ on a fresh 24.04 image50-cloud-init.conf          PasswordAuthentication no
60-cloudimg-settings.conf   PasswordAuthentication no
One caveat, because the numbers do matter. Drop-ins are read in filename order, so
50- is read before 99-, and first-one-wins applies between them too. A
99- file cannot override something a 50- file already
set. Here that is fine: the only thing those two stock files set is
PasswordAuthentication no, which is exactly what we want anyway. If you ever need to
overrule a stock drop-in, give your file a lower number than theirs.
Create this file:
PermitRootLogin prohibit-password
PasswordAuthentication no
PubkeyAuthentication yes
KbdInteractiveAuthentication yes
AuthenticationMethods publickey,keyboard-interactive

Match User root
    AuthenticationMethods publickey
That is the whole trick of this guide in six lines: humans need a key and a code, root needs only a key, and nobody gets in with a password.
Step 2: check the config before you apply it
sshd -t parses the config and prints nothing if it is valid. Never restart SSH
without running it first, because a typo here is how you lock yourself out:
sshd -t
Step 3: apply it, then confirm something is still listening
On Ubuntu 24.04 restart the socket, not the service, because the socket is what holds port 22 (the same socket activation from Break 4):
systemctl restart ssh.socket
Now verify two things before you close your rescue terminal. That port 22 is really open, and that your drop-in actually took effect rather than losing to something read earlier:
ss -ltn | grep ':22'
sshd -T | grep -iE 'permitrootlogin|passwordauthentication|authenticationmethods'
The second command prints the rules sshd is really applying, not the ones you wrote. Remember
that prohibit-password comes back as its old alias without-password:
What you'll seepermitrootlogin without-password
passwordauthentication no
authenticationmethods publickey,keyboard-interactive
That check matters more than it looks. I skipped it once during this build and ended up with
nothing listening on port 22 at all, which from outside looks exactly like a firewall problem. It
cost me a provider-console power cycle. If that command prints nothing, do not close your other
terminal, and start SSH again with systemctl start ssh.socket.
Step 4: the firewall, with allow and never limit
Default-deny everything coming in, then open only what you need. Note port 8000: that is the Coolify dashboard itself. Leave it out and you will lock yourself out of the panel while "securing" the server:
ufw default deny incoming
ufw default allow outgoing
ufw allow 22/tcp
ufw allow 80/tcp
ufw allow 443/tcp
ufw allow 8000/tcp
ufw enable
If you have moved Coolify behind a domain with HTTPS and no longer reach it on
:8000, drop that line. Check how you actually open your panel before you decide.
Closing 8000 for good, once the panel is on a domain, is the domain-first path in
How to secure a
Coolify VPS without breaking Coolify, which also fixes the deeper problem this firewall
misses: Docker publishes container ports past ufw entirely.
Step 5: fail2ban, the protection ufw limit was supposed to give you
Install it:
apt update
apt install -y fail2ban
Then create its config. This bans an IP for an hour after 5 failed logins in 10 minutes, and it counts failed authentications, so Coolify reconnecting fast never trips it:
[sshd]
enabled = true
backend = systemd
maxretry = 5
findtime = 10m
bantime = 1h
Start it and confirm the jail is actually running:
systemctl enable --now fail2ban
fail2ban-client status sshd
Step 6: now prove it, from outside
Test from your laptop over the internet, not from the server itself. Loopback connections never cross the firewall, so a localhost test can pass on a box that is unreachable from the world.
Hardened and working, at the same time
Same server, same minute. Checks run from a laptop over the public internet.
The security checks
-- 1. key-based root login from the internet
  [PASS]
-- 2. root PASSWORD login is refused
  [PASS]
-- 3. the human user is challenged for 2FA
    Authenticated using "publickey" with partial success.
    deploy@server: Permission denied (keyboard-interactive).
  [PASS]
-- 4. firewall + fail2ban
  [PASS] ufw active
  [PASS] fail2ban active
-- 5. no LIMIT rule on 22
  [PASS]
-- 7. Coolify's key opens a root session
  [PASS]

RESULT: PASS=8 FAIL=0
The panel, at that same moment
Root password login refused, 2FA enforced for the human, firewall up, fail2ban running. And Coolify still says reachable and validated.
That is the point of the whole guide. Security and a working panel were never the trade everyone assumes they are.
If you are already locked out
First: stop retrying. Every failed attempt feeds fail2ban, and if it bans you, port 22 stops answering entirely and you have made your own diagnosis harder. I did this to myself during this build and lost an hour to it.
If you still have a terminal open from before the change, you are fine. An established SSH session is not re-authenticated when sshd restarts or when the rules change. Only new connections hit the new config. I tested this deliberately: with root login fully disabled, a new connection was refused while the session I had left open kept working as root, and I repaired the server through it.
That is the single most useful habit in this guide. Open a second terminal before you edit sshd_config, every time.
If every session is closed, use your provider's web console. It attaches to the machine's screen directly and does not go through SSH at all, so a broken SSH config cannot lock you out of it. DigitalOcean calls it the Droplet Console, Hetzner has it as Console in the server view, and Vultr as View Console. Log in there with your root password, fix the config, restart SSH, and validate the server in Coolify.
If you never set a root password, that console will not help. Most providers offer a recovery or rescue mode that boots a temporary system with your disk attached, which is the last resort. This is the real reason to keep the second terminal open.
Questions people actually ask
Why does Coolify still say the server is reachable when it clearly is not?
Because it reuses one open connection for many commands, a trick called multiplexing. It keeps
a master socket under /data/coolify/ssh/mux/, and an already-open master keeps
working after you break authentication. During this test the panel reported reachable and
validated for over ten minutes after root SSH was completely dead. It is also why the break
so often shows up as "it worked yesterday" rather than immediately.
Is hardening my VPS even worth it?
Yes, and it is not close. While I was running the firewall test, the log picked up scans from three separate addresses within seconds of the firewall coming up, on a server that was about twenty minutes old and announced nowhere. Bots scan the whole address space continuously. The answer to this guide is never "turn security off", it is "point it at the right thing".
Do I still need a non-root user?
For yourself, yes. Do your own work as a normal sudo user with 2FA. Just do not take root's key away, because that key is Coolify's only way in.
For Coolify, no — and that is a change from what this page said in July. I re-ran it on 4.3.9 and a documented non-root setup could neither restart the proxy nor deploy anything. The section above has the commands, the errors and the reason.
Related
Tested on: Ubuntu 24.04.4 LTS · OpenSSH 9.6p1 ·
Docker 29.6.2 · Coolify 4.1.2, and re-tested on Coolify 4.3.9 · DigitalOcean
droplets, 2 vCPU / 4 GB.
Lab runs: 2026-07-27 (the five breaks and the recipe) and 2026-08-19 (the
non-root section, rebuilt from scratch on four fresh servers after a reader hit it).
Last verified: 2026-08-19. Every error message, log line and number on this
page came from those runs.

Get the free Vibe Engineering Blocks guide
The exact building blocks I use to ship real products with AI — yours as a free PDF.
Questions & Discussion
Ask a question about this guide →Have a question? Ask it in the community — it's tagged #guide and linked back here. Reading is open to everyone; posting needs a free account.
Loading questions…