Time to change something. You will add a Notes screen, link to it, and see it live. Roughly ten minutes, and most of it is the agent's.
Keep both terminals from Run It on Your Computer running, and have Claude Code open in the project as set up in Open It in Claude Code.
The only thing you need to know before you start: files in apps/mobile/app/ are screens. Create a file, get a route.
1. Ask for the screen
/new-screen is one of the four slash commands in .claude/commands/. It reads the repo's own rule for adding a screen before it writes anything.
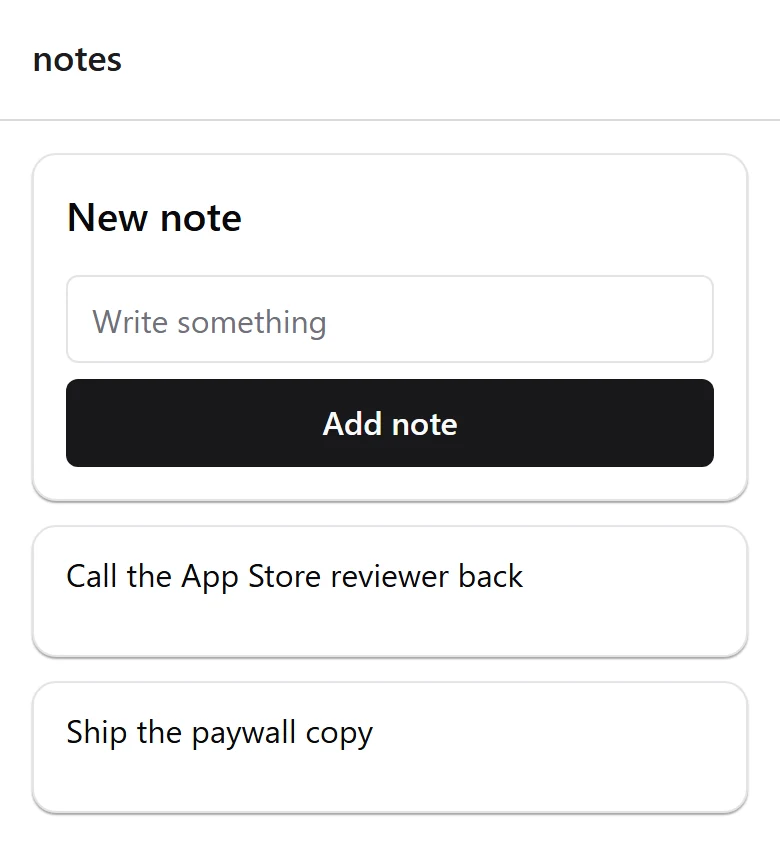
/new-screen Notes. A card at the top with a text input and an Add note button, and the notes listed below it newest first, with an empty state when there are none. Keep the state local for now, no API call.
2. Check four things before you look at the app
The point of the prompt is not that it saves typing. It is that the result is checkable. Open what it wrote and confirm:
- The file is
apps/mobile/app/notes.tsx. Notscreens/, notcomponents/. That is Expo Router's rule and it is inCLAUDE.md. - It imports from
@repo/ui, not fromreact-nativedirectly.Screen,Card,Input,Button,Textshould all come from the kit. - There are no colours in the file. No hex codes, no
StyleSheet.createwith abackgroundColor. Theming comes from the design tokens. - It uses
className, not astylesobject. That is NativeWind, and it is why the screen follows dark mode without being told to.
If any of those four are wrong, the agent answered from training data instead of from the repo. Send it back:
Re-read CLAUDE.md and .claude/rules/new-screen.md. My screen must live under apps/mobile/app/, use components from @repo/ui rather than raw react-native, and style with NativeWind className rather than StyleSheet. Fix the file you just wrote.
3. Look at it
Save. The browser reloads on its own. Go to http://localhost:8081/notes.
Type something, press Add note, and it appears above the form. Toggle dark mode from the home screen and this screen follows, because you never wrote a colour.
4. Link it from the home screen
Add a My notes button to apps/mobile/app/index.tsx that navigates to /notes, matching the other buttons on that screen.
It should reach for Link from expo-router wrapping a Button, the same as the links already there.
5. Keep the app healthy
pnpm testStill 85 passed, 0 failed. You added a screen without breaking anything.
Why that worked
Nothing above depended on the agent being clever. It depended on three things being written down:
- Routing is the file system.
app/index.tsxis the home screen.app/demo/toasts.tsxis the screen at/demo/toasts. There is no route table to update, which is why "create the file in the right folder" is the whole of check 1. <Screen>handles the safe areas, so content never sits under the notch. That is one import instead of a per-platform inset calculation the agent would otherwise invent differently each time.classNameis real Tailwind, through NativeWind, and every component in@repo/uiis already themed for light and dark. The reason check 3 says "no colours" is that a colour in the file is the one thing that breaks theming later.
The kit exports 27 components from packages/ui: Text, Button, Card and its parts, Input, Skeleton, Screen, Toaster, ErrorBoundary, Dialog and its parts, AlertDialog, EmptyState, Avatar, SearchBar, and FilterChips. Open packages/ui/src/index.ts for the full list. It is worth reading once, because it is the list your agent reuses from instead of writing a fourth button.
If you would rather type it yourself
The generator is a convenience, not a dependency. This is a complete apps/mobile/app/notes.tsx:
import * as React from 'react';
import { View } from 'react-native';
import { Button, Card, CardContent, CardHeader, CardTitle, Input, Screen, Text } from '@repo/ui';

export default function NotesScreen() {
  const [draft, setDraft] = React.useState('');
  const [notes, setNotes] = React.useState<string[]>([]);

  function addNote() {
    const text = draft.trim();
    if (!text) return;
    setNotes((current) => [text, ...current]);
    setDraft('');
  }

  return (
    <Screen>
      <View className="gap-3 py-4">
        <Card>
          <CardHeader>
            <CardTitle>New note</CardTitle>
          </CardHeader>
          <CardContent>
            <View className="gap-2">
              <Input placeholder="Write something" value={draft} onChangeText={setDraft} />
              <Button onPress={addNote}>
                <Text className="font-medium text-primary-foreground">Add note</Text>
              </Button>
            </View>
          </CardContent>
        </Card>

        {notes.length === 0 ? (
          <Text variant="muted">No notes yet. Add one above.</Text>
        ) : (
          notes.map((note, i) => (
            <Card key={`${note}-${i}`}>
              <CardContent>
                <Text className="py-3">{note}</Text>
              </CardContent>
            </Card>
          ))
        )}
      </View>
    </Screen>
  );
}
And the link for apps/mobile/app/index.tsx, next to the buttons already there:
<Link href="/notes" asChild>
  <Button variant="outline">
    <Text className="font-medium">My notes</Text>
  </Button>
</Link>
If Link is not imported yet, add import { Link } from 'expo-router'; at the top.
Typed by hand or generated, it is the same file. The four checks in step 2 are what matter either way.
Do the next one on your own
/new-screen Expenses. A list of expenses with a total at the top, using the same patterns as app/notes.tsx.
Run the same four checks. When they pass twice in a row without you correcting anything, you can stop checking every time and start checking when something looks off.
Next: Connect Your Own Backend, or jump to Charge For It.