How to Self-Host Supabase: The Parts the Docker Compose Skips
 Hasan Aboul Hasan
Published 2026-08-12
Updated 2026-08-15
Hasan Aboul Hasan
Published 2026-08-12
Updated 2026-08-15
The official Docker Compose gets you a Supabase login screen in about 20 seconds. Everything that makes it a real backend is undocumented: the secrets you must set before the first boot, auth email that fails silently, a connection pooler that hangs if you rotate keys late, HTTPS, and a backup that restores. I ran the whole thing on one 4 GB server and measured every part. This is that run, written down.
- Self-hosted Supabase running on your own server, HTTPS included
- Auth emails that actually send, proven with a real confirmation email
- Secrets set the right way, so the pooler and dashboard don't fight you later
- A backup you have actually restored, not one you hope works
- The raw database and gateway ports closed to the internet
Supabase is the open-source Firebase alternative: a Postgres database with Auth, file Storage, instant REST and Realtime APIs, and a dashboard called Studio, all in one stack. The company sells a hosted version. The same product also ships as a Docker Compose you can run on your own server, for free.
So I did. Fresh DigitalOcean droplet, the official supabase/docker compose, no shortcuts. Getting the login screen was easy. Then I spent the rest of the run on the parts every other guide skips: the secrets, the email, the pooler, the upgrade, and the backup. I broke a few things on purpose and measured what it took to fix them.
The one lesson that matters most, up front: set every secret before your first docker compose up. Supabase's own docs say the same, and I'll show you exactly why, because I ignored it once and watched the connection pooler hang forever with no error.
What you actually get
The word "Supabase" is one product, but the compose starts eleven containers. Knowing what each one is makes every later problem readable instead of scary. Here is the stack I got, with the real idle memory of each piece measured after ten minutes of settling.
Gateway
Envoy · 84 MBThe one door in. Routes /auth, /rest, /storage to the right service.
Postgres
121 MBPostgres 17. The actual database. Everything else is a wrapper on it.
Studio
255 MBThe dashboard. Heaviest single piece.
Auth (GoTrue)
35 MBSignups, logins, JWTs, magic links.
Storage
220 MBFile uploads and downloads on top of Postgres + disk.
Pooler (Supavisor)
187 MBConnection pooler. Owns both database ports.
REST (PostgREST)
32 MBTurns your tables into a REST API automatically.
Realtime
206 MBLive subscriptions over websockets.
Meta + imgproxy + Edge
324 MBSchema API, image transforms, and the edge-function runtime.
Two things surprised me here, and both matter because they make older tutorials wrong:
- The gateway is Envoy now, not Kong. Almost every self-hosting guide you'll find still talks about the "Kong" container and its config. In the current compose that container is gone, replaced by
supabase-envoy. If a tutorial tells you to editkong.yml, it's out of date. - There is no analytics/Logflare container. The old stack shipped a Logflare-based analytics service that was a constant source of boot failures in the community forums. The current default compose doesn't start it at all. One less thing to break.
What it needs to run
Supabase's official minimum is 4 GB RAM, 2 CPU cores, and 40 GB of disk, with 8 GB and 4 cores recommended. Those numbers are honest. On my 4 GB droplet the whole stack idled at about 1.5 GB of RAM used, leaving roughly 2.3 GB free before any real traffic. The images take 8.9 GB of disk on their own.
- Containers: 11
- Idle RAM: ~1.5 GB
- Images on disk: 8.9 GB
- Time to login screen: ~20 s
- Official minimum: 4 GB / 2 vCPU
So a 4 GB box is the real floor, not a suggestion. A 2 GB VPS boots the stack but has nothing left for your app or your users. A 1 GB box does not run it at all. If you're pricing a server, that's a $24-a-month class of machine, which matters for the cost comparison at the end.
Step 1 – Server, Docker, and the compose
Start with a fresh Ubuntu server that has Docker and the compose plugin installed. Then pull just the docker/ directory of the Supabase repo, not the whole thing:
git clone --filter=blob:none --no-checkout --depth 1 https://github.com/supabase/supabase
cd supabase
git sparse-checkout set docker
git checkout
cd docker
cp .env.example .env
That last line is the one that matters. The compose reads everything from .env, and the example file is full of demo values with a giant warning attached. Do not run up yet. The next step is the whole reason this guide exists.
Step 2 – Set every secret first
The default .env ships a dashboard password of this_password_is_insecure_and_should_be_updated and demo API keys that are published in Supabase's own repo. If you boot with these and expose the box, you are handing out admin access. And two components bake these values in on first boot, so changing them later is real work, not a config edit.
There are five secrets that matter. The Postgres password, the JWT secret, the anon and service_role keys, the dashboard password, and the vault encryption key. The tricky pair is the API keys: your ANON_KEY and SERVICE_ROLE_KEY are not random strings, they are JWTs signed with your JWT_SECRET. Change the secret and the old keys stop working, so all three move together.
You don't need a website to generate them. A JWT secret is just a long random string, and you can sign the two keys with openssl:
# a strong JWT secret
openssl rand -hex 20

# then sign an anon and a service_role JWT with THAT secret
# (role="anon" and role="service_role", iss="supabase", 10-year exp,
#  HS256). Supabase's docs also ship a generate-keys.sh that does this;
# either way, the keys must be signed with your new JWT_SECRET.
Set all of them in .env before the first boot:
POSTGRES_PASSWORD=your-own-long-random-password
JWT_SECRET=your-own-40-char-secret
ANON_KEY=<jwt signed with JWT_SECRET, role=anon>
SERVICE_ROLE_KEY=<jwt signed with JWT_SECRET, role=service_role>
DASHBOARD_USERNAME=supabase
DASHBOARD_PASSWORD=your-own-dashboard-password
VAULT_ENC_KEY=your-own-32-char-key
SECRET_KEY_BASE=your-own-64-char-key
Two components snapshot your secrets the first time they start. Postgres initializes its data directory with whatever POSTGRES_PASSWORD is set at that moment, and after that, changing the variable does nothing: the database keeps the old password. The connection pooler is worse. It stores its tenant credentials encrypted with your vault key on first boot. I rotated my secrets after booting, and every connection through the pooler then hung forever with no error message at all. The fix was to wipe the pooler's tenant tables and restart it. Setting the secrets first means you never meet either trap.
Step 3 – Bring the stack up
docker compose pull
docker compose up -d
On my box the pull moved 8.9 GB of images in under two minutes, and once the containers started, Studio was serving in about 20 seconds. Check it:
docker compose ps
# all 11 containers should read (healthy) within a minute or two
Now open http://your-server-ip:8000. You get a browser username-and-password box, not a login page. That's HTTP basic auth, using the DASHBOARD_USERNAME and DASHBOARD_PASSWORD you just set. Pass it and you're in Studio, looking at a real Postgres database with a working table editor.
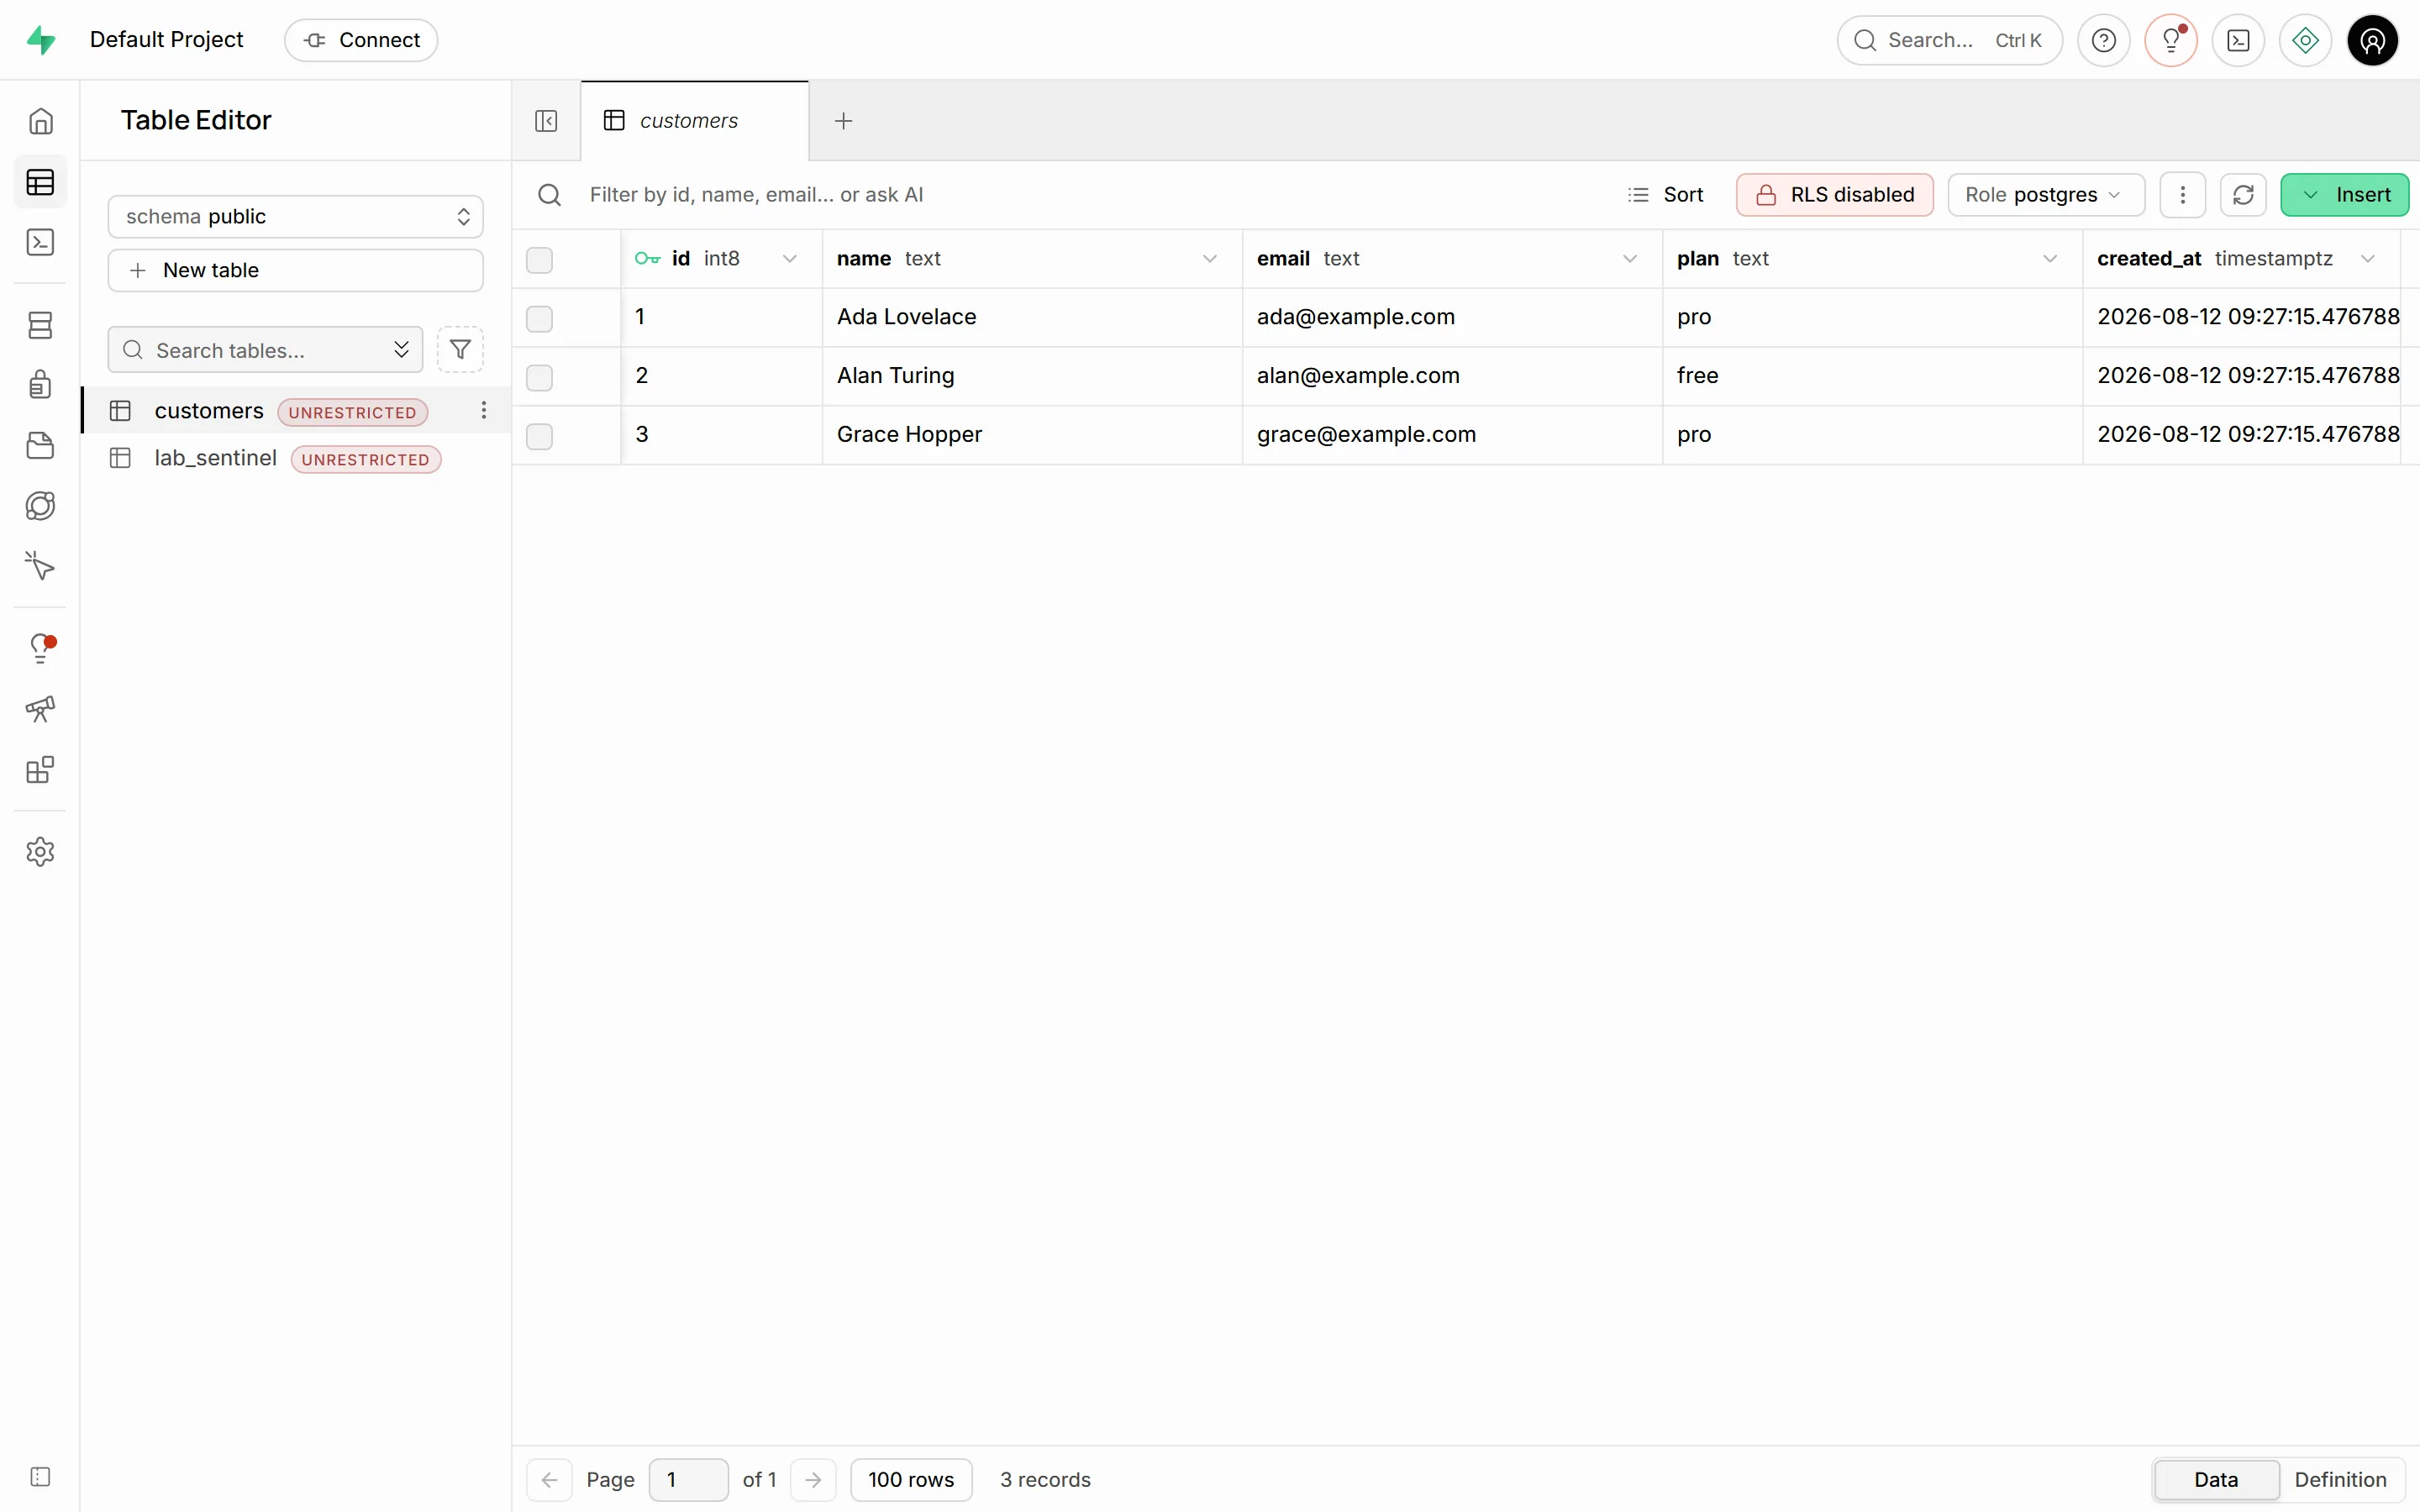
Every table you create in the editor starts with Row Level Security disabled, which the badge in the screenshot is telling you. On self-hosted Supabase your anon key can read those tables straight through the REST API. Turn RLS on for anything real before you expose the API. This is the same rule as Supabase Cloud, but nothing here forces it on you.
Step 4 – Auth email (the silent failure)
This is where most self-hosted Supabase projects quietly break. Try to sign a user up right after install and you get a 500:
{"code":500,"error_code":"unexpected_failure","msg":"Error sending confirmation email"}
The user row is created, but they can never confirm, so they can never log in. The reason is in the auth container's logs:
component=api error="dial tcp: lookup supabase-mail on 127.0.0.11:53: server misbehaving"
level=error msg="500: Error sending confirmation email"
The default .env points SMTP at a host called supabase-mail on port 2500. That container does not exist in the compose. So auth has nowhere to send mail, and it fails closed. Nothing tells you this on the dashboard; you only find it when a real signup breaks.
The fix is to point the SMTP variables at a mail service you actually control and restart auth:
SMTP_HOST=smtp.your-provider.com
SMTP_PORT=587
SMTP_USER=your-smtp-username
SMTP_PASS=your-smtp-password
[email protected]
SMTP_SENDER_NAME=Your App
docker compose up -d auth
Do this with a transactional provider (Resend, Postmark, SES, Mailgun) on port 587, not your own from-scratch mail server. Most cloud hosts, DigitalOcean included, block outbound port 25 anyway, so a relay on 587 is the path that works. Once it's wired, a signup returns 200 and the confirmation email lands:
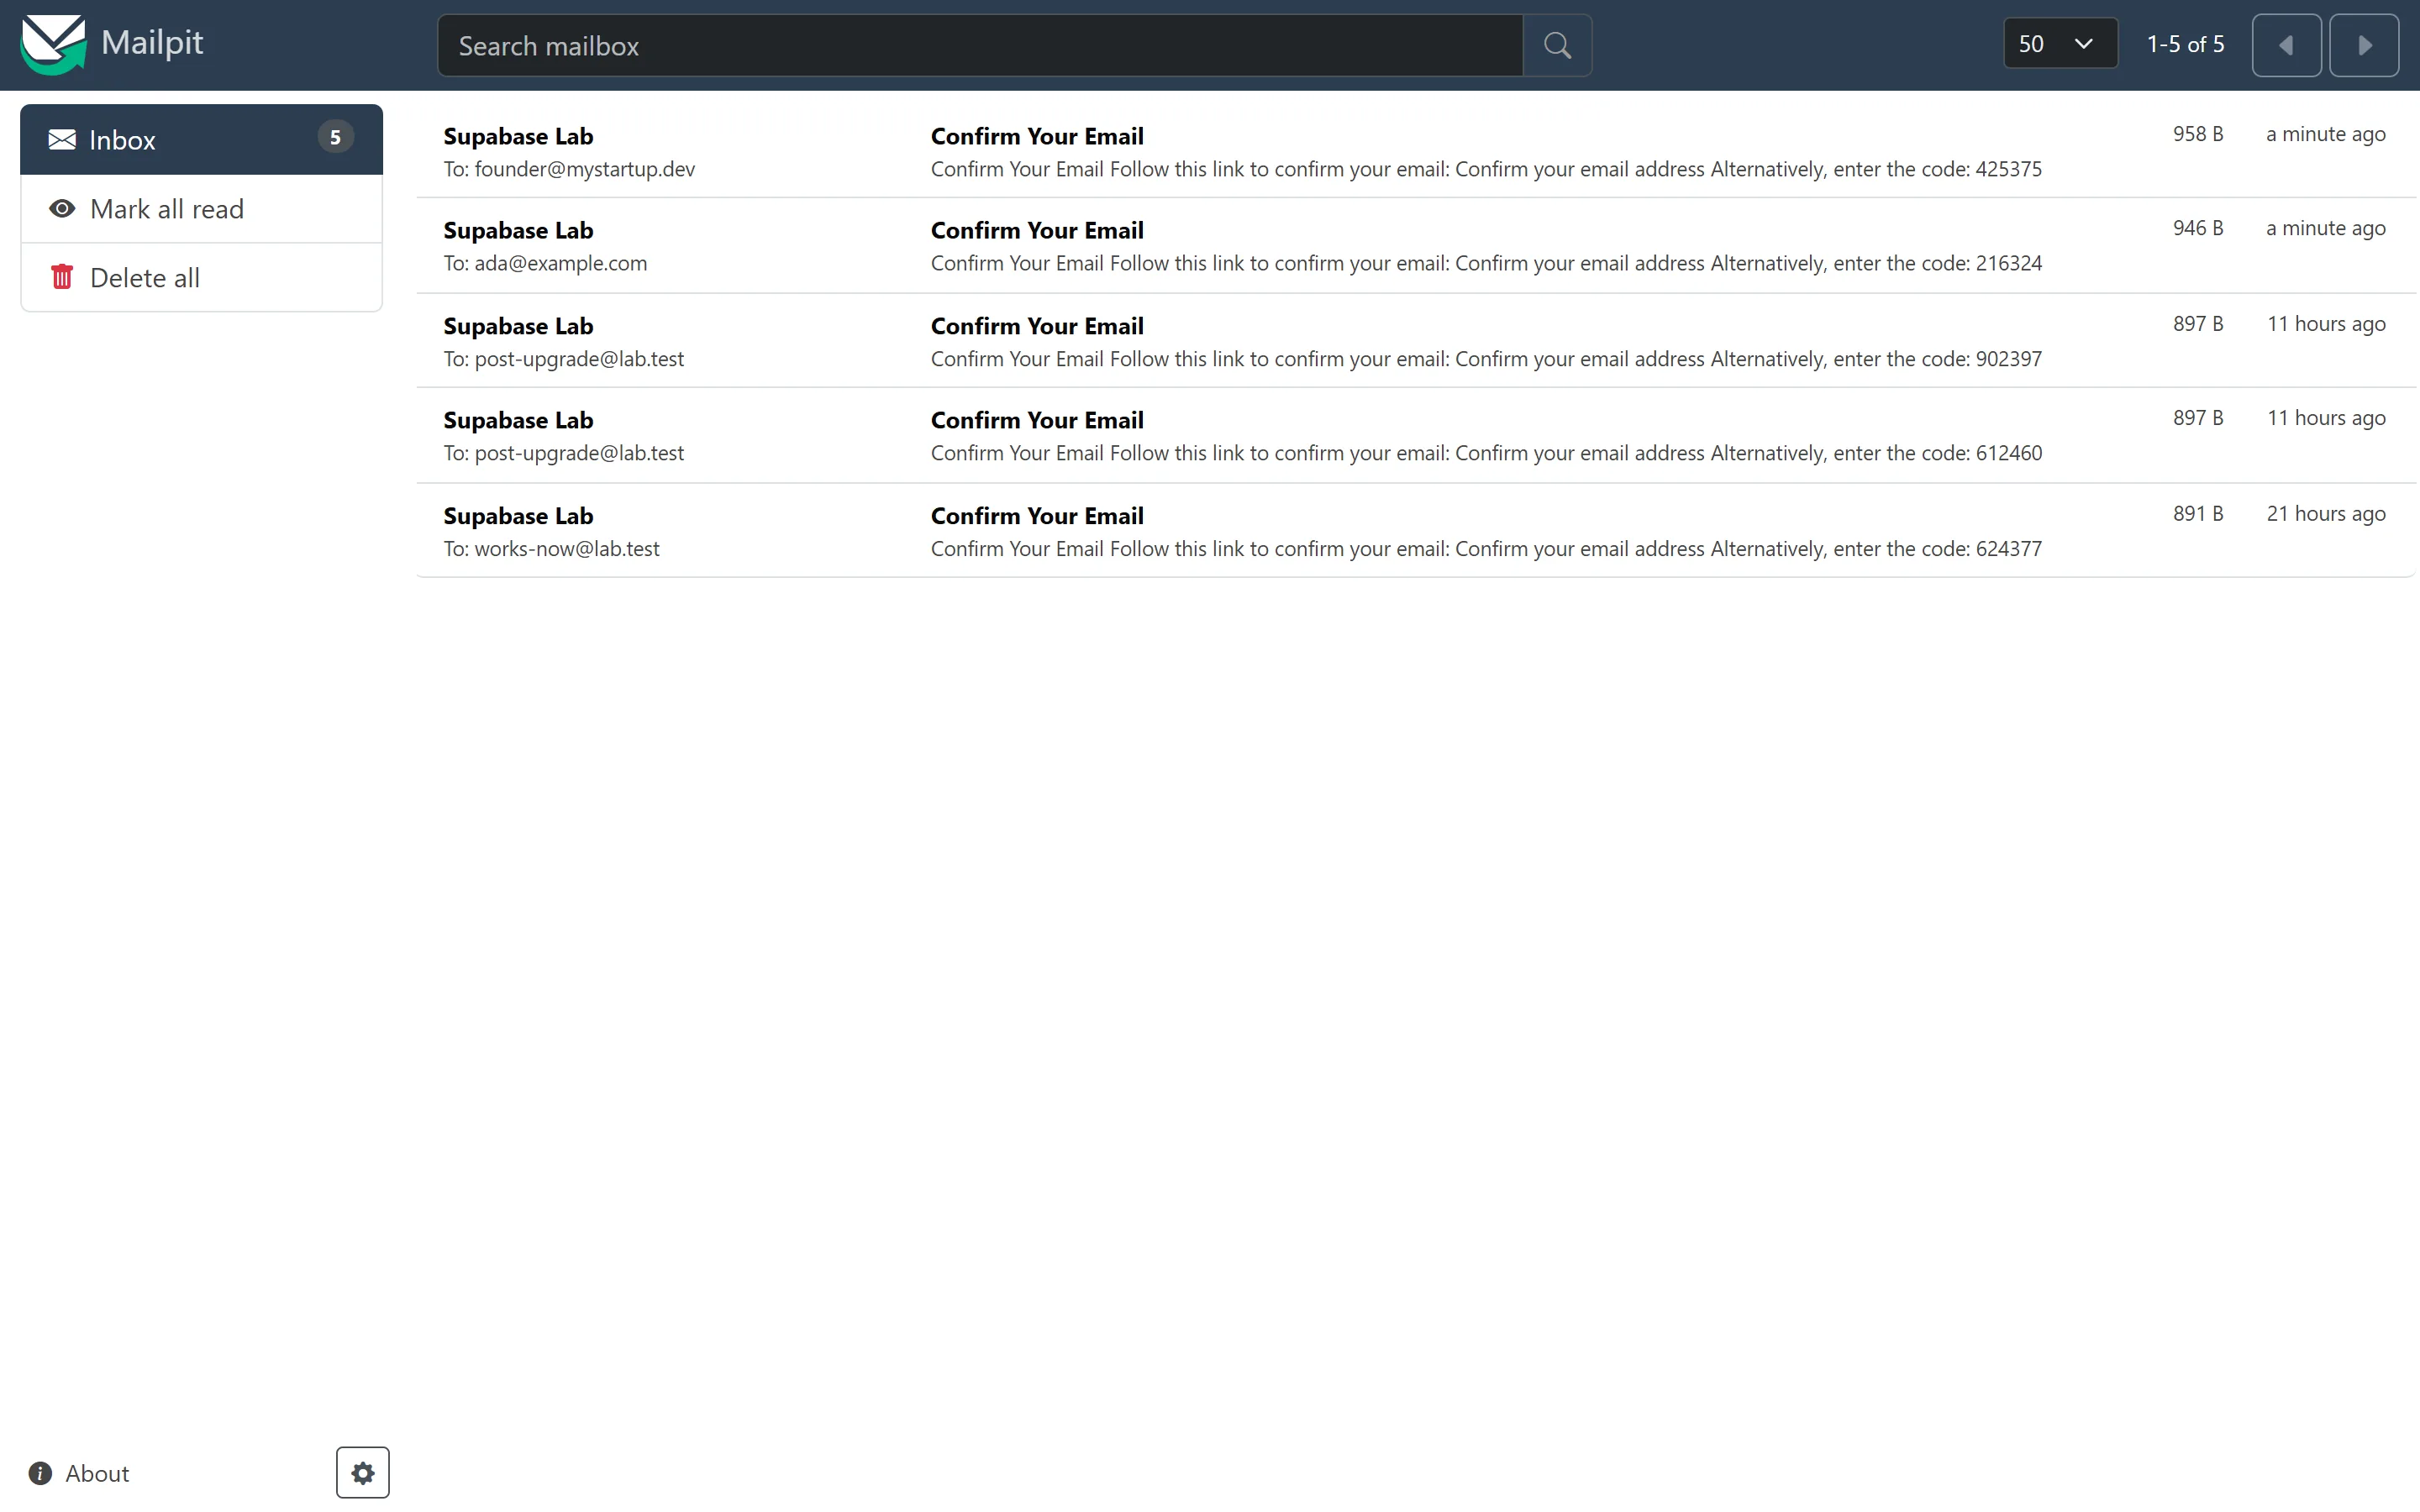
One thing to know before you test: GoTrue rate-limits its own mail. Ask for a second email within a minute and you get a 429 over_email_send_rate_limit. That's the software protecting you, not a bug.
Step 5 – Connection pooling
Open a database connection and you'll hit the second surprise. Both database ports on the host, 5432 and 6543, belong to the pooler (Supavisor), not to Postgres directly. Postgres itself only listens inside the Docker network. So the connection string you paste into your app goes through the pooler, and it needs your tenant id in the username:
# transaction mode (6543): for serverless / many short connections
postgresql://postgres.your-tenant-id:PASSWORD@your-server:6543/postgres

# session mode (5432): for long-lived connections
postgresql://postgres.your-tenant-id:PASSWORD@your-server:5432/postgres
Leave the .your-tenant-id suffix off and you get a flat FATAL: no tenant identifier provided, which is a confusing error until you know this. The two ports are two pooling modes: port 6543 is transaction mode (grab a connection per statement, best for serverless and lots of short-lived clients), port 5432 is session mode (hold a connection, best for a long-running server).
One piece of old advice you can ignore: the classic warning that transaction poolers break prepared statements. I tested it, preparing a statement on one connection and executing it on another through port 6543, and it worked every time. Current Supavisor handles this. Twenty-five clients hitting the pool at once all completed cleanly too.
Step 6 – HTTPS and lock-down
Two jobs here, and they go together. Give the stack a real certificate, and stop publishing the raw ports to the internet.
Put a reverse proxy in front. Caddy is the shortest path because it gets and renews the certificate for you. A three-line Caddyfile is enough:
supabase.example.com {
    reverse_proxy supabase-envoy:8000
}
Point it at the supabase-envoy gateway, run it on the same Docker network, and set your public URL in .env so Studio and the auth links use the real hostname:
SUPABASE_PUBLIC_URL=https://supabase.example.com
API_EXTERNAL_URL=https://supabase.example.com
SITE_URL=https://supabase.example.com
On my run Caddy had a valid Let's Encrypt certificate within a few seconds and the API answered over HTTPS. Now close the raw doors. By default the compose publishes the gateway (8000) and both pooler ports (5432, 6543) on 0.0.0.0, meaning the whole internet. A small compose override binds them to localhost, where only your reverse proxy and your own SSH tunnels can reach them:
# docker-compose.override.yml
services:
  api-gw:
    ports: !override
      - "127.0.0.1:8000:8000"
  supavisor:
    ports: !override
      - "127.0.0.1:5432:5432"
      - "127.0.0.1:6543:6543"
First, the override service names are the compose service names, not the container names. The gateway service is api-gw, even though its container is supabase-envoy. Get that wrong and compose refuses the file. Second, this compose does not auto-load the override in every version; run it explicitly with docker compose -f docker-compose.yml -f docker-compose.override.yml up -d to be sure.
Why bother, on a box nobody knows about? Because they find it in minutes. I left this server on a brand-new IP that had never hosted anything, announced nowhere. The first uninvited SSH login attempt arrived 20 minutes after boot. Over the run it logged 246 attempts from 25 different IPs, trying 75 usernames, with admin alone tried 92 times. Key-only SSH shrugs all of it off, and closing the raw database ports means the one thing facing the internet is HTTPS on 443.
Upgrading without fear
The scariest-sounding part of self-hosting is the easiest. A routine upgrade is pulling new image tags and recreating the stateless services. I timed one, with a probe hitting the API every second the whole way through: bumping the auth, REST, and Studio containers to newer versions and back.
- Recreating the containers returned in about 3 seconds
- Total measured downtime: 5 seconds, in short blips as each service restarted one at a time
- Signups worked again the moment it settled
The database is not touched in a routine upgrade, which is exactly why it's safe. The one that isn't a tag change is a Postgres major version bump; that's a data migration and needs its own plan and a backup taken first. Which brings us to the part you must not skip.
Backups that actually restore
Here is a fact that trips everyone up: docker compose down -v does not delete your Supabase data. In the official compose, Postgres and Storage keep their data in bind mounts on the host, at ./volumes/db/data and ./volumes/storage, not in named Docker volumes. So the -v flag removes the containers and one small config volume, but your database and files stay on disk. I wiped a stack with down -v and my test row was still there after a fresh boot.
That's good news for accidents. It also means a real backup has to copy those two directories plus a database dump, and there's a trap in the files:
# database: a full dump from inside the db container
docker exec supabase-db pg_dumpall -U supabase_admin > db.sql

# storage: MUST include extended attributes, or restores break
tar --xattrs --xattrs-include='*' -czf storage.tgz -C volumes/storage .
Supabase Storage keeps each file's metadata, its content type and cache headers, in POSIX extended attributes on disk, not in the database. A plain tar or cp silently drops them. I restored a backup made without --xattrs and every file came back returning a 500. Adding --xattrs --xattrs-include='*' to both the backup and the restore fixed it: the same file came back byte-identical and served fine. If your restore returns 500s on files that are clearly there, this is why.
To prove the backup, I did the real drill: took the dump and the tar, deleted the bind mounts for real, booted a stack from zero (empty database, no users, the test table gone), then restored. The database row came back, the auth users came back, and the uploaded file served byte-for-byte identical. A dump restore through psql throws a pile of "already exists" errors as it recreates built-in roles; those are noise, the data still lands. The point is that a backup you have restored once is worth more than three you have only made.
Running it on Coolify instead
Everything above is the raw docker compose path: you own the file, you set the secrets, you run the commands on the box. If your server already runs Coolify, there is a tempting shortcut, a one-click Supabase in the service catalog. I deployed it on a fresh Coolify server to see what you actually get, and then I tried the obvious next idea, pointing Coolify at the current compose myself. The template works, but it is old. The current compose breaks in two separate ways, and then works once you tick one box that nothing tells you about. All three runs are below, so you don't lose an evening to them.
The one-click template works, but it is old
Add a new service in Coolify, pick Supabase, deploy. It comes up. Coolify generates every secret for you, a random Postgres password, dashboard login, and JWT keys, so there is none of the "set the secrets first" work and none of the default-credential exposure the raw compose has. On my 4 GB server the full stack went healthy in about 13 minutes on first deploy and settled at roughly 1.9 GB of RAM on top of Coolify's own ~0.5 GB, which still fits a 4 GB box.
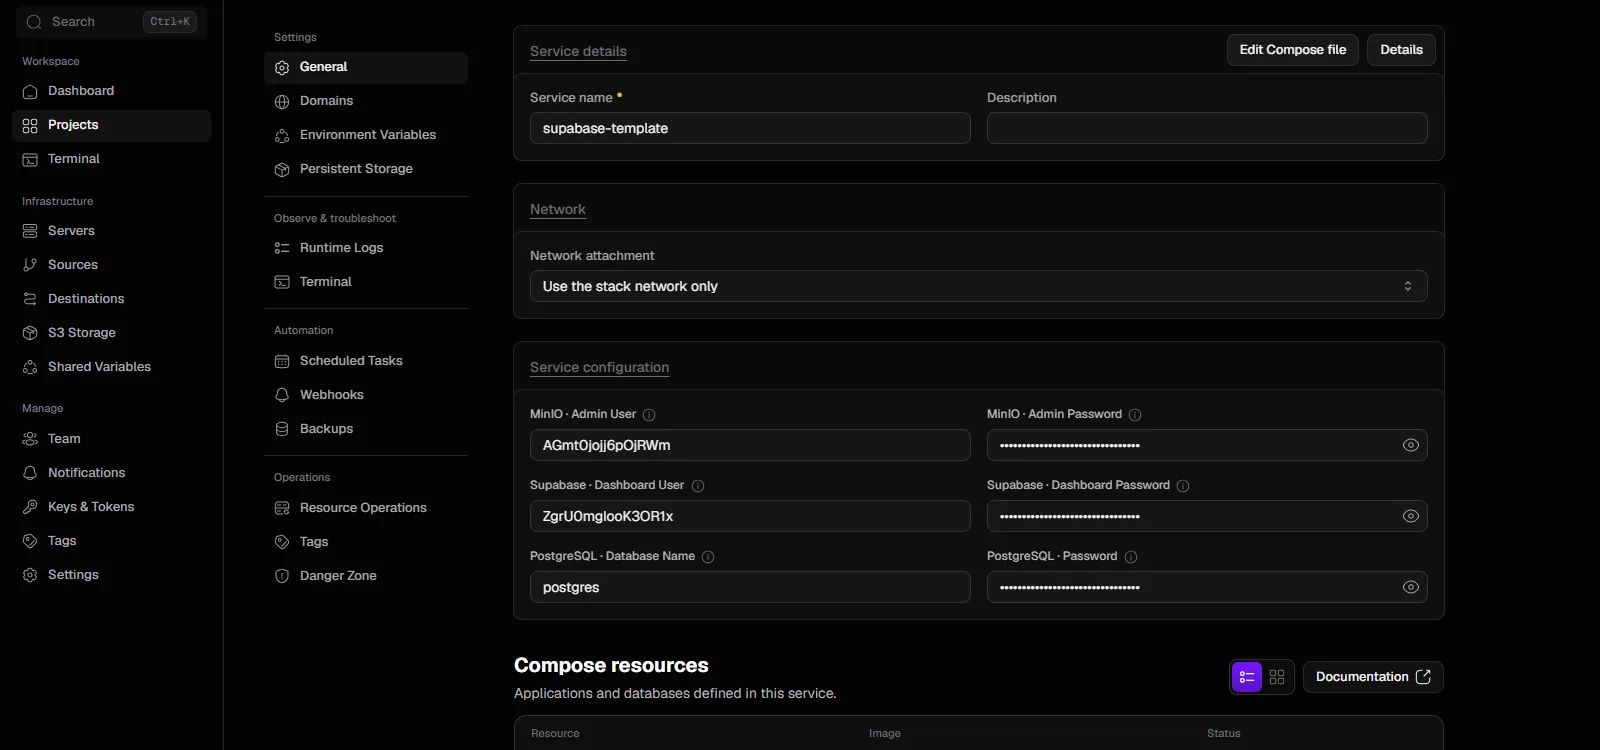
.env to edit.The catch is the version. The template's definition was last updated on 2026-04-05 and it has not moved with Supabase since. I compared every running image against the current official compose on the same machine:
| Component | Coolify one-click template | Current Supabase |
|---|---|---|
| API gateway | kong 3.9.1 | envoy 1.39.0 |
| Postgres | 15.8 | 17.6 |
| Analytics | Logflare + Vector | removed from the stack |
| Storage API | 1.44.2 | 1.60.4 |
| Studio | 2026.03.16 | 2026.08.03 |
| Containers | 15 | 11 |
It still ships Kong, which Supabase replaced with Envoy. It runs Postgres 15, two major versions behind. It even runs the Logflare analytics stack that current Supabase deleted, and on my box that was the single biggest container, 482 MB of RAM for a piece that is no longer part of the product. It boots and it is healthy. You are just starting months behind, and updating it means hand-editing image tags in the compose, which is the exact chore the one-click was supposed to save you.
Pointing Coolify at the current compose: two traps
So the natural move is to skip the template and give Coolify the current file yourself, as a Docker Compose resource built from the supabase/supabase repo. I tried exactly that. It fails twice, and neither failure is a Supabase bug.
Coolify reads the compose, finds every ${VAR} it mentions, and pre-creates all of them, including the ones you never set, as empty strings. Plain Docker leaves an unset variable absent; Coolify makes it blank. The Supabase compose references 91 variables. Deploy without filling them and docker compose does not even complain, it renders POSTGRES_PASSWORD: "", JWT_SECRET: "", ANON_KEY: "" and starts the stack. Then Postgres refuses to initialize with the exact line "Database is uninitialized and superuser password is not specified. You must specify POSTGRES_PASSWORD to a non-empty value," and the deploy dies. The fix is the same discipline as the raw path: open the resource's environment and set every variable, the same values from Step 2 above, before the first deploy.
Set all 91 variables and it gets further. The stack pulls the current images, Postgres and Studio go healthy, and then Auth and the REST API crash-loop, both with the same error: password authentication failed for user "supabase_auth_admin". This one took me a while, because the password was set correctly. The problem is somewhere you would never look.
Supabase's compose bind-mounts seven small SQL files into the database on first boot, one of them, roles.sql, is what sets the passwords for the internal roles like supabase_auth_admin and authenticator. Those mounts are written as relative paths (./volumes/db/roles.sql). When Coolify runs the compose, its working directory is the app's own folder, which does not contain the repo files, so Docker sees a missing source path and does what Docker always does: it creates an empty directory in its place. The database mounts seven empty folders where seven SQL scripts should be. roles.sql never runs, the auth roles are created with no password, and every service that connects as them fails. I confirmed it on the box: on the broken stack those seven paths are directories and the internal roles have a null password; on the working one-click template, the same files are real files, which is exactly why the template runs and a hand-rolled compose, out of the box, does not. The fix is one checkbox. That is the next section.
The current version on Coolify, without the template
Coolify has a setting for exactly this problem, it just does not advertise it. On the app's General page, under Build pipeline, there is a checkbox called "Preserve repository during deployment". Its help text says what it does: "Git repository (based on the base directory settings) will be copied to the deployment directory."
In practice, Coolify copies the cloned docker/ folder into /data/coolify/applications/<uuid>/ before it runs docker compose up there, so every relative mount in the compose finds a real file instead of an empty folder. I read that in Coolify's source first, then ran it on a fresh box to make sure the code does what it says. It does.
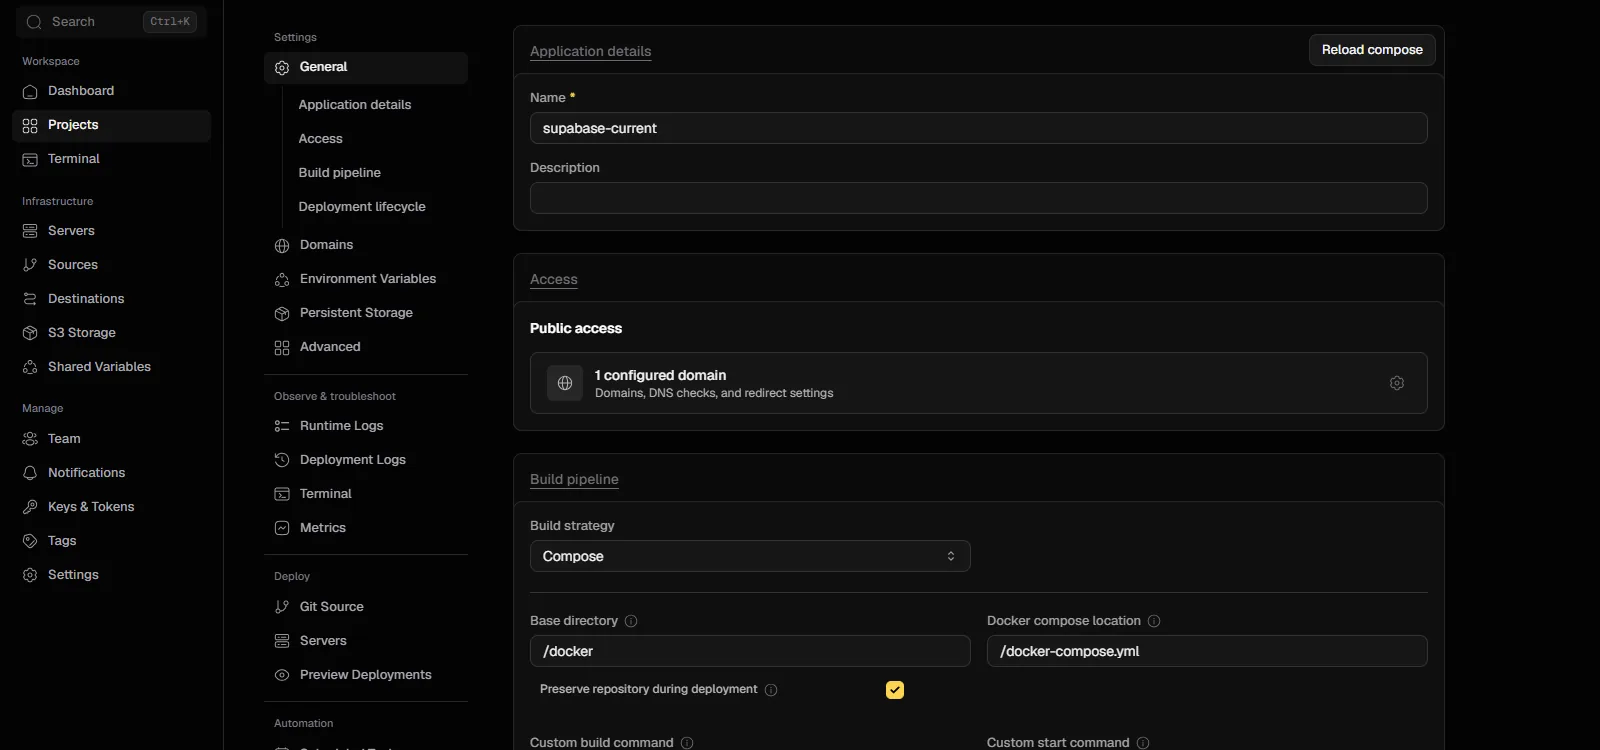
Here is the recipe that came up healthy on current images:
- New resource, Public Repository:
https://github.com/supabase/supabase, branchmaster. - Build pack Docker Compose, base directory
/docker, compose location/docker-compose.yml. Coolify reads the file and lists the eleven services. - On the same page, tick Preserve repository during deployment and save.
- Environment Variables, Developer view: paste the whole official
.env.examplewith your values from Step 2 filled in:POSTGRES_PASSWORD,JWT_SECRET, freshly signedANON_KEYandSERVICE_ROLE_KEY,DASHBOARD_PASSWORD,SECRET_KEY_BASE,VAULT_ENC_KEY, and the three URLs (SITE_URL,API_EXTERNAL_URL,SUPABASE_PUBLIC_URL) pointing at your https domain. Also setAPI_GW_HTTP_PORT=8001: Coolify's own panel owns port 8000, and the gateway will not start on a taken port. - Domains: put your domain on the
api-gwservice. Studio, Auth, REST and Storage all sit behind it. - Deploy.
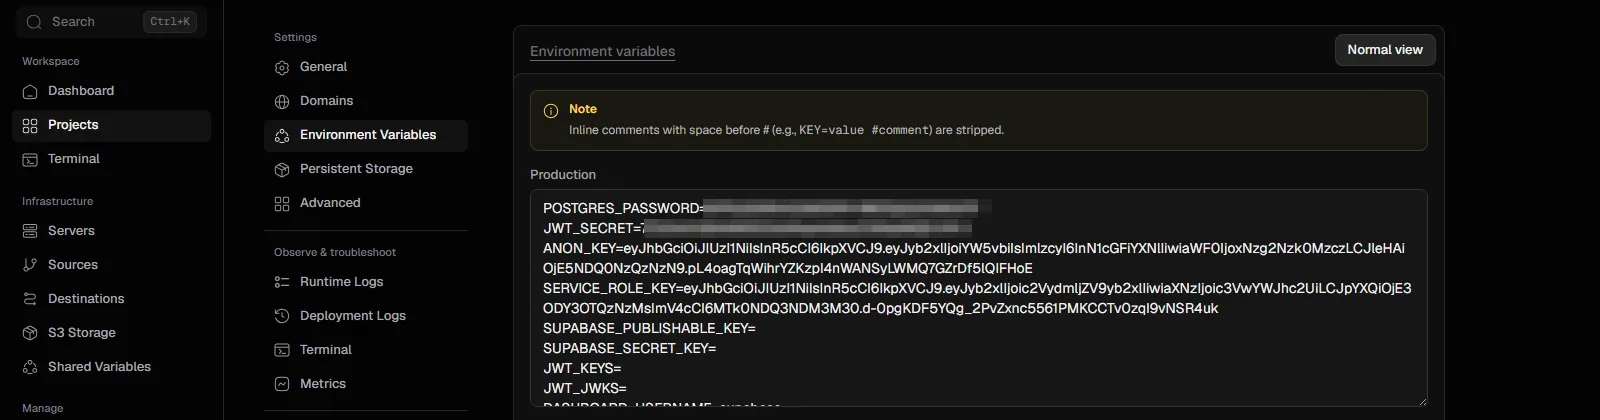
.env.example, secrets filled in, before the first deploy. The new key variables can stay empty.On my 4 GB box the first deploy went running: healthy in 475 seconds, most of it image pulls. All eleven containers, all healthy, on the current tags: Postgres 17.6, Envoy 1.39, GoTrue 2.189, Studio 2026.08.03, the same stack the raw compose gives you at the top of this guide, and no Logflare.
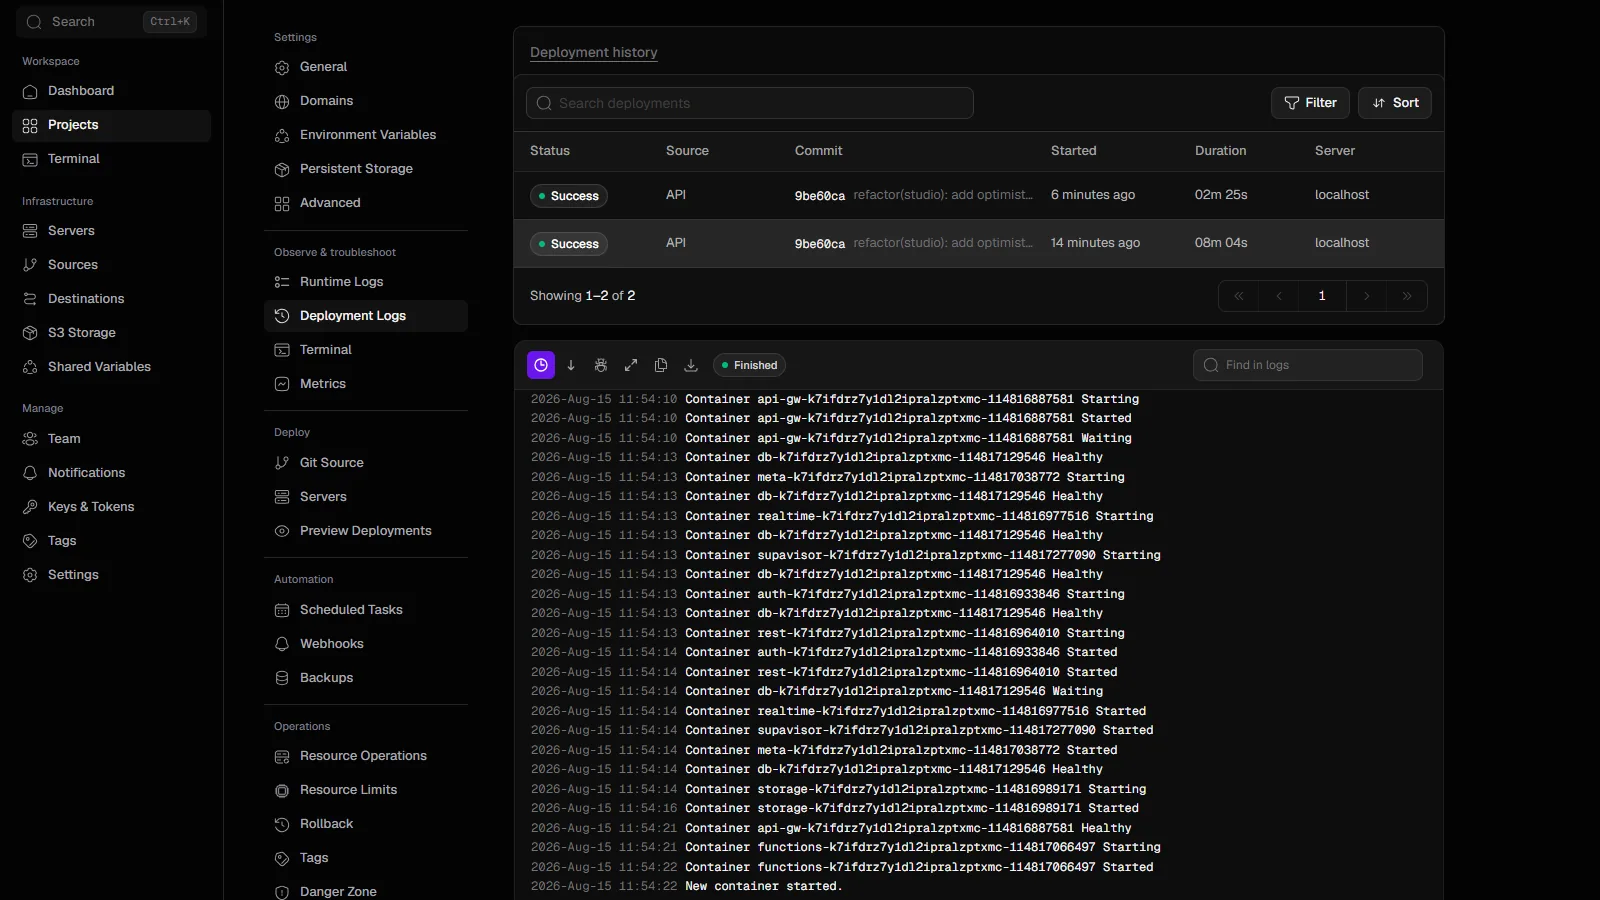
master, the database healthy, every service started, done. The second row is the redeploy that set the domain.I checked the exact thing that broke before: the seven SQL init files are regular files in the deployment folder, and supabase_auth_admin and authenticator have passwords. Auth answered 200, Storage 200, and Studio asked for its dashboard login. The stack idled at about 1.4 GB plus Coolify's 0.5 GB, so it fits a 4 GB server with room to spare.
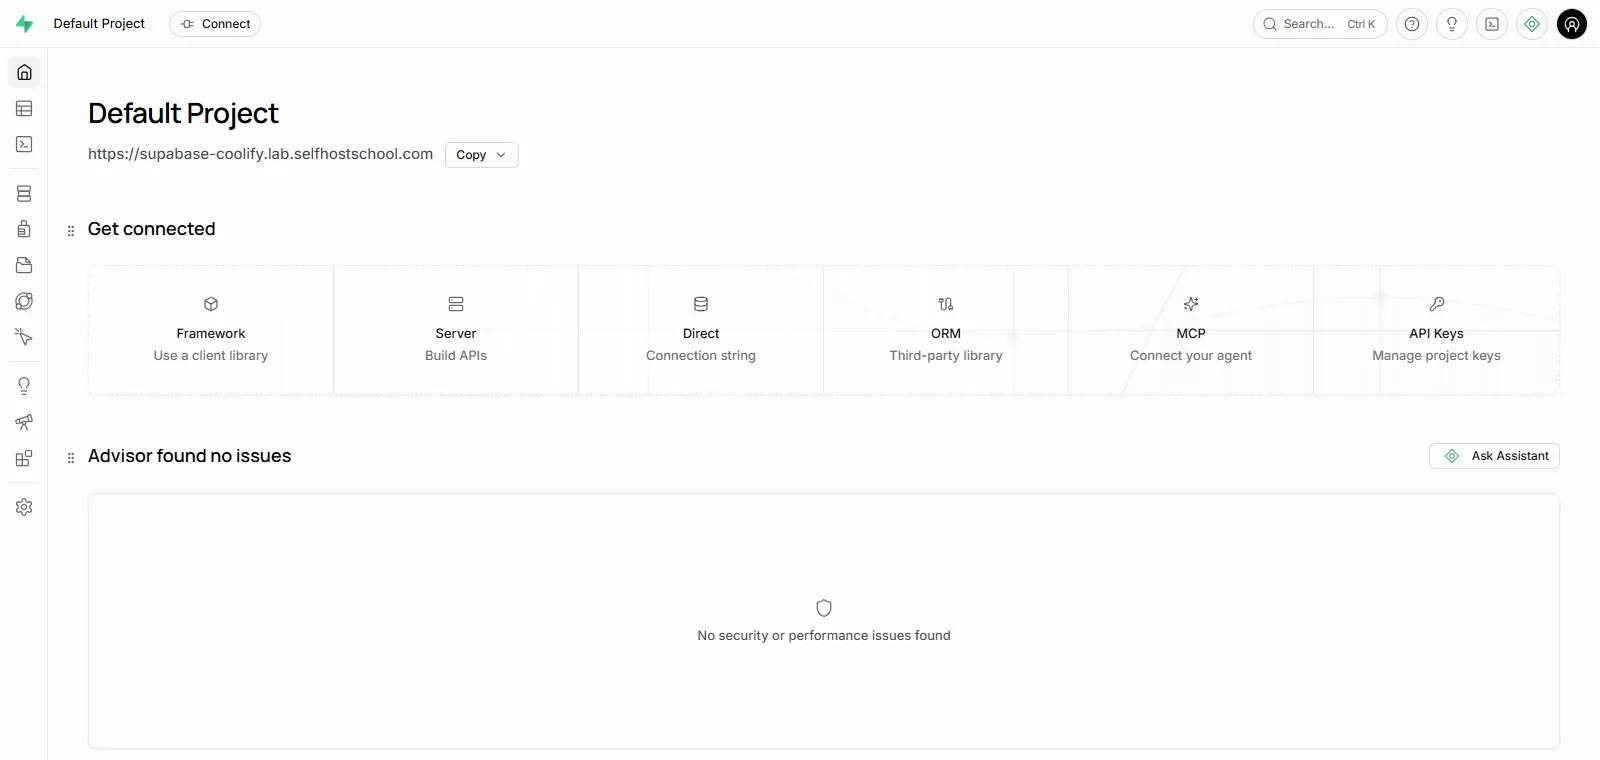
Two things about this path are better than the template. Your data lives in bind mounts under that same deployment folder (volumes/db/data and volumes/storage), and I proved it survives a redeploy: I planted a database row and a file, redeployed, and both were still there.
And a redeploy clones master again, so it re-reads the compose and its image tags. Redeploy is your upgrade button. That cuts both ways: upstream can bump a Postgres major in that file, so read the compose diff and back up before you redeploy, the same rule as the raw path.
Two things to know. Coolify does not close the pooler's published ports (5432 and 6543 on all interfaces), so the firewall step from Step 6 still applies.
And today's .env.example also lists new, empty SUPABASE_PUBLISHABLE_KEY, SUPABASE_SECRET_KEY, JWT_KEYS and JWT_JWKS variables for Supabase's newer asymmetric keys. Leaving them empty is fine, the classic ANON_KEY and SERVICE_ROLE_KEY still work, and that is what I ran with.
The verdict, HTTPS, and backups
Put the three runs together and the verdict is simple. On Coolify, run the current compose as a public-repo app with "Preserve repository during deployment" ticked. You get today's Supabase with Coolify's proxy and deploy button in front of it.
Use the one-click template only if you want zero configuration and can live with Kong, Postgres 15, and a Logflare container you did not ask for. Both paths need the same care with secrets; the template generates them for you, the compose app makes you paste them, which is also why it can't start with defaults.
The one thing Coolify genuinely makes easier is HTTPS, on either path. Set a domain on the gateway service and its built-in proxy issues a real Let's Encrypt certificate, with Studio served over HTTPS behind its dashboard login, no Caddy config to write. Both of mine came back issued by Let's Encrypt.
One gotcha that cost me ten confused minutes: after you change a service's domain, redeploy it, do not just restart it. A restart leaves the proxy serving its own default certificate; a full redeploy regenerates the proxy rules and the real certificate appears.
Backups have the same shape as HTTPS, useful but partial. For the one-click template, Coolify can schedule a database backup for the stack's Postgres from its Backups tab, on a cron you set, to local disk or an S3 bucket. I created one and ran it and it produced a real pg_dump file on disk.
For the compose app, the Backups tab offers volume and directory schedules, not a database dump, so do the backup drill above yourself from inside /data/coolify/applications/<uuid>/, same pg_dump, same tar --xattrs. Neither path backs up Supabase Storage for you; the uploaded files still carry their metadata in the extended attributes I described, and only tar --xattrs brings them back.
FAQ
How much RAM does self-hosted Supabase need?
The official minimum is 4 GB RAM and 2 CPU cores, with 8 GB and 4 cores recommended. I measured the 11-container stack on a 4 GB box: it idled at about 1.5 GB used, leaving roughly 2.3 GB free before any traffic. A 2 GB VPS boots it but has no headroom; a 1 GB box does not run it. Plan for 4 GB.
What is missing compared to Supabase Cloud?
You run one project per stack, and Studio is protected only by HTTP basic auth. You do your own backups, upgrades, and monitoring. The managed extras Cloud sells (point-in-time recovery, read replicas, branching, and the hosted logs and analytics platform) are not in the box. The database, Auth, Storage, the REST and Realtime APIs, and Studio itself are the same product.
Is it cheaper than Supabase Cloud?
Cloud's Pro plan is $25 a month. Self-hosting needs at least a 4 GB VPS, roughly $12 to $24 a month, plus your own time for operations. If the server is already there for other things, the marginal cost is close to nothing. If you'd rent a box only for Supabase, the savings over Pro are small and you take on the ops yourself. The free Cloud tier also pauses a project after one week of inactivity, which self-hosting never does.
Does docker compose down delete my data?
No. Postgres data and Storage files live in bind mounts on the host (./volumes/db/data and ./volumes/storage), so docker compose down -v leaves them on disk. A real backup has to copy those directories plus a database dump, and the Storage files need tar --xattrs or they restore broken.
How do I upgrade self-hosted Supabase?
Pull the new image tags and recreate the stateless services. I timed one at about 5 seconds of total downtime, in short blips. The database isn't moved in a routine upgrade. A Postgres major version is a migration, not a tag change, so back up first.
Why don't my auth emails send after install?
The default .env points SMTP at a host, supabase-mail, that doesn't exist in the compose, so auth can't connect and every signup returns a 500. Point the SMTP_* variables at a real relay on port 587 and restart the auth container.
Is the Coolify Supabase template up to date?
No. As of August 2026 Coolify's built-in Supabase template was last updated 2026-04-05 and ships Kong, Postgres 15, and the Logflare analytics stack, all of which current Supabase has moved off (Envoy gateway, Postgres 17, no Logflare). It deploys and runs fine, but you start months behind, and updating it means hand-editing image tags. For current versions, deploy the official compose as a public-repo app with "Preserve repository during deployment" ticked (see above), or run the raw docker compose from this guide directly on the VPS.
Why does self-hosted Supabase fail to deploy on Coolify?
Two reasons, if you point Coolify at the official compose yourself. First, Coolify injects every variable the compose references, including ones you never set, as an empty string, so Postgres starts with a blank password and refuses to initialize; the fix is to set all of them before the first deploy. Second, even with every variable set, the compose bind-mounts seven init-script files by relative path, and Coolify runs it from a folder that does not contain them, so Docker creates empty directories in their place and the database roles never get passwords. The fix for the second is the "Preserve repository during deployment" checkbox on the app's General page, which copies the cloned repo into that folder; with it ticked and every variable set, the current stack came up healthy on my box.
Can I run the latest Supabase version on Coolify?
Yes, without the one-click template. Add the official repo (github.com/supabase/supabase, branch master) as a Public Repository app with the Docker Compose build pack, base directory /docker, tick "Preserve repository during deployment", paste every variable from .env.example with your secrets filled in before the first deploy, and set your domain on the api-gw service. On a 4 GB server it came up healthy in about 8 minutes on Postgres 17 and Envoy. Redeploying re-clones master, which is also how you upgrade.
What this is part of
Supabase is one service on one server. Running several services on a single VPS without them fighting each other, putting a reverse proxy in front of all of them, and backing the whole thing up is the actual skill. That's what I teach in Self Hosting 2.0: from a blank server to a full stack you own, including the backup and hardening playbook this guide only points at.
Course
Want the full system?
Related
Get the free Vibe Engineering Blocks guide
The exact building blocks I use to ship real products with AI — yours as a free PDF.
Questions & Discussion
Ask a question about this guide →Have a question? Ask it in the community — it's tagged #guide and linked back here. Reading is open to everyone; posting needs a free account.
Loading questions…