How to Make Faceless YouTube Shorts With Claude Code (Free Project)
 Hasan Aboul Hasan
Published 2026-07-30
Hasan Aboul Hasan
Published 2026-07-30
No camera, no microphone, no video editor, no drawing. You describe a short in one sentence and claude-faceless-shorts-creator, my free open-source project, plans it, draws it as code, narrates it, and lands the captions on the exact spoken word. Setup is about half an hour. You need a paid Claude plan (there is no free tier), Node, ffmpeg, and one API key for the voice. The hard part is not the setup, it is knowing what makes a short worth watching, so the last half of this page is the beat grammar the fourteen examples follow.
- The project running, with all sixteen example compositions playable on your own machine
- One key in a
.envfile, and a clear map of which key unlocks which track - Your first short planned, built, voiced and rendered as a 1080x1920 mp4
- The six-beat grammar that separates a short people finish from one they swipe
Ok, let's start.
I built this because I wanted to test one idea: how far can you get making video when you remove the camera, the editor and the stock footage, and keep only a description of what the video should teach. The answer turned out to be further than I expected, so I open sourced the whole thing.
See what it makes
These are the example shorts that ship inside the repo. Every one was made by the project, with no footage and no stock. Click any one to play it. The still on each card is that short's opening frame, straight out of the render.
Every script, beat sheet and sound cue sheet behind them is in the repo, so you can read exactly how any of them was built.
Watch it build one
You have seen the finished shorts. Here is the middle part: one sentence in, the plan, the animation, the voice, and a rendered short out. Same project and same commands as the steps below, so if you would rather watch first and set up after, start here.
What this is, and what a skill is
Two words show up on every step below, so let's define them once.
Claude Code is an AI assistant that does the work. It can run in your terminal, the plain text window where you type commands to your computer, or as a panel inside VS Code, which is how I run it. Either way, you talk to it in normal English, and it reads files, runs commands and writes code for you.
A skill is a folder with a written playbook inside it. Someone works out how to do one job well, writes it down once, and Claude follows that playbook every time you ask for that job. You never open these files.
This project is five of those playbooks. Three of them are whole production lines, and Claude picks the right one from the way you ask.
| You say | Track | Where the pixels come from |
|---|---|---|
| make a short about the x11 trick | make-short |
100% code. A Remotion animation, no footage, no stock |
| make a vox-style short about coffee | make-vox |
Paper collage. AI image layers, die-cut, with a camera flying across them |
| make an AI video short with blue-man | make-ai-short |
A video model animating a locked recurring character |
The other two skills are support. suggest-sfx is the sound pass, and it works from a library that grows every time you make a short. vidtsx-2d-generator is the rulebook that keeps an animation from crashing mid-render, and you never call it yourself.
Remotion is the engine underneath all three tracks. It builds video out of layers the way a web page is built out of elements, and it draws every frame from code. That is the reason a chess board and a watercolour forest can come out of the same project: neither one is footage.
What you need first
Here is the full list before the steps. Everything except the Claude plan and the voice is free.
- VS Code, a free code editor. Your workspace.
- Claude Code, the assistant that does the work. New to it? That page is the full tour.
- Node 18 or newer. Remotion is a Node project. Install the current LTS build and you are covered.
- Python 3.10 or newer. The voice, sound and mixing tools are small Python programs.
- ffmpeg. The free program that encodes and muxes the video. Everything leans on it.
Here is the part I did not expect to be able to write. For the default track, there is no pip install step at all. The Python tools in this repo are standard library only, so once Python itself is on your machine, they run. There is no requirements.txt and no virtual environment to remember. Only the paper-collage track needs extra Python packages, and I flag those where they come up.
Install Node, Python and ffmpeg before Step 5, not during it. If one is missing, the setup stops with something like 'npm' is not recognized or 'ffmpeg' is not recognized. That is not a bug in the project. It means that tool is not installed, or not on your PATH.
Step 1: Install VS Code
VS Code, short for Visual Studio Code, is a free code editor from Microsoft. For this guide, think of it as one window holding everything: your project files on the left, Claude Code in its own panel, and a terminal at the bottom for the few commands you run yourself.
- Go to code.visualstudio.com.
- Download the build for your system. The site usually detects it for you.
- Install it like any app, and open it once so you know it works.
If you already have VS Code, skip ahead.
Step 2: Install Claude Code
There are two ways to install it, and both end in the same place. I use the VS Code extension, because it keeps the chat, the project files and the terminal in one window.
The VS Code extension (what I use)
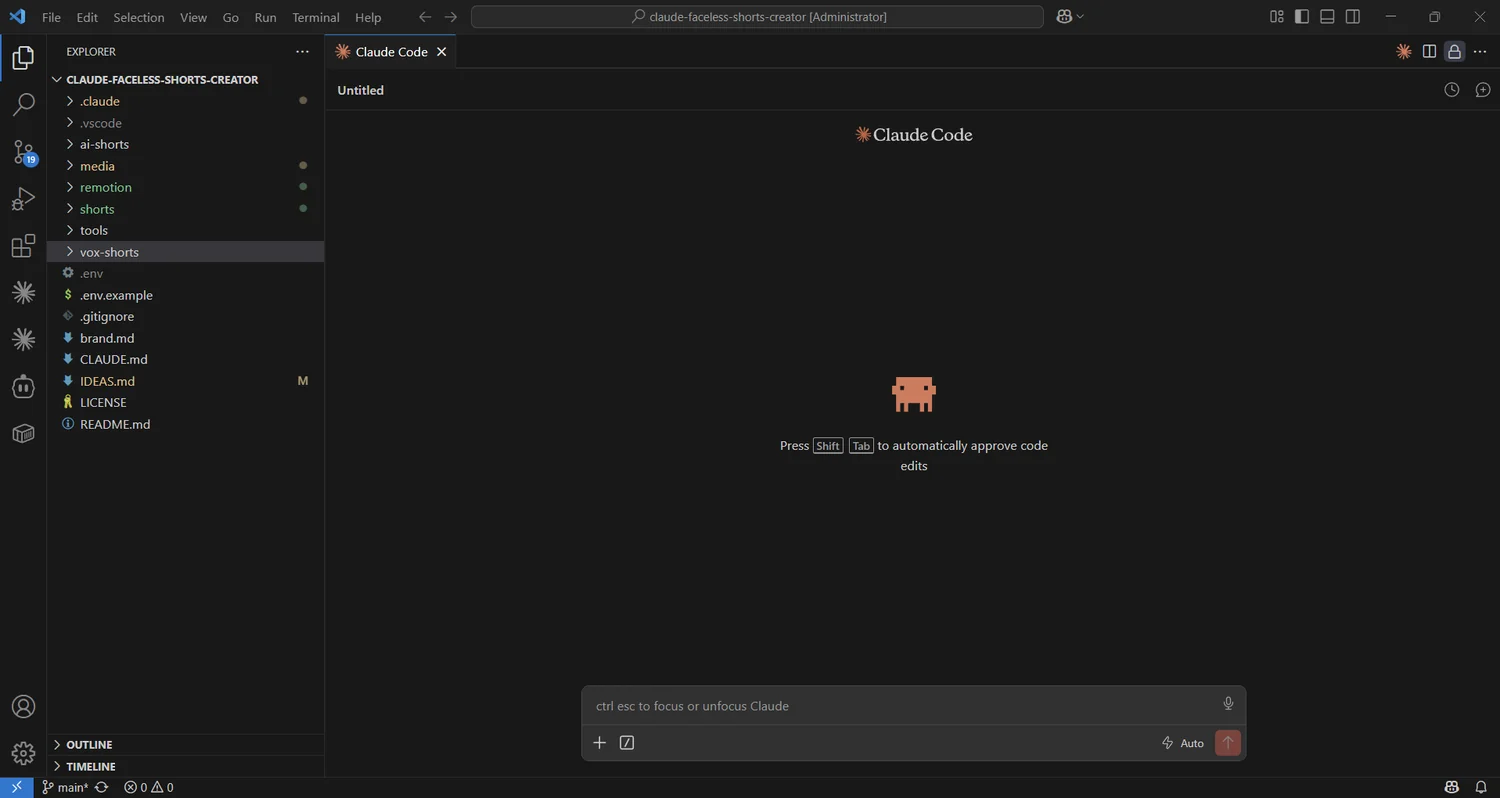
In VS Code, click the Extensions icon in the left bar or press Ctrl+Shift+X, search Claude Code, and install the one published by Anthropic. It adds a Claude Code panel to VS Code, and that panel is where I direct this whole project.
The terminal version
Prefer the plain terminal? Same tool, same abilities. Open a terminal on your own machine. On Windows the simplest is PowerShell: press Start, type PowerShell, open it. Then paste one line. It downloads and installs Claude Code, and it keeps itself updated afterwards.
irm https://claude.ai/install.ps1 | iex
On Mac or Linux, paste this instead. Same job, same result:
curl -fsSL https://claude.ai/install.sh | bash
Now check it landed. Run this in the same terminal. It should print a version number:
claude --version
If it says the command is not found, close the terminal, open a new one, and run it again. A fresh terminal is the fix nine times out of ten.
Either way, the first time you start Claude Code it opens your browser to sign in. It needs a paid Claude plan, and I put the whole cost picture near the end.
Step 3: Get the project
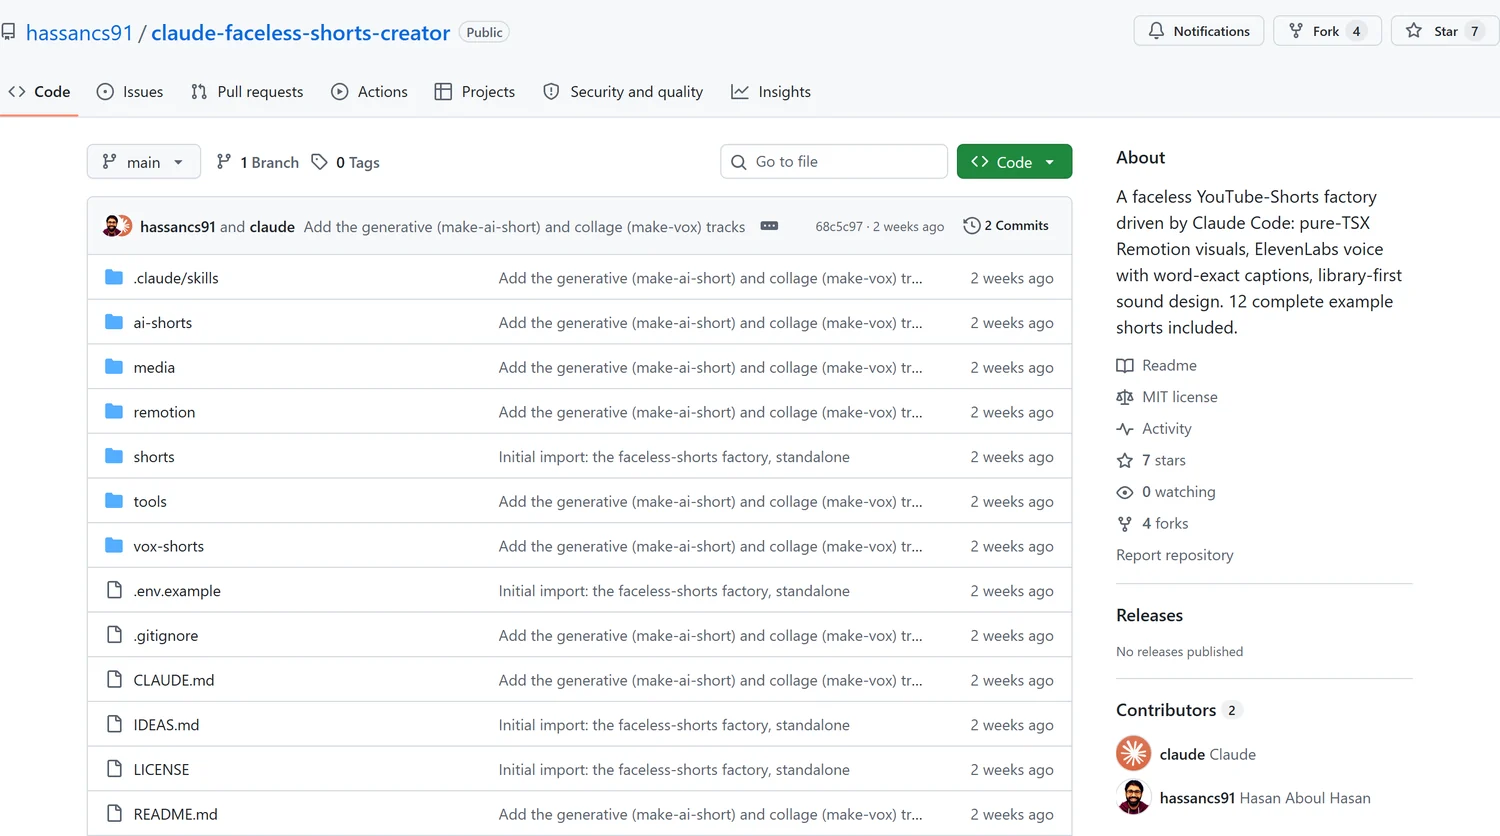
The project is free and MIT licensed, which means you can clone it, change it, and sell what you make with it.
Option A: clone with git (the normal way)
If you have git installed, use this path, because updating later is one command. Run this on your own machine, in the folder where you keep projects. It downloads the project into a new folder:
git clone https://github.com/hassancs91/claude-faceless-shorts-creator
Then walk into it. cd means change directory, and every command after this runs from inside that folder:
cd claude-faceless-shorts-creator
Option B: download the ZIP (no git needed)
No git, no problem. Open the repo page, click the green Code button, choose Download ZIP, and unzip it somewhere you will remember. That folder is your project.
Step 4: Open the folder and start Claude Code
Open VS Code. Choose File, then Open Folder, and pick the project folder. Your files appear on the left.
Now start Claude Code. I click the Claude Code icon the extension added, and the panel opens next to my files, already looking at the project. This is what my screen looks like from here on:
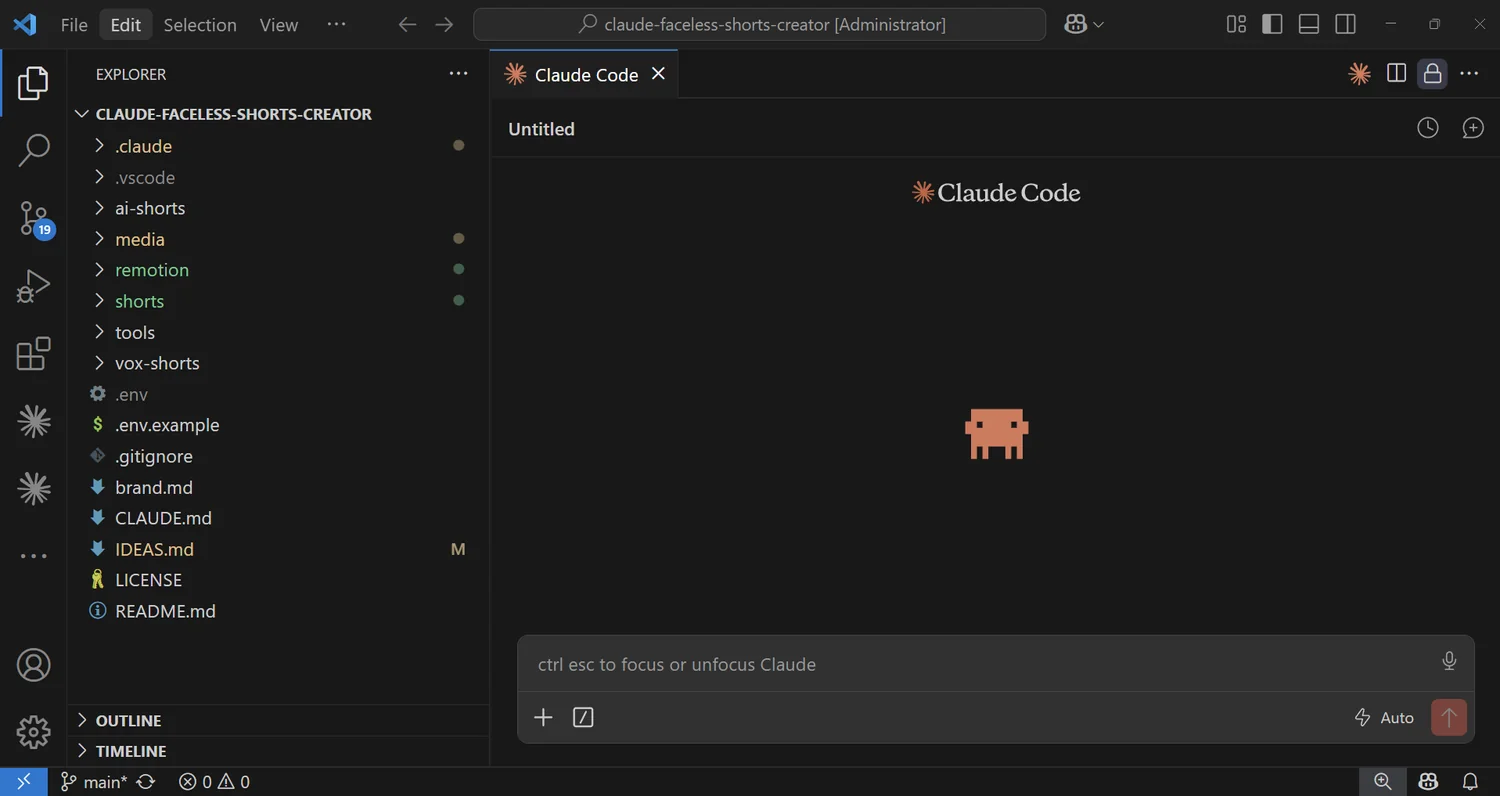
If you installed the terminal version instead, open the built-in terminal with Terminal, then New Terminal. A panel opens at the bottom, already sitting in your project folder. Start Claude Code by typing one word and pressing Enter:
claude
Whichever way you started it, you get one thing for free here. The project ships its five skills in a .claude/skills/ folder, and Claude Code finds them the moment you open the folder. Nothing to install, nothing to switch on.
Run everything from the repo root. This trips people up, so here is the reason. The tools find engine paths, like the sound library, relative to their own location. They find project paths, like shorts/short-1-chess, relative to where you are standing. Stand somewhere else and the project paths miss. The only exception is the npm commands in the next step, which run inside the remotion folder and then come back.
Step 5: The one-time setup
This looks like the scary step. It is four commands, once, and then never again for this project.
First, move into the animation engine's folder. Run this from the repo root:
cd remotion
Now install Remotion's own parts. This is the long one, a minute or two on a normal connection:
npm install
Next, build the registry. This scans the shots folder and writes the list of compositions so the studio and the renderer can find them. Run it again any time you add or rename a short:
npm run gen
It prints what it found, which is a quick way to confirm the install worked:
Outputgen-registry: 16 shot(s) -> registry.gen.tsx
  - Ai1Door  1080x1920@30 36.4s
  - Short1Chess  1080x1920@30 42s
  - Short7Kids  1080x1920@30 55s
  - Vox1Coffee  1080x1920@30 40.5s
  ...
Now go back up to the repo root, where the rest of the work happens:
cd ..
See the examples before you spend anything
Before you make anything, look at what is already in there. Run this from the repo root. It opens Remotion Studio in your browser:
cd remotion && npm run studio
No API key is involved in this. The compositions are code, so they play on your machine for free.
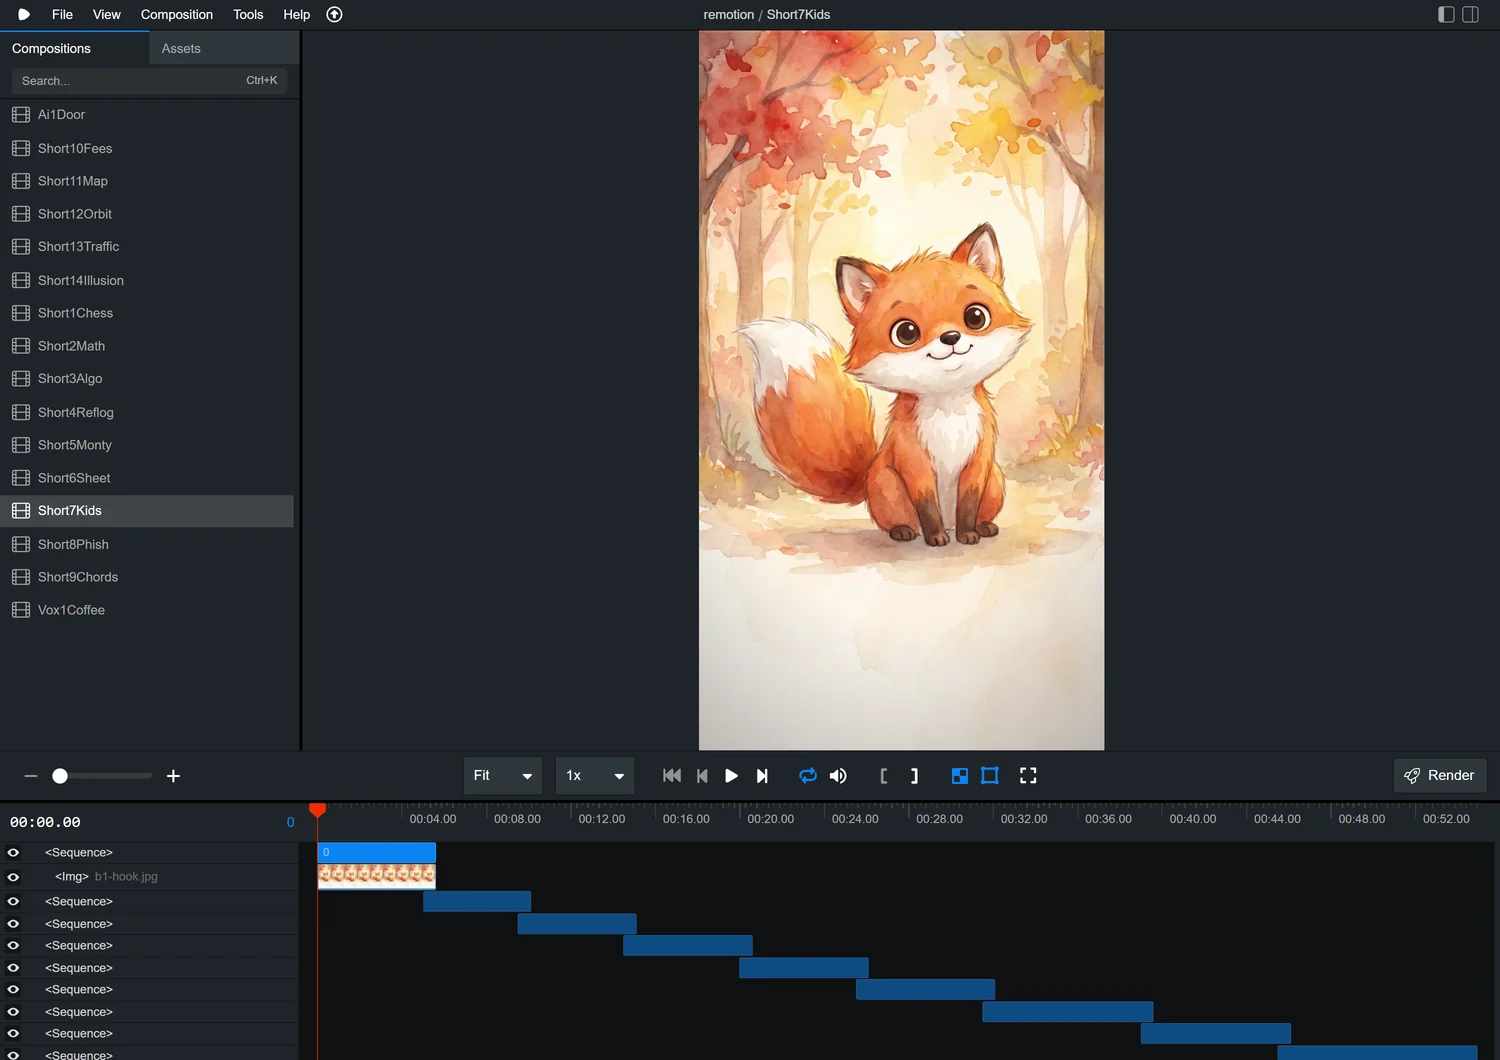
That timeline is worth a second look, because it is the thing most people get wrong about AI video. Nothing here was generated as a finished clip. It is a stack of layers on one timeline, and each layer is code that knows what it should look like on any given frame. That is why you can change one line and re-render, instead of rolling the dice again.
Close the studio with Ctrl+C in the terminal, then cd .. back to the root.
Step 6: Add your ElevenLabs key
The project reads your keys from one file at the repo root. Make it by copying the example. On Windows:
copy .env.example .env
On Mac or Linux, the same job:
cp .env.example .env
An API key is a long password that lets the project use a paid online service as you. Open the new .env file in VS Code and paste yours in. It is git-ignored, so it never leaves your machine.
ELEVENLABS_API_KEY=your_key_here
GEMINI_API_KEY=
FAL_KEY=
Only the first line matters to start. Here is what each one actually unlocks.
| Key | What it does | Where to get it | Need it to start? |
|---|---|---|---|
ELEVENLABS_API_KEY |
The narration, the sound effects and the music beds | elevenlabs.io | Yes. This is the one |
GEMINI_API_KEY |
Generated images, for storybook shorts and collage layers | ai.google.dev | No. Only for image-based shorts |
FAL_KEY |
Generated video clips, for the third track only | fal.ai | No. Leave it blank |
So the honest minimum for the default track is one ElevenLabs key. That is it.
One detail that saves real money once you start rewriting scripts: the narration clips are cached by the text of each line. Change one line out of twelve and only that line gets billed again. The other eleven come from cache.
Step 7: Ask for your first short
Now the good part. Go back to Claude Code, in its panel or in the terminal, and just say what you want in plain English:
make a short about the water cycle, for kids
It does not start building. It writes the plan first, and this is the part I want you to actually read rather than skim past. Here is a piece of the real answer to that exact sentence, on a clean run.
The plan comes before the pixels
Excerpt from a real run. Nothing was written to disk and nothing was rendered; this is the planning stage only.
> make a short about the water cycle, for kids

Read the skill, brand.md, and IDEAS.md. No files written, nothing run.

short-15 - "Older Than Dinosaurs"
1080x1920 @30 - 1260 frames = 42.0s

The hook
  "This water is older than the dinosaurs."
  Frame 0 is the whole cycle already running, mid-lap. Title card
  plus a live 240 / 240 DROPS chip. Thumbnail-grade, no fade from black.

Beat sheet
  HOOK    0.0-3.8    frames    0-114
  SETUP   3.8-11.6   frames  114-348   the lap plays backward
  QUIZ   11.6-14.8   frames  348-444   "How long does one drop stay up there?"
  REVEAL 14.8-32.8   frames  444-984   five steps, one per spoken word
  TWIST  32.8-38.6   frames  984-1158  a dinosaur drinks from the same sea
  LOOP   38.6-42.0   frames 1158-1260  last frame == frame 0

VO
  12 lines - 78 words - 2.5 words/sec (a kids read needs more air)

Three facts to settle before I write beats.json
  2. "Earth has never made a single new drop" is the teaching
     simplification, and it is literally false: hydrogen escapes to
     space, volcanoes add juvenile water, combustion makes new
     molecules. Recommended swap, same punch and true:
     "Earth doesn't get new water. It just reuses the old."
     Your call.

> Stopping here. Say go and I'll do the fact pass, then build.
Read the plan, then change it. On that run it caught a line in its own script that was not true and offered a replacement. That is the whole reason the plan comes first. Fixing a sentence costs you ten seconds here. Finding it after the render costs you the render, the narration and the sound pass.
When the plan looks right, tell it to go. From there it writes the animation, renders frames at phone size and reads them back to check the picture matches the words, renders the video, generates the narration, and lands the sound effects. Your finished short arrives in that short's own output/ folder as an mp4, 1080x1920, with voice and sound already mixed.
How to plan a short that's actually good
This is the part that matters, and it is the part nobody talks about, because it is the part the tool cannot do for you.
Making a short is easy now. Making one somebody watches to the end is not, and it has almost nothing to do with which AI you used. The fourteen examples in this repo all follow the same six-beat shape. The skill holds it, so you get it by default, but you should know it, because you are the one deciding whether a topic is worth 40 seconds.
The six beats, on a 42 second short
This is the grammar in the make-short skill. Times are the defaults; a topic can push them around.
-
HOOK0.0 - 3.4s
Frame 0 is already the payoff. No fade from black, no build-up, no logo. The first frame is fully composed and it is good enough to be the thumbnail, because on a vertical feed it is the thumbnail.
-
SETUP3.4 - 11s
The one piece of context the payoff needs. Not the history of the topic. One thing.
-
QUIZ~2.5s, optional
A card that asks the viewer to commit to a guess before the answer. It is optional, and it is what drives comments.
-
REVEAL2 to 4 steps
Each step lands on a spoken word. Not near it. On it. The captions carry real per-word timings from the narration, so the animation and the voice hit together.
-
TWISTbefore the end
The bit they did not see coming, and the bit they send to a friend.
-
LOOPlast frame == frame 0
The ending is a loop, not a call to action. The last frame dissolves back into the first, so the replay is seamless and the view counts twice.
No engagement outros. The skill refuses to end on "comment below" or "which one next". They read as dated, they cost you the loop, and the payoff line is a better ending than any question.
Write about 100 words, and not one more
This is the rule I got wrong first, and the numbers are from fixing it. A 40 second short holds about 100 words of narration. Push past that and the text to speech has to speed itself up to fit the window, which is audible and cheap sounding.
So the working number is 2.7 words per second, with a little slack before the next line starts. Slower for a kids read. If your script does not fit, the script is too long, not the short too short.
Check the frames, not the vibe
Before any full render, the skill renders single frames at phone size and reads them. This catches things a description never will: a caption sitting under a UI element, a reveal that has not finished when the voice names it, a hook frame that is not actually composed yet.
The rule that makes it useful: render a frame at the exact moment of each payoff line, and check the thing the narration names is on screen right then. Checking only the beat boundaries misses it. On one of the shorts, the traffic jam looked half formed under the line calling it a wall of stopped cars, and only the opening frame looked right. Nothing but a frame at that exact second would have caught it.
The safe areas are not decoration
Vertical video has furniture on top of it. Captions sit centred around y1500, and nothing you care about goes in the bottom 340 pixels or the right 160. That is where the app puts its own buttons, the description and the account name. Put your payoff there and a third of your viewers never see it.
New to all of this? Everything above is a craft rule someone worked out and wrote down so a machine could follow it. Learning to write those rules yourself, for your own work rather than mine, is the actual skill. That is what Build With AI 1.0 is for.
The other two tracks
Once the default track works, the other two are the same conversation with a different opening sentence.
The paper collage track
This is the Vox-style documentary look: a paper background, die-cut shapes, a real map, and a camera moving across all of it. Ask for it like this:
make a vox-style short about the history of coffee
It needs the Gemini key for the image layers, and it is the one place the Python side needs extra packages. Run this from the repo root, once, if you want this track:
pip install pillow rembg
Some collage layers are built by screenshotting HTML instead of generating an image, which needs a headless browser. Also once, also only for this track:
pip install playwright && playwright install chromium
The visual language of this track is written down in vox-shorts/DESIGN.md, and the coffee example ships with all six of its layers committed, so you can open them and see exactly how a scene is cut apart.
One honest note about this track, since I put a poster of it in the gallery above: the frame-0 rule does not apply here. A collage short opens on bare paper and assembles itself over the first seconds. It is a documentary, and it has documentary pacing.
The generative track
This one animates a recurring character with a video model, and it is the only track where the pixels are not reproducible, so the generated clips are committed to the repo rather than rebuilt.
make an AI video short with blue-man
Two rules matter here, and the skill enforces both. It states the cost before it spends anything, because video models are billed per second. And it never regenerates a locked character from a text description, because that is how a character quietly stops looking like itself between shots. The character lives as a reference image plus a character.json, and both are in the repo.
If you want to see the reasoning behind the model choice, ai-shorts/IDEAS.md has the bake-off: three video models compared on the same shot, with the per-second cost worked out for each.
Make it your channel
The project ships with a house look: light, calm, indigo, a lot of whitespace. It is real and you can keep it. But if you change nothing, your shorts carry my brand, not yours.
The style contract is one file, brand.md at the repo root. Colours, fonts, motion, safe areas and sound taste, all in plain English. Every skill reads it before it builds anything, so editing that file changes every future short.
Change the palette in two places, not one. brand.md is what the skills read. remotion/src/brand.ts is the same palette as code, and it is what the animations actually import. Change one and not the other and your shorts will keep rendering in the old colours while the plan describes the new ones.
You can also just tell Claude what you want and let it edit both. That is the whole point of the thing.
What it costs
The project is free and MIT licensed. The services it calls are not, and they run on your own keys, on your own accounts. Nothing here is a subscription to me.
| Service | For | Cost note |
|---|---|---|
| Claude Code | Directing everything | Paid. Claude Pro is about $20 a month. No free tier |
| ElevenLabs | Voice, sound effects, music | Paid, per character of narration. Clips are cached, so a rewrite only re-bills the lines you changed |
| Gemini | Generated images | Only for image-based shorts and collage layers |
| fal.ai | Generated video clips | The most expensive by far, billed per second of clip. Third track only |
| Remotion | Rendering every frame | Free for individuals and teams of up to 3. Companies of 4 or more need a paid licence |
I am deliberately not giving you a per-short figure. It moves with your script length, your track and each provider's pricing, and a number I measured last month would be a number you plan against wrongly next month. Check each provider before you plan a batch.
FAQ
Do I need to know how to code?
No. You describe the short in a sentence and review what comes back. The only file you edit by hand is .env, where you paste your key, and that is copy and paste. Claude writes the animation code, and the repo already carries the rules that keep it from crashing.
What is the smallest set of keys I need to start?
One. An ElevenLabs key covers the voice, the sound effects and the music beds, which is everything the default TSX track needs. GEMINI_API_KEY is only for shorts built on generated images, and FAL_KEY only for the generative video track. Leave both blank until you want those.
Do I need a camera, a microphone, or any drawing skill?
None of the three. Every pixel in the default track is drawn by code in Remotion, so there is no footage and no stock. The narration is text to speech. A microphone only matters if you decide to use your own voice instead of the default AI one, which I think you should once you are past your first few.
Can I use my own voice instead of the AI one?
Yes, and it is one flag. The examples use the ElevenLabs premade voice Liam. Pass --voice with any other ElevenLabs voice id, including a clone of your own voice, and regenerate. Word timings come back from the same call, so the captions stay locked to the exact spoken word.
How long is a short, and what does it come out as?
1080 by 1920 at 30 frames per second, around 38 to 42 seconds. The finished file lands in the short's own output/ folder as an mp4 with the voice and sound effects already mixed in. It is a normal video file, so you upload it to YouTube, TikTok or Instagram like anything else.
Why does the project keep telling me to run commands from the repo root?
Because the tools resolve two kinds of path differently. Engine paths like the sound library are found relative to the tool's own location, but project paths like shorts/short-1-chess are found relative to where you are standing. Run from anywhere else and the project paths miss. The one exception is the npm commands, which run inside the remotion folder.
Does this work on Mac and Linux?
It should. Claude Code, Node, Python and ffmpeg all run on the three systems, and the Python tools are standard library only. I build on Windows 11, so that is what I have actually tested and what the screenshots show. If you hit a platform bug, open an issue on the repo and I will fix it.
What this is part of
Take the video away and this guide taught one habit. You do not do the hard job yourself, and you do not hand it over blind either. You write down how the job should be done, point a set of small sharp tools at it, and read the plan before anything runs.
Here the job was a 40 second short. In a real product it is your app, your data, your deploy, wired exactly the same way.
That is the thing I actually teach. Build With AI 1.0 walks from an empty folder to a deployed AI product:
- Building a real AI app with Python and Django, start to finish
- Wiring AI models into real features, the same pattern this project uses
- Directing AI with written playbooks instead of copy, paste and hope
- Auth, payments, and shipping to real users
Course
Want the full system?
Related

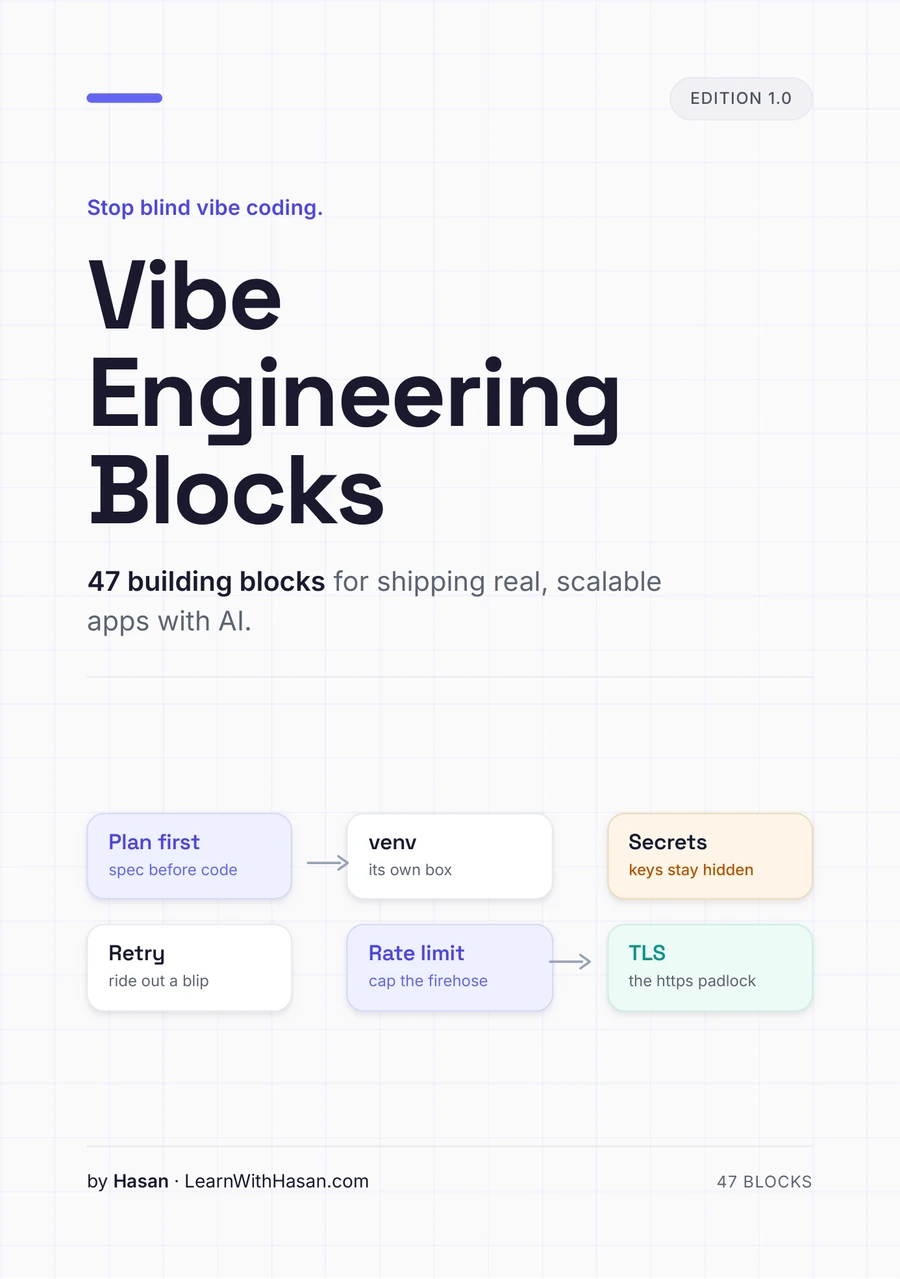
Get the free Vibe Engineering Blocks guide
The exact building blocks I use to ship real products with AI — yours as a free PDF.
Questions & Discussion
Ask a question about this guide →Have a question? Ask it in the community — it's tagged #guide and linked back here. Reading is open to everyone; posting needs a free account.
Loading questions…