Optimize Landing Pages With AI (Free Script Inside)
Optimized Landing Pages = Higher Conversion Rates
So, Last week, I developed a simple AI Automation Workflow that allows me to build a team of AIs to optimize and fix my landing pages.
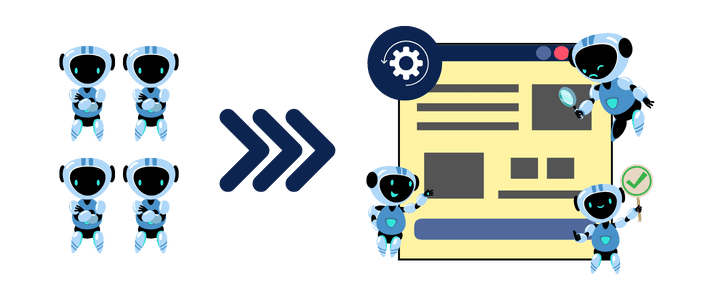
In this post, I will explain how this AI tool works, how it helps optimize your landing pages, and how you can use it to optimize anything in your business.
The Idea
Instead of the traditional approach of asking ChatGPT:
check my landing page and suggest some tipsI thought about something different and more powerful.
Why Don’t I create a Team of AIs – like an AI army – each with a different background and perspective, for example, a Digital Marketer AI, a UX designer AI, an Entrepreneur AI, and so on…
Then, I will ask them all to give some tips to optimize my landing page.
Finally, I will collect all these optimization tips, extract the most important and unique tips, and return them with a simple UI, something like:

And, of course, all this will be 100% automated with one single magical click!
Building the tool
Let’s keep things simple. This automation workflow works as follows:
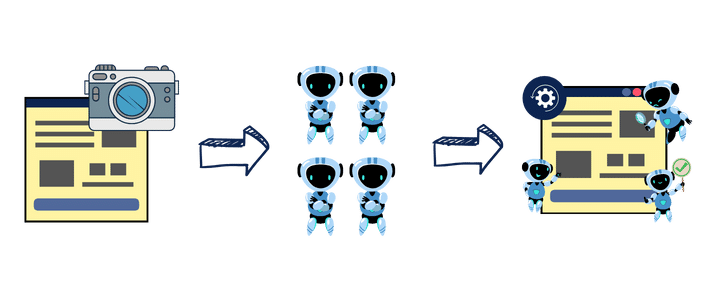
Step 1: Get the Landing Page Image
We can use tools like the Windows snipping tool to capture and save a web page and then feed it to our tool.
But! there is a better approach. We can automate this process, too!
Remember, My main goal here is to help you automate almost anything in your marketing and business to help you focus on what is more important… Growth, Ideas, Creativity, Health, and Family ❤️
So, I used a simple Python function that takes a URL, and it automatically captures the webpage image and feeds it to our AI engine (Our AI Team). Nice Ha 😉
Here is the code:
def capture_web_page_image(url, file_path):
    chrome_options = Options()
    chrome_options.add_argument("--headless")
    chrome_options.add_argument("--window-size=1920,1080")
    chrome_options.add_experimental_option("excludeSwitches", ["enable-automation"])
    chrome_options.add_experimental_option("useAutomationExtension", False)
    driver = webdriver.Chrome(options=chrome_options)

    stealth(
        driver,
        languages=["en-US", "en"],
        vendor="Google Inc.",
        platform="Win32",
        webgl_vendor="Intel Inc.",
        renderer="Intel Iris OpenGL Engine",
        fix_hairline=True,
    )


    driver.get(url)
    time.sleep(4)  # Wait for the page to load

    driver.save_screenshot(file_path)
    driver.quit()
    return file_path
Don’t worry; I will give you the full code shortly; just follow up for 2 minutes to understand the idea. Then you can have fun with the code yourself 🙂
Now, it is not enough to get the web page image. We should host it somewhere online so the AI script can easily access it.
I created another function that uploads the image to Imgur through their API. Here is the simple function I used:
client_id = "10086" #set your clinet ID

def upload_to_imgur(image_path):

    headers = {"Authorization": f"Client-ID {client_id}"}

    with open(image_path, "rb") as image:
        data = {"image": image.read()}
        response = requests.post("https://api.imgur.com/3/upload", headers=headers, files=data)

        if response.status_code == 200:
            # Extracting the public URL from the response
            return response.json()['data']['link']
        else:
            print(f"Error: {response.status_code}")
            print(response.json())
            return None
When you sign up on Imgur, your Client ID is on your account page. Copy and paste it into the client_id variable.
Now we have the Landing Page image, and it is hosted publicly online. Our AI Team can easily access and analyze it.
Step 2: Create your AI Team Personas
The next step is to create your AI Team! This can be a team of 2-3, and it may go up to 1000 or more!

In my case, I defined two teams, one for testing consisting of 4 Members.
The other bigger one has around 19 members.
The idea here is very simple. We need to define the Role of each AI member in our script.
Here are my small team personas:
persona_prompts_small = [
    {"Young Entrepreneur": "As a young, tech-savvy entrepreneur interested in the latest market trends and innovations, "},
    {"Freelance Graphic Designer": "As a freelance graphic designer, "},
    {"Small Business Owner": "As a small business owner of a local café, "},
    {"Professional Blogger": "As a professional blogger, "},
]
You can think about each as an AI assistant coming from a different background. We have a young entrepreneur, a college student, a freelance graphic designer, and so on.
You will find this in the prompt_template File in the project.
Step 3: Analyzing The Landing Page
Now, we come to the main script.
url = "https://learnwithhasan.com"

captured_image_path = web_screenshot.capture_web_page_image(url,"screenshot_test.jpg")
image_url = web_screenshot.upload_to_imgur(captured_image_path)

# Initialize an empty list to store all the results
all_persona_results = []

#loop through the list or personas and ask for evaluation
for persona in persona_prompts_small:
    for title, prompt in persona.items():
        print(f"Analyzing With: {title}...")
        persona_prompt = f"{prompt} {anlysis_prompt}"
        result = analyze_image_basic(image_url,persona_prompt)
        all_persona_results.append(result)
        print("Done------")

#get  the overaall results
results_string = '\n'.join(all_persona_results)
final_prompt = f"Act as a Landing Page Expert Analyzer, please checkout the following feedback from different people about a landing page, extract 7-10 unique suggestions, and return them in a list in JSON format. Feedback: {results_string}"
overall_analysis = generate_with_response_model(final_prompt,SuggestionsModel)
print(overall_analysis.result)
We simply loop through the personas we created. Using OpenAI Vision API, which allows us to read and analyze images with AI, we will ask each persona to analyze the page, and then we will add the tips generated to the all_persona_results List.
Finally, we will extract the unique tips from the whole list using GPT-4 API and return the top suggestions in JSON.
Step 4: Build a Simple UI
The script works perfectly in the terminal, but if you follow me, you know I love to make things as simple as possible. So, it is time to build a simple UI for our script.
This is super simple if we combine streamlit with our power prompt below:
Act as an expert Python programmer specialized in building user-friendly UIs using Streamlit.

Create a Streamlit UI for the provided script. Make sure to comment all the code to enhance understanding, particularly for beginners. Choose the most suitable controls for the given script and aim for a professional, user-friendly interface.

The target audience is beginners who are looking to understand how to create user interfaces with Streamlit. The style of the response should be educational and thorough. Given the instructional nature, comments should be used extensively in the code to provide context and explanations.

Output:
Provide the optimized Streamlit UI code, segmented by comments explaining each part of the code for better understanding.

Input:
Provided script: {your input script}
This prompt is part of my premium prompt library, which is updated every month with new special prompts. All power members get access to the library.
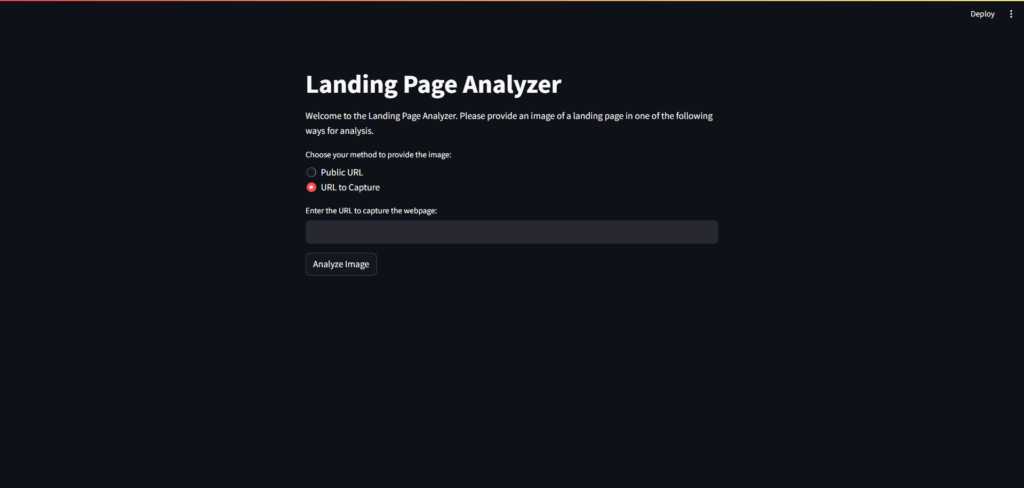
Anyway, so I used my special prompt, and in seconds, I created a UI for my tool with Streamlit.
And here we are:
🔥 Suggested post -> How To Use AI in Marketing (11 Practical Examples)
Get The Code
Click on the button below to get the full source code of this project:
Note that We are using OpenAI API here, so make sure to set your API Key in the openai_functions Script.
It will cost you around $0.2-$0.3 for each run with 4 Team members. so plan accordingly or use Local Language Models Instead. Learn more about OpenAI Pricing here.
Remember, if you face any problems if you need help, you can always join us on the forum to get free support. We are there almost every day waiting for your questions 🙂
If you like to see this project in action, you can check this video:


You are the greatest person and also a great and very good and better YouTuber then the others❤
I’ve been supporting you for a while with a small donation. I don’t often understand how to implement your code as I’m not educated as a programmer. This one seems like it’s a business in a box. I’m anxious to see if I can understand it well enough to use it myself.
Thank you!
Please join the forum so we can follow up properly
Love all your content 😍 I learn something new or spark new ideas from your posts. 🙏
Thanks!