In this post, I’ll walk you through a full, detailed step-by-step guide on how you can build an AI Paraphraser Tool using Python.
Not only that, but I’ll also provide you with the complete code that gives it a friendly user interface (UI)
I’ll provide you with all the codes and prompts at the end of this post. So, now focus on following with me step by step to understand how everything works.
How Do Paraphrasing Tools Work?
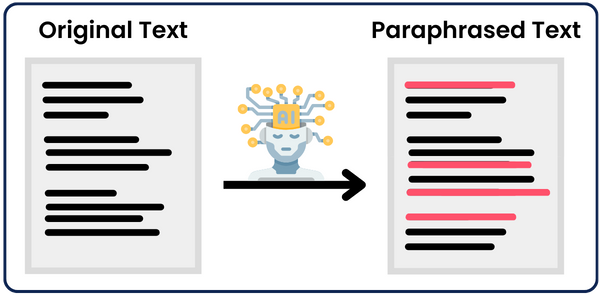
Before the era of AI, most paraphrasing tools simply swapped words with their synonyms, maintaining the original meaning of the text.
However, after AI took over this domain, these tools improved to the extent that they are now able to analyze the input text and create an alternative version with a different structure and wording while conveying the same meaning.
Here are some of the things most paraphraser tools do:
- Word Substitution: The tool identifies and replaces words with their synonyms while maintaining the original meaning of the text.
- Sentence Restructure: One of the most critical steps in paraphrasing is rearranging the structure of sentences. For example, it may convert active voice to passive voice or change the order of phrases and clauses to create a different sentence flow.
- Consolidating Information: Summarize information from long sentences or paragraphs into shorter, more concise versions that cover the essential points.
- Adjusting Formality and Tone: This would be done based on the settings or intended use. For instance, it can transform a casual tone into a more formal one or vice versa.
- Removing Redundancy: Detect and remove redundant phrases or words, making the text clearer without unnecessary repetition.
- Ensuring Coherence: Beyond word-level changes, effective paraphrasing ensures that the rephrased text remains logically connected, maintaining the flow and readability of the content.
As you can see, it’s not just about changing words. As we go now over some types of paraphrasing styles, you’ll see how the prompt changes a lot with each one.
The Implementation
In our case, the main engine that paraphrases the text is our power prompt. These prompts are fed to OpenAI’s GPT model or any other Model you prefer, which will do all the work for us.
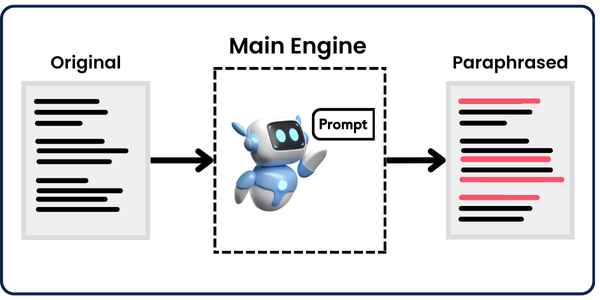
The code structure is very simple. It just reads the content of a text file, paraphrases it using the power prompt chosen, and saves the response in another text file. So, the only part that needs to be very well-crafted is the prompt.
By now, you should have grasped the idea behind how the code works. So, it’s time to get technical!
Get Our Environment Ready
First, our code is dependent on the SimplerLLM library, which makes building AI tools much easier as you will see now.
let’s start by creating a virtual environment and installing the library.
So, open a new terminal and run the following step-by-step:
1- Create the Virtual Environment:

python - m venv venv2- Create and Activate the Virtual Environment:

venv/scripts/activate3- Install SimplerLLM:

pip install simplerllmNow, we have a virtual environment with simplerllm installed, which will help isolate the project and avoid conflicts between package versions.
Try the Code
First things first, we’ll need to create a .env file and add our OpenAI API Key so that the SimplerLLM functions can use it to generate the responses.
If you don’t have an API key, go to OpenAI’s website and generate a new one. Then, add it to the .env file in this form:
OPENAI_API_KEY = "YOUR_API_KEY"
Now, we’re ready to use the code; here it is:
from SimplerLLM.tools.generic_loader import load_content
from SimplerLLM.language.llm import LLM, LLMProvider
from prompts import Standard, Academic, Kiddie, Formal, Expand, Shorten

text = load_content("input.txt")

#Edit the prompt name in accordance to what you want to convert it to
final_prompt = Academic.format(input = text.content)

llm_instance = LLM.create(provider=LLMProvider.OPENAI, model_name="gpt-4o")

response = llm_instance.generate_response(prompt=final_prompt, max_tokens=1000)

with open("response.txt", "w", encoding='utf-8') as f:
    f.write(response)
As you can see, we’ve imported two things to our code; the SimplerLLM functions we’ll use and the prompts module, which I created and saved all the power prompts in, and I’ll give you them for free!
The text variable uses the SimplerLLm function load_content that takes your text file as input and loads its respective data. Here’s how it would look:
text = load_content("input.txt")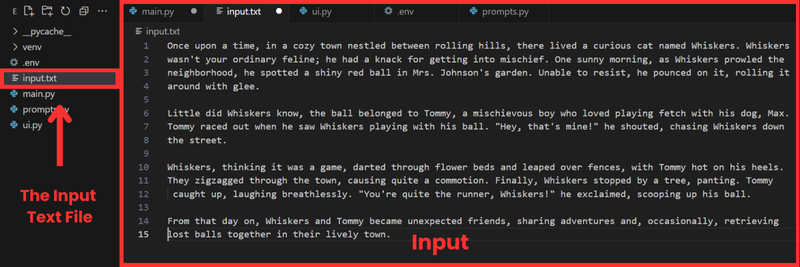
Academic Paraphraser
Now, we need to format the prompt and store it in the final_prompt variable. This can be done by using the Academic prompt, which we imported from the prompts Module and passed with the content of the text file.
final_prompt = Academic.format(input = text.content)
Then, we create an OpenAI LLM instance in order to call their GPT model, and we call it using the generate_reponse function as shown in the response variable.
llm_instance = LLM.create(provider=LLMProvider.OPENAI, model_name="gpt-4o")

response = llm_instance.generate_response(prompt=final_prompt, max_tokens=1000)
💡 Note that by default, this function returns a maximum of 350 tokens as output; that's why we added the max_tokens parameter to increase it to 1000. If your expected token count is bigger than 1000 tokens make sure you increase this number as needed.
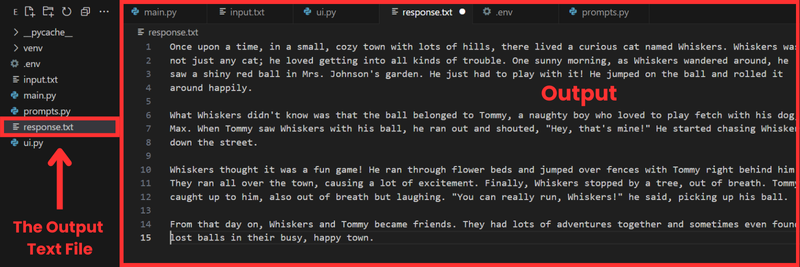
💡 To calculate the number of tokens that your text is, use this tokenizer tool by OpenAI to do so. or you can use the tiktoken library to calculate directly in your python code.Then, we take the response generated and save it in a response.txt file. Here’s what the output will look like:
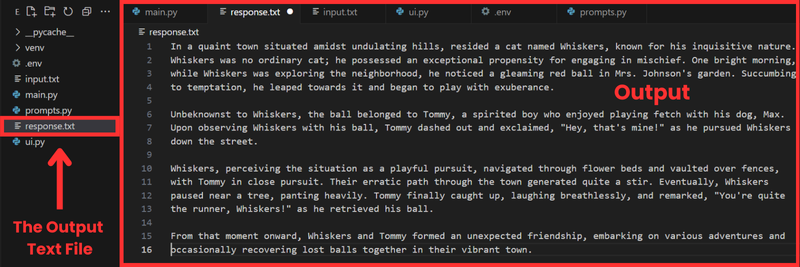
As you can see, the paraphrased output text is still very close in the number of characters; however, the content drastically changed when we used strictly formal language, and the vocabulary used is way more complex than before.
The changes that occur to the text are in accordance with what I constructed the prompt to do.
Kiddie Paraphraser
Let’s try using the kiddie format instead of academic and see how the output changes. So, just replace kiddie instead of academic in the final_prompt variable like this:
final_prompt = Kiddie.format(input = text.content)
And here’s the result:
The result now is very different from the one above. The words used are more informal, and the idea is explained very simply, making it easy for kids to understand and enjoy.
Shortening Paraphraser
Let’s now try another type of paraphrasing that not only changes words and sentence structure but also changes the text’s length either by increasing or decreasing.
As we did before, we’ll replace kiddie in the final_prompt variable by the shorten to decrease its length. Here’s what we get:
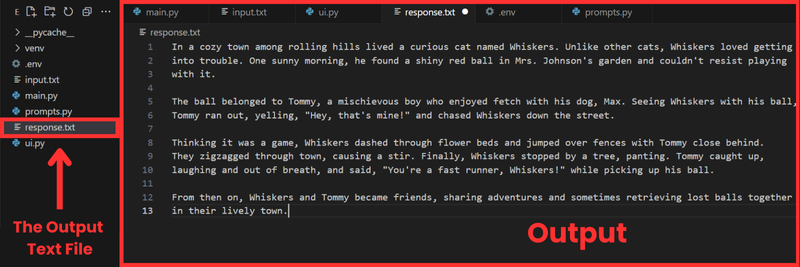
The paraphrased text now was shortened to 147 words, where it was before 204. Plus, it did some word substitution with a little bit of sentence restructuring.
As you can see, the output changes a lot depending on the prompt we choose. So, the better the prompt, the better the result.
This is what we call prompt engineering, which helps you create the most optimal prompts to get the best out of them
The Code and Prompts
Here are both the code we used above and the prompts.py file, which contains the prompts we used above. If you want the other three prompts I crafted, check the premium prompts library!
Create a UI For The Tool
The script works perfectly in the terminal, but why don’t we build a simple, user-friendly interface that makes it easier to run the code? Plus, people who don’t know anything about coding will be able to use it without interacting with the code at all.
This is super simple if we combine streamlit with our power prompt below:
Act as an expert Python programmer specialized in building user-friendly UIs using Streamlit.

Create a Streamlit UI for the provided script. Make sure to comment all the code to enhance understanding, particularly for beginners. Choose the most suitable controls for the given script and aim for a professional, user-friendly interface.

The target audience is beginners who are looking to understand how to create user interfaces with Streamlit. The style of the response should be educational and thorough. Given the instructional nature, comments should be used extensively in the code to provide context and explanations.

Output:
Provide the optimized Streamlit UI code, segmented by comments explaining each part of the code for better understanding.

Input:
Provided script: {your input script}
This prompt is part of the premium prompt library, which is updated every month with new special prompts. All power members get access to the library.
Anyway, I used the prompt, and in seconds, I created a UI for my tool with Streamlit. Here’s the code it generated:
import streamlit as st
from SimplerLLM.language.llm import LLM, LLMProvider
from prompts import Academic, Kiddie,  Shorten

st.title("AI Paraphrasing Tool")

input_text = st.text_area("Paste your text here", height=300)

style = st.selectbox("Choose the style of transformation",
                             ['Academic', 'Kiddie', 'Shorten'])


def get_style(style):
    return {
        'Academic': Academic,
        'Kiddie': Kiddie,
        'Shorten': Shorten
    }[style]

if st.button("Paraphrase Text"):

    prompt = get_style(style)
    final_prompt = prompt.format(input=input_text)

    llm_instance = LLM.create(provider=LLMProvider.OPENAI, model_name="gpt-4o")
    response = llm_instance.generate_response(prompt=final_prompt, max_tokens=1000)

    st.write(response)
    st.success("Text Paraphrased Successfully!")
If you review the code above, you’ll see that creating an interface using Streamlit is very easy. Everything is built-in.
Now, to run the code, you’ll need to save the code as ui.py, open a new terminal and run the following:
streamlit run ui.py
Of course, you can change the file’s name, but you’ll also need to change it to the new file’s name when you run it.
Once you run it, the following web page will open:
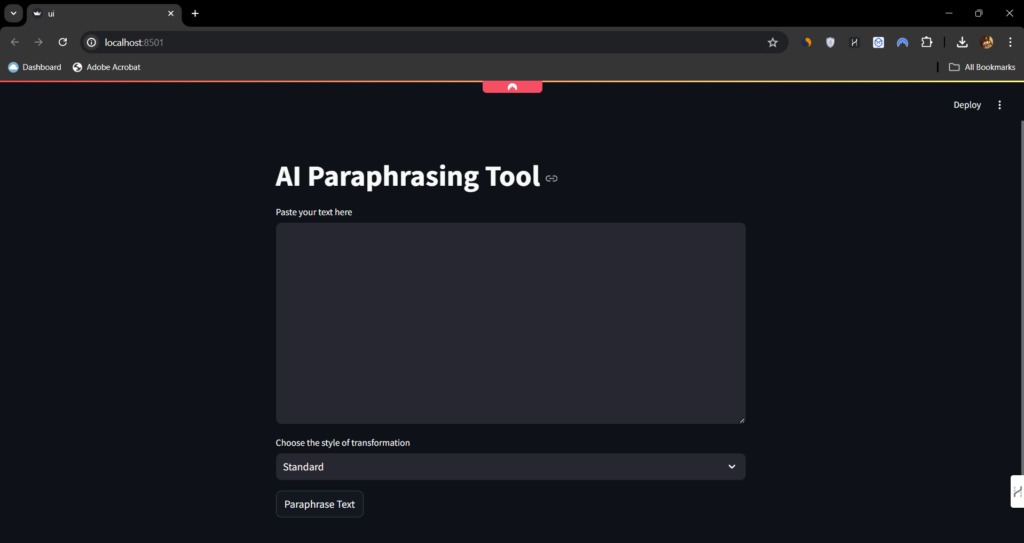
As you can see, it’s very simple and straightforward to use. You enter the text you want to paraphrase, choose the style from the drop-down box and click the “Paraphrase Text” button.
Don’t forget, if you face any problems, don’t hesitate to post them on the forum. we will be there to help you almost every day.
Turn This Tool Into a Money-Making Machine

Rather than keeping the tool only for your use, let people use it and charge them for every use. Let me explain:
If you build a neat user interface for your tool on your WordPress website (one of the easiest things to do), you can build a points system, and people would buy points to use these tools.
This is the technique Hasan uses on his Tools Page, where he charges people a certain number of points on every use, depending on the tool they’re using.
If you want to learn how to clone the same strategy and business model he’s using, check out this guide. It teaches you how to build a SAAS on WordPress and includes a premium forum where the team will be there to help you whenever needed!
If you’re looking for a free source, I also have you covered! Here’s a Free Guide that teaches you the basics of how to start. Good Luck!

When you say “open a new terminal” where do i find this terminal? How do i open a new one?
I still find it confusing as to how i can add this to my wordpress site.
Can you elaborate on these issues please?
Hi Raj, this is not a WordPress Tool, I developed this in python. did you watch the courses on building tools on wordpress?