In this post, I will show you how to create a Free AI Chatbot on a WordPress site WITHOUT using third-party services or chatbot plugins.
If you follow up with me for the next few minutes, you will create an AI chatbot like this:
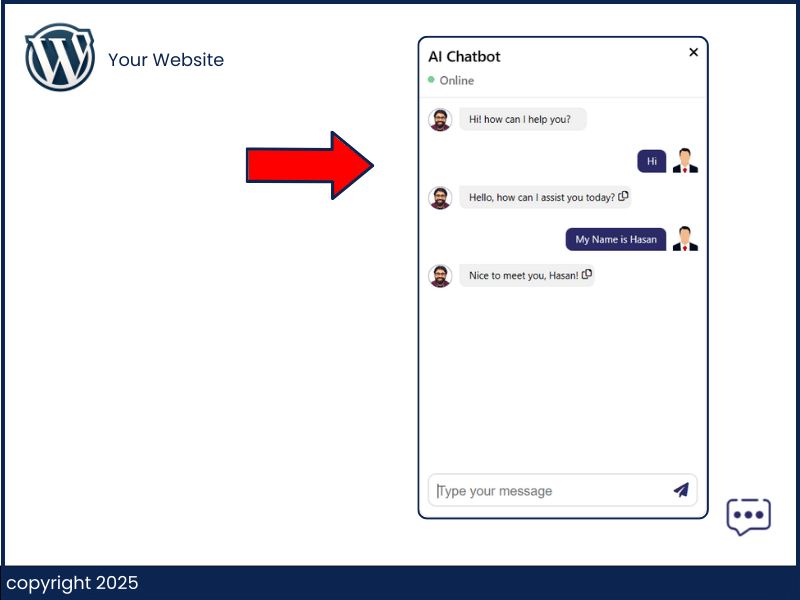
We will build this totally from scratch so you can understand the idea behind building AI chatbots and integrating them with WordPress.
🚨 🚨 Disclaimer: This post has a lot of value and may cause some side effects, like making you smarter and super eager to share it with everyone you know 😂
🚨 🚨 Second Disclaimer: The chatbot we’ll build can be implemented on any website, not just WordPress. Feel free to express your thanks with a $1M donation! 😄 bad joke?
Why Add an AI Chatbot To Your Site?
Before building the AI Chatbot, let’s examine the top 5 benefits of adding one to your website.
- Provide Fast, 24/7 Customer Service: AI chatbots are available all the time, day or night. This means your customers can get help and answers to their questions anytime they need, without waiting for business hours.
- Collect Customer Feedback: Chatbots can easily ask for feedback from your visitors. This helps you learn what your customers like or don’t like and what they need. This information is very important for improving your services or products.
- Reduce Customer Requests and Support Emails: With a chatbot, many common questions are answered quickly by the bot itself. This reduces the number of messages and emails that need your attention, freeing up your time or your team’s time to handle more complex queries.
- Boost Sales and Conversions: Chatbots can guide visitors to the right products or services, answer their questions, and even help them through the buying process. This can lead to more sales and better conversion rates as customers feel supported and confident in their purchases.
- Improve User Experience: A chatbot can make your website more interactive and engaging. It can provide personalized interactions and make sure that visitors find what they are looking for quickly and efficiently. This leads to a better overall experience on your site, which can keep customers coming back.
Now that we understand the benefits of adding an AI chatbot to your site, let’s move on to the next step and start building it.
We’ll start by understanding the structure of the AI Chatbot.
AI Chatbot Structure
Before we start building our AI-powered chatbot, let’s examine its structure and see how each part functions.
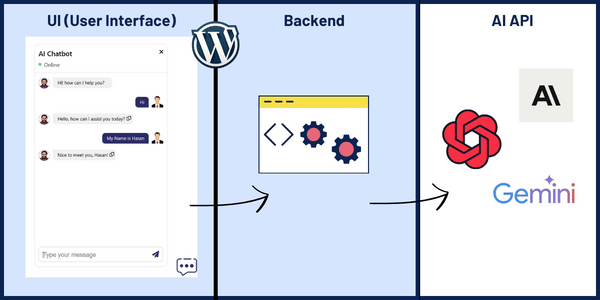
Our chatbot consists of three main parts:
- The UI or the Chatbot Interface: This is the part of the chatbot that your users will interact with. It’s where they’ll type their questions and where the chatbot’s responses will be displayed. It’s designed to be user-friendly and intuitive.
- The Backend: This is the core of the chatbot where all the configurations are set up. It handles the logic and processes necessary to determine how the chatbot should respond to various inputs.
- AI APIs: These are the artificial intelligence engines that power the chatbot’s ability to understand and respond to user queries. You can use APIs from major providers like OpenAI, Gemini, or Anthropic, or open-source models. These APIs process the data sent from the backend and return the responses that the UI displays to the user.
Both the UI and the backend are highlighted in blue (in the image), indicating that these components will be published and implemented on WordPress, making them accessible and manageable through your website’s platform.
Now that we have a clear picture of the AI Chatbot structure, let’s begin with creating the AI chatbot UI!
Create the Chatbot UI
The first step in building our AI chatbot is to create the user interface (UI).
In this guide, we’re building the chatbot from scratch without using any plugins, focusing on using basic web development frameworks like HTML, CSS, and JavaScript.
Don’t worry about coding everything yourself; I’ve prepared the codes for you. You just need to copy and paste them!
Access the Code
To get started, click the button below to access the code for our chatbot:
Inside the download, you will find two folders: one for the frontend and one for the backend.
In the frontend folder, there are three files:
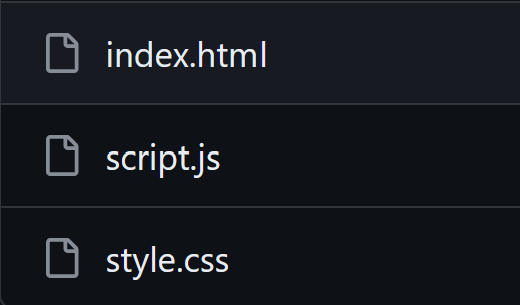
- index.html: This file contains the main HTML structure for the chatbot UI.
- style.css: This stylesheet file will help you style the chatbot’s appearance.
- script.js: This JavaScript file is crucial as it will handle the connection with the WordPress backend.
When you open the index.html file in your browser, the chatbot UI will load, but since it’s not yet connected to the backend, an error will appear. This is expected at this point, so don’t worry!
You will get something like this:
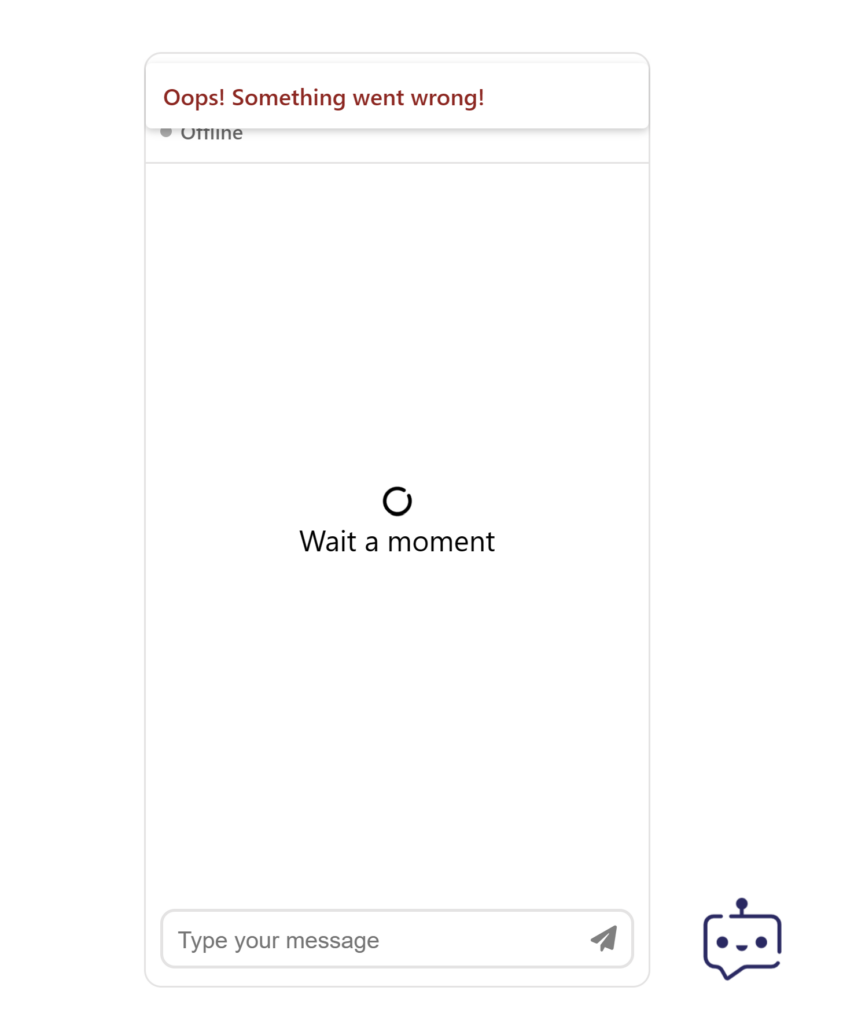
This error message confirms that the UI part is NOT yet communicating with the backend, which is exactly what we anticipate at this stage.
Your Task
For now, your task is to download the UI part, test it in your browser, and ensure that you see the error message. This might seem like a strange goal! 😅
Did you get the error? Perfect ✅
Let’s move to the next step
Setup the Backend
Now that we’ve set up the user interface for our AI chatbot, it’s time to move on to part two and set up the backend.
Since we are building the chatbot for WordPress, we’ll implement the backend directly within the WordPress environment.
Note that if you like to test this and you dont have a wordpress site, you can use LocalWP to install WordPress locally and test with it.
1- Install Wp Code Snippets Plugin
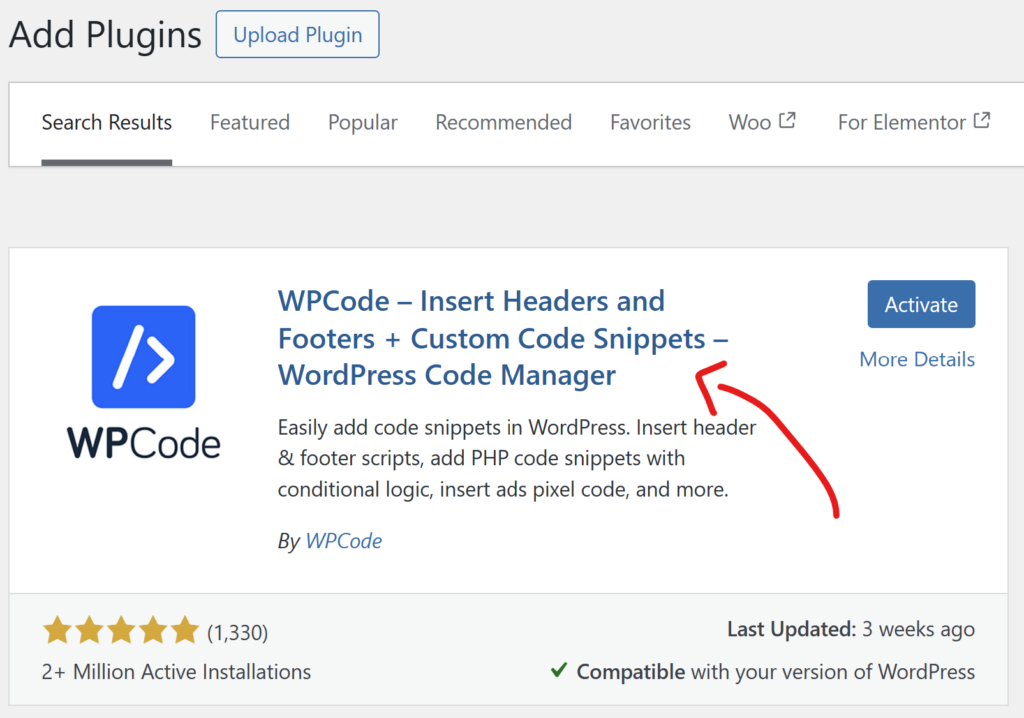
Start by going to your WordPress dashboard. Navigate to ‘Plugins‘, click ‘Add New’, and search for “WP Code Snippets.”
Install “WPCode” plugin. It’s important to select the correct one shown in the image below:
2- Copy The Backend Code
Return to the folder you downloaded earlier and open the backend folder. Look for the config.php file.
Open this file with any text editor you prefer, copy all the contents, and then go back to your WordPress dashboard.
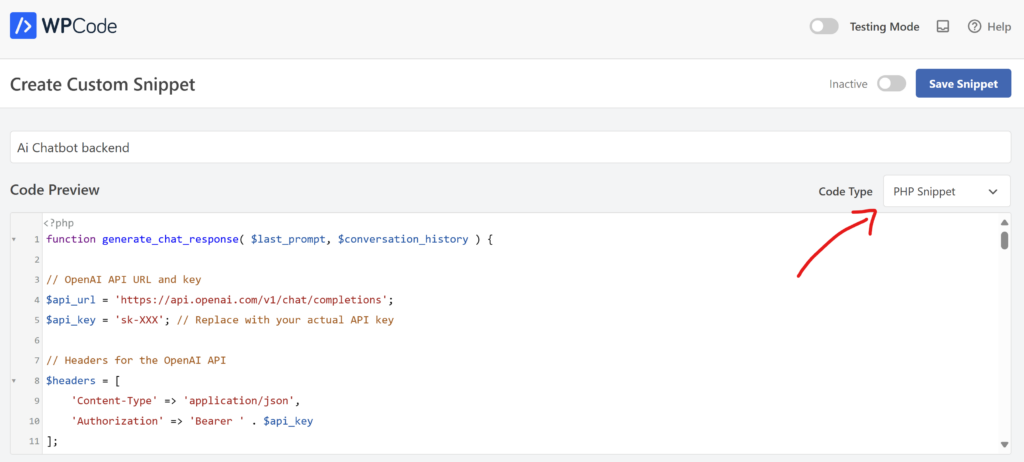
Inside the WP Code Snippets area, create a new empty snippet. Paste the copied PHP code into this snippet. Ensure that you set the code type to “PHP Snippet” as shown below:
3- Set your OpenAI API Key
The backend code uses the OpenAI API to power our AI chatbot, so you will need an API key from OpenAI. If you don’t already have one, you’ll need to visit OpenAI’s website, sign up, and generate a new API key.
Once you have your API key, replace the placeholder in the snippet with your actual key:
$api_key = 'sk-XXX'; // Replace with your actual API key
By following these steps, you’re integrating powerful AI capabilities into your WordPress site, enabling your chatbot to process and respond to user queries effectively.
With the backend now set up, your chatbot is almost ready to go live.
Connect the UI with the Backend
With the UI and backend now set up, the next crucial step is to link them together.
Here’s how to connect the UI with the backend:
Open the script.js file located in the frontend folder you’ve previously downloaded.
Look for the section at the top of the file where URLs are configured.
Here, you’ll need to update the URLs to match your website’s domain. This ensures that when the UI sends a request, it correctly reaches the backend hosted on your WordPress site.
For example, if your website is https://www.YourSuperWebsite.com, you will change the URL in the script.js to something like this:
const apiUrl = 'https://www.YourSuperWebsite.com/wp-json/myapi/v1/chat-bot/';
const botConfigurationUrl = 'https://www.YourSuperWebsite.com/wp-json/myapi/v1/chat-bot-config';

Once you’ve updated the URLs in the script.js, save your changes.
Now, re-open the index.html in your browser to reload the chatbot interface.
This time, when you interact with the chatbot, it should be able to communicate with the backend, and you should be able to chat with the AI bot without any problems.
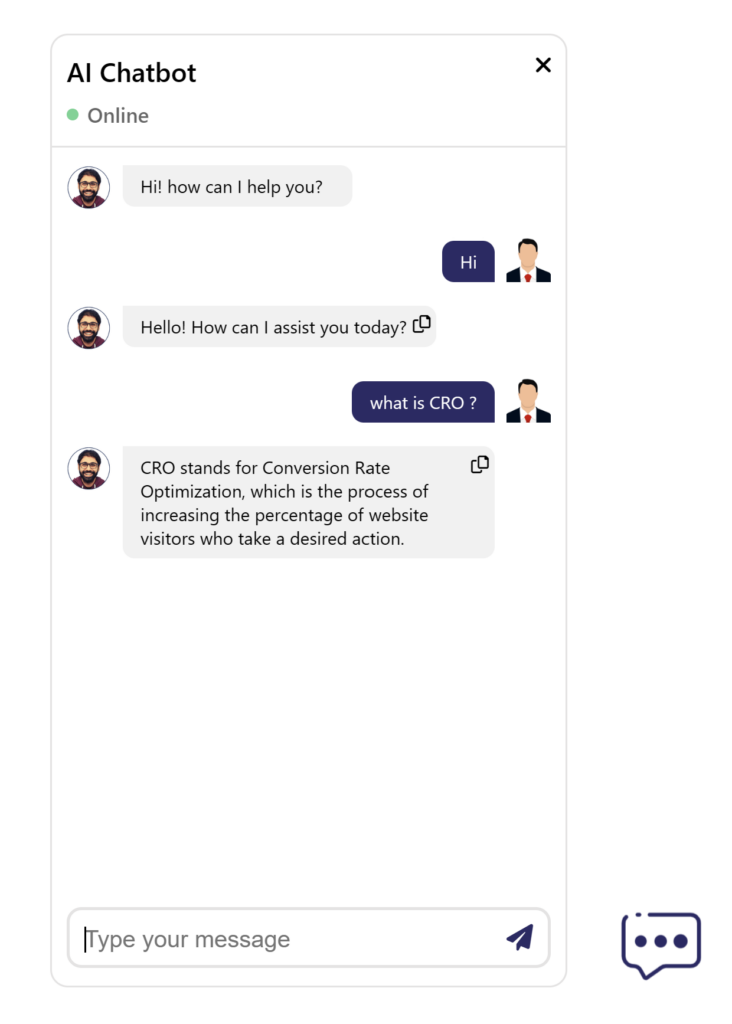
If everything is set up correctly, your chatbot should now be operational, responding to queries based on the AI’s processing done in the backend.
Done? Perfect ✅
The Chatbot Configuration
To enhance the flexibility and personalization of our AI chatbot, I have developed a backend function that allows for easy customization.
This function is crucial for tailoring the chatbot to better align with your brand and user expectations.
Customize Your Chatbot
To customize your chatbot, you will need to access the PHP snippet we created in the WP Code Snippets plugin. Here’s a detailed guide on how to do it:
- Access the Backend Snippet: Go to your WordPress dashboard and navigate to the WP Code Snippets area where you previously pasted the backend code. Look for the function:
load_chat_bot_base_configuration. - Understand the Function: This function is designed to configure your chatbot dynamically. Here is a breakdown of what you can customize:
- User Avatar URL: Set the URL for the avatar image that represents the user in the chat interface. This could be a default image or something more personalized.
- Bot Image URL: Set the URL for the bot’s avatar image to give your chatbot a distinct personality.
- Startup Message: Customize the initial greeting message that users see when they start interacting with the chatbot.
- Font Size: Adjust the font size to ensure that the chat interface is readable and matches the style of your website.
- Common Buttons: Define buttons that appear in the chat interface, providing quick options for common queries or actions.
Here is a snippet of the code for better understanding:
function load_chat_bot_base_configuration(WP_REST_Request $request) {
    $user_avatar_url = "https://learnwithhasan.com/wp-content/uploads/2023/09/pngtree-businessman-user-avatar-wearing-suit-with-red-tie-png-image_5809521.png";
    $bot_image_url = "https://learnwithhasan.com/wp-content/uploads/2023/12/site-logo-mobile.png";

    $response = array(
        'botStatus' => 0, // 0 for offline, 1 for online
        'StartUpMessage' => "Hi, How are you?",
        'fontSize' => '16',
        'userAvatarURL' => $user_avatar_url,
        'botImageURL' => $bot_image_url,
        'commonButtons' => array(
            array(
                'buttonText' => 'I want your help!!!',
                'buttonPrompt' => 'I have a question about your courses'
            ),
            array(
                'buttonText' => 'I want a Discount',
                'buttonPrompt' => 'I want a discount'
            )
        )
    );

    return $response;
}
Once you have edited and configured these options, make sure to save the changes in your WP Code Snippets dashboard. This will immediately update the settings for your chatbot.
Upgrade Your Chatbot!
Now that we have a functioning AI chatbot on our site, let’s explore some advanced features and upgrades to make it even more powerful and tailored to your specific needs.
1- System Prompt Customization
To make your chatbot niche-specific and direct its responses in a certain style, consider customizing the system prompt. This is the instruction you give to the AI about how it should behave.
For example, to make your chatbot focus on digital marketing, you can modify the backend code like this:
$conversation_history[] = [
    'role' => 'system',
    'content' => 'Answer questions only related to digital marketing, otherwise, say I don’t know.'
];
This restricts the chatbot to respond only to queries related to digital marketing. You can also tailor the system prompt to define the response style, topic, target audience, etc.
Here’s another example:
You are a language learning coach. your task is to helps users learn and practice new languages. Offer grammar explanations, vocabulary building exercises, and pronunciation tips.
Engage users in conversations to help them improve their listening and speaking skills and gain confidence in using the language.

Do not respond to questions outside of your language coaching role.
2- Retrieval-Augmented Generation (RAG)
This upgrade involves giving the chatbot access to your documents, FAQs, or any site-specific knowledge base.
This allows the AI to pull information directly from your resources to answer questions, making its responses more accurate and tailored to your content.
A detailed tutorial on setting up RAG will be included in an upcoming newsletter—don’t forget to subscribe!
3- Agentic Chatbot
Transform your chatbot into an autonomous agent that can perform additional functions.
For example, integrating with WordPress functionalities allows the chatbot to manage user accounts, reset passwords, and more, acting like a human agent on your site.
I’ve created a simple prototype for building AI agents on WordPress. You can learn more and access the code for testing here:
✅ If you’re interested in understanding what agents are and how to build them from scratch, check out this course, “Build AI Agents From Scratch With Python“
4- Connect with Python API
While our backend is PHP-based, Python offers more robust libraries and packages. You can make your PHP backend a tunnel to a Python API, enhancing your chatbot’s capabilities.
Here is an example of how to make the chatbot interact with an API instead:
function call_fast_api_endpoint( $last_prompt, $conversation_history ) {
    $api_url = 'https://yourapi.com/chat-bot-test';
    $api_key = 'XXX';

    $body = json_encode(array(
        'last_prompt' => $last_prompt,
        'conversation_history' => $conversation_history,
    ));

    $response = wp_remote_post($api_url, array(
        'headers' => array(
            'Accept' => 'application/json',
            'x-api-key' => $api_key,
            'Content-Type' => 'application/json',
        ),
        'body' => $body,
        'method' => 'POST',
        'data_format' => 'body',
    ));

    if ( is_wp_error( $response ) ) {
        // Handle error
        return $response->get_error_message();
    }

    $response_body = wp_remote_retrieve_body( $response );
    return json_decode($response_body, true);
}
This function sends the last prompt and the conversation history to the Python API, which processes the data and returns a response. It uses WordPress functions like wp_remote_post and wp_remote_retrieve_body to handle HTTP requests.
This integration allows your chatbot to leverage advanced Python capabilities, enriching its functionality and responsiveness.
Detailed instructions on how I integrated Python with my WordPress Site and added the Points system to Build my SaaS on WordPress + code examples are available in the WordPress SaaS Course.
5- Utilize Other AI APIs
Yes, it’s possible to integrate other AI platforms like Anthropic, Gemini, or even open-source models into your WordPress.
While a full explanation is beyond this scope, you can find a tutorial on how to integrate the Gemini API to build an AI tool on WordPress on my YouTube channel:
These enhancements not only make your chatbot more effective but also more integrated with the specific needs of your business and audience.
Publish on WordPress
Once you have your AI chatbot ready, the next step is to integrate it into your WordPress site. You can choose to deploy it on a specific page or across all pages on your site, depending on your needs. Here’s how you can do it:
Publishing on a Single Page
- Create a New Page: Navigate to your WordPress dashboard and go to Pages > Add New. Give your page a title that corresponds with the chatbot’s function, such as “Customer Support Chatbot.“
- Add Custom HTML Block: In the WordPress block editor, click the ‘+’ button to add a new block, and select ‘Custom HTML’ from the formatting options. This is where you will paste the custom HTML, CSS, and JavaScript codes.
- Preview and Publish: Always preview your page to ensure the chatbot appears and functions as expected before hitting the publish button. Adjust the placement and design if necessary to ensure it fits well with the rest of your page’s layout.
Publishing on All Pages
If you want your AI chatbot to be accessible from any page of your WordPress site, you can paste it to the footer of your website, again, by using Wp Code Snippets.
Just Click on Add Headers and Footers, and paste the full code (HTML, JS, and CSS) in the footer section.
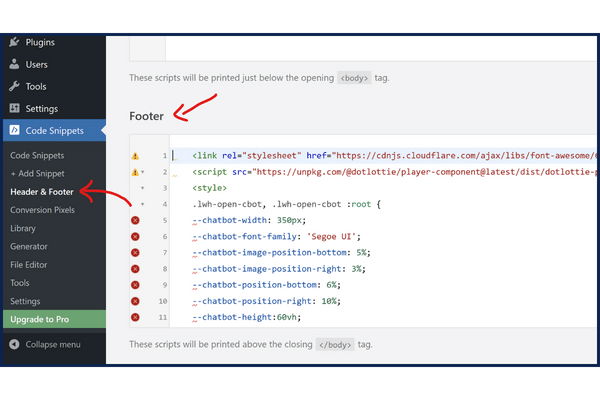
Save, and now your chatbot will appear on all pages.
For further details and support, join our forum, where I’m available nearly every day to answer questions and engage with community members!


This is really fantastic and we appreciate all your help and instruction.
Is it possible for a human to take over the chat from the AI at some point? Is that already built into the code?
Again, well done and thank you!
Thank you! will add this feature in the upcoming updates
I am getting Oops Something went wrong error when i am trying to chat with the bot.
can you help me.
please join the form, and share in which step you are
how do you implement the RAG i want to build a chatbot for a customer and connect it to their documentation
I am preparing a tutorial about this