
How To Create AI Tools With WordPress in 5 Minutes!
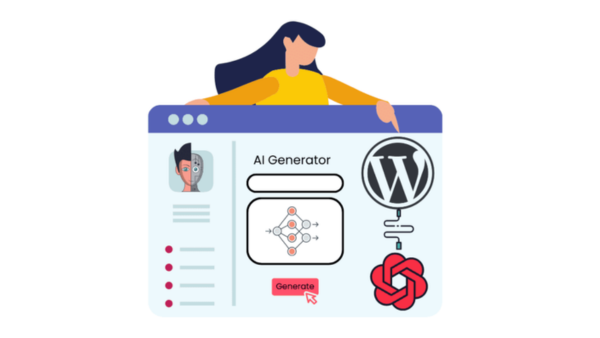
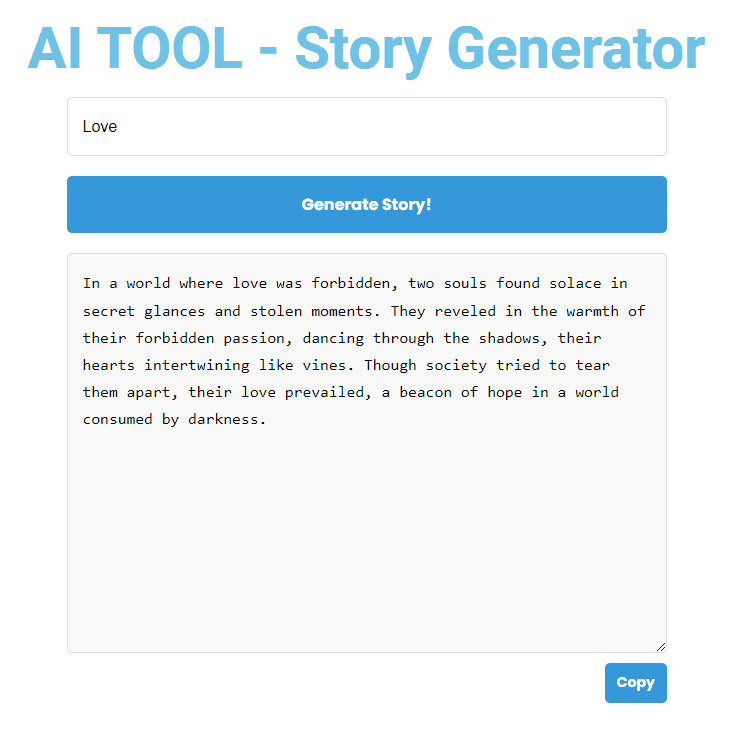
In this post, I will show you how to create an AI Tool With WordPress like this one:
Why Create Online Tools?
Here are some reasons for you to consider creating and adding an online tool to your website:
1. Get More Traffic:
- Engagement: These tools can help users engage more with your website and spend more time there.
- SEO Benefits: This type of interactive content can improve your site’s search engine ranking, driving more organic traffic.
- Shareability: If your tool provides value, users are likelier to share it on social media, increasing your reach.
Building online tools helped me reach Millions of Users Worldwide in a significant amount of time especially if you utilize the power of Quick Win Keywords.
Learn more about my detailed strategies and growth hacks in the following Posts:
– How I Got 1,325,223 Views on My Website? — Part 1
– How I Got 1.3M Visits in 12 Months 🔥 — Part 2
– How I Will Get 5,000,000 Views Per Month on My Website in 2023📈
2. Lead Magnets:
- Segmentation: By understanding how visitors use your tool, you can segment your audience for more personalized marketing.
- Build Trust: Offering a valuable tool for free or as a trial can foster trust and loyalty, converting visitors into long-term clients or subscribers.
3. Monetize:
- Subscription Models: You can restrict access to premium features and offer tiered subscription models for different user needs. I did that on my website.
- Ad Revenue: If the tool attracts a large user base, you can monetize through targeted advertisements.
- B2B Partnerships: Your tool might attract business clients interested in white-label solutions or collaborations.
Understand The Tool Structure
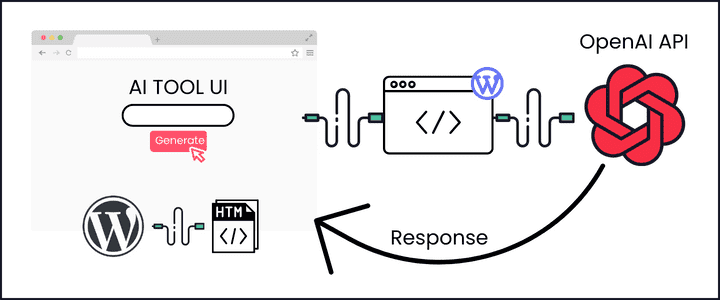
Creating AI tools on WordPress involves 3 main steps. Below is a detailed breakdown of how to create this tool:
1. Create a WordPress Page:
Start by creating a new page on your WordPress site hosting the AI tool. This page will be the user interface for interacting with the tool.
2. Add HTML Code:
Add Some HTML code to create the tool page. This will be the starting point of communication with the OpenAI API.
3. Implement a WordPress Function:
You’ll add a custom WordPress function that receives the user input from the HTML form and sends it to OpenAI’s API. This function acts as a bridge between your website and OpenAI, allowing the two to communicate.
4. Connect to OpenAI API:
The WordPress function will connect with OpenAI’s API to generate text based on the user’s prompt.
Generate an OpenAI API Key:
To use any of OpenAI’s models, you must first obtain an API access key. Here’s how to do it:
- Go to OpenAI’s API page and click on the “Signup” button.
- You will be prompted to create an account. Verify your email to complete the signup process.
- Once logged in, you can find your API keys under the account dashboard.
For more in-depth guidance, you can check my full guide on getting started with GPT-4 API here.
Step 1: Add The API Call Function
In this step, we’ll add the PHP function that will enable our tool to communicate with the OpenAI API. For this purpose, we will use the WPCode plugin in WordPress.
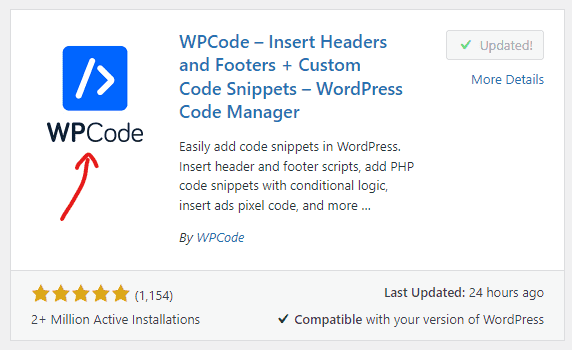
What is the WPCode Plugin?
WPCode is a WordPress plugin that provides a clean and simple way to run PHP code snippets on your site. It removes the need to add custom snippets to your theme’s functions.php file.
Installing and Activating the Code Snippets Plugin
- From your WordPress dashboard, go to ‘Plugins > Add New’
- In the search bar, type ‘WPCode‘
- Find the plugin in the search results and click ‘Install Now’, then ‘Activate’.
Adding the OpenAI API Call
Once you’ve activated the plugin, follow these steps to add your API call:
- From your WordPress dashboard, navigate to ‘Code Snippets> Add New’.
- In the ‘Title’ field, give your new snippet a name, like “OpenAI API Call”.
- Set The Code Type to PHP
- In the ‘Code’ text box, you’ll enter your PHP code. Below is an example of how you could structure this code:
function openai_generate_text() {
    // Get the topic from the AJAX request
    $prompt = $_POST['prompt'];

    // OpenAI API URL and key
    $api_url = 'https://api.openai.com/v1/chat/completions';
    $api_key = 'sk-XXX';  // Replace with your actual OpenAI API key

    // Headers for the OpenAI API
    $headers = [
        'Content-Type' => 'application/json',
        'Authorization' => 'Bearer ' . $api_key
    ];

    // Body for the OpenAI API
    $body = [
        'model' => 'gpt-3.5-turbo',
        'messages' => [['role' => 'user', 'content' => $prompt]],
        'temperature' => 0.7
    ];

    // Args for the WordPress HTTP API
    $args = [
        'method' => 'POST',
        'headers' => $headers,
        'body' => json_encode($body),
        'timeout' => 120
    ];

    // Send the request
    $response = wp_remote_request($api_url, $args);

    // Handle the response
    if (is_wp_error($response)) {
        $error_message = $response->get_error_message();
        wp_send_json_error("Something went wrong: $error_message");
    } else {
        $body = wp_remote_retrieve_body($response);
        $data = json_decode($body, true);

        if (json_last_error() !== JSON_ERROR_NONE) {
            wp_send_json_error('Invalid JSON in API response');
        } elseif (!isset($data['choices'])) {
            wp_send_json_error('API request failed. Response: ' . $body);
        } else {
            wp_send_json_success($data);
        }
    }

    // Always die in functions echoing AJAX content
   wp_die();
}

add_action('wp_ajax_openai_generate_text', 'openai_generate_text');
add_action('wp_ajax_nopriv_openai_generate_text', 'openai_generate_text');
The code defines a PHP function named openai_generate_text, which will be executed when a request is made to WordPress using the action openai_generate_text.
This function communicates with OpenAI’s API to generate a text based on a prompt provided by the user.
The function first retrieves the user-provided prompt from the POST request:
$prompt = $_POST['prompt'];
The last two lines of the code hook the function to the wp_ajax_openai_generate_text and wp_ajax_nopriv_openai_generate_text actions so that it will be executed when a request with the action openai_generate_text is made to WordPress.
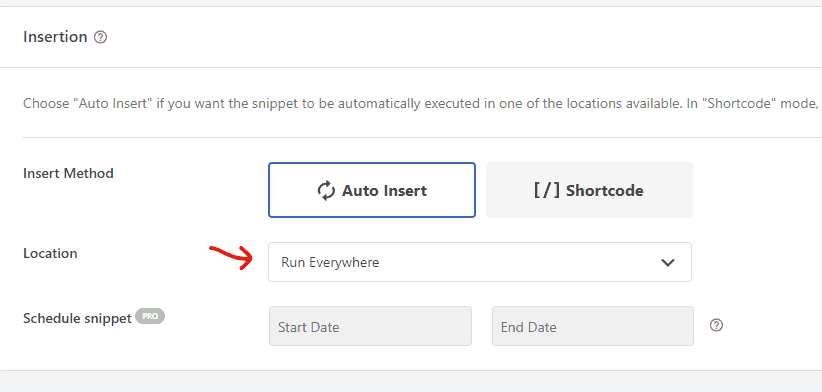
Publish The Code Snippet
Now, Make sure to set this script to run everywhere and publish it.
Step 2: Create The Tool Page
Now that our API function is ready let’s create a new page on our WordPress site where we can add our AI tool.
We’ll be using Elementor, a popular WordPress page builder, to create the page.
📣 Note: You can use any builder you want. What is important is the ability to add custom HTML code to the page.
Installing and Activating Elementor
- From your WordPress dashboard, go to ‘Plugins > Add New’.
- In the search bar, type ‘Elementor‘.
- Find the plugin in the search results and click ‘Install Now’, then ‘Activate’.
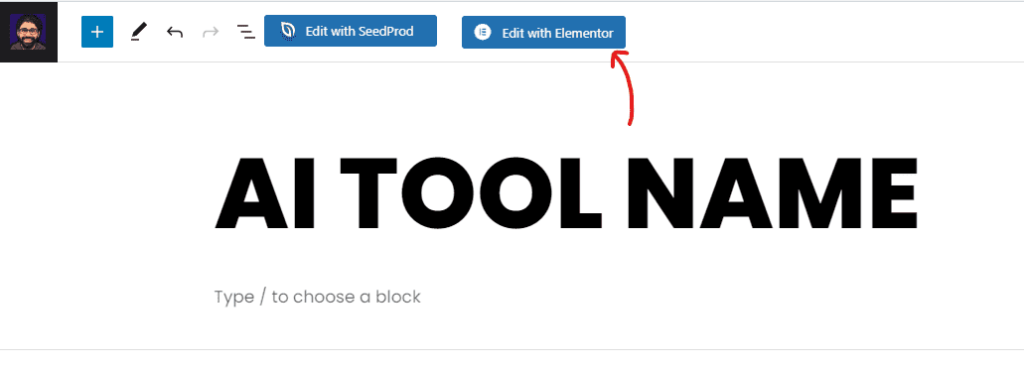
Creating a New Page with Elementor
- Navigate to ‘Pages > Add New’ from your WordPress dashboard.
- Enter a title for your page, such as “AI Tool”.
- Click on ‘Edit with Elementor‘ to start designing your page.
Adding Custom HTML in Elementor
To add custom HTML in Elementor, you need to drag and drop the HTML Code widget into your page. Follow these steps:
- On the Elementor editor page, you’ll see a sidebar with several icons on the left. Click on the one that looks like a grid or matrix.
- This will open up a list of widgets that you can use. Look for the ‘HTML’ widget
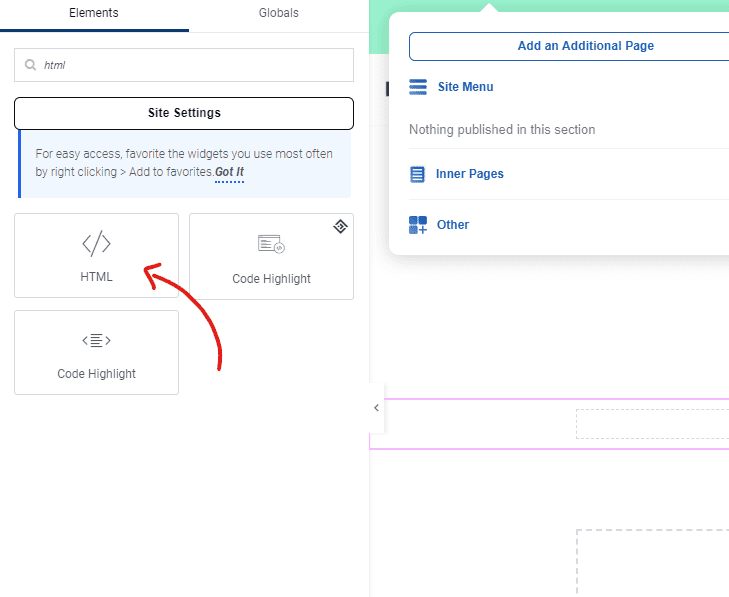
Here, you can paste your custom HTML code for your AI tool. In our case, it will include code for an input field, a button, and a text area for output results.
Basic example:
<div>
    <input type="text" id="userInput" placeholder="Type something here...">
    <button id="submitButton">Submit</button>
    <textarea id="resultArea"></textarea>
</div>
To make things easy for you, I created the full HTML, JS, and CSS Code so that you can copy and paste it directly. Here it is:
<div id="text-generation-tool">
    <input type="text" id="topic" placeholder="Your Topic...">
    <button id="generate-button">Generate Story!</button>
    <div id="result-container" style="display: none;">
        <div class="result-wrapper">
            <div class="result-content">
                <textarea id="result" readonly></textarea>
            </div>
            <div class="copy-button-container">
                <button id="copy-button">Copy</button>
            </div>
        </div>
    </div>
    <div id="loading" class="loader" style="display: none;"></div>
</div>

<style>
    /* Basic styles for the text generation tool */
    #text-generation-tool {
        width: 100%;
        max-width: 600px;
        margin: 0 auto;
        font-family: Arial, sans-serif;
    }

    #topic {
        width: 100%;
        padding: 15px;
        margin-bottom: 20px;
        font-size: 16px;
        border-radius: 5px;
        border: 1px solid #ddd;
    }

    #generate-button {
        display: block;
        width: 100%;
        padding: 15px;
        margin-bottom: 20px;
        font-size: 16px;
        border: none;
        border-radius: 5px;
        color: #fff;
        background-color: #3498db;
        cursor: pointer;
        transition: background-color 0.3s ease;
    }

    #generate-button:hover {
        background-color: #2980b9;
    }

    #result-container {
        display: none;
        margin-bottom: 20px;
    }

    .result-wrapper {
        position: relative;
        overflow: hidden;
    }

    .result-content {
        display: flex;
    }

    #result {
        flex: 1;
        height: 400px;
        padding: 15px;
        font-size: 16px;
        border-radius: 5px;
        border: 1px solid #ddd;
        background-color: #f9f9f9;
    }

    .copy-button-container {
        margin-top: 10px;
        text-align: right;
    }

    #copy-button {
        padding: 8px 12px;
        font-size: 14px;
        border: none;
        border-radius: 5px;
        color: #fff;
        background-color: #3498db;
        cursor: pointer;
        transition: background-color 0.3s ease;
    }

    #copy-button:hover {
        background-color: #2980b9;
    }

    /* CSS for the loader */
    .loader {
        display: block;
        margin: 50px auto;
        border: 16px solid #f3f3f3; /* Light grey */
        border-top: 16px solid #3498db; /* Blue */
        border-radius: 50%;
        width: 50px;
        height: 50px;
        animation: spin 1s linear infinite;
    }

    @keyframes spin {
        0% { transform: rotate(0deg); }
        100% { transform: rotate(360deg); }
    }
</style>
By the way! I generated this code with ChatGPT in about 5 minutes!
Feel free to use this code as a baseline for any tool you want to create. For example, if you want to change the placeholder text in the input field, adjust this line:
<input type="text" id="topic" placeholder="Your Topic...">
But that’s not all. You can even input this code into ChatGPT and ask it to make modifications for you. Let’s see an example of this in action:
Prompt: “Update the input box to a dropdown list where I can select one of the following: (love, help, friendship)”
After running this prompt, here’s what ChatGPT produced:
<div id="text-generation-tool">
    <select id="topic">
        <option value="" selected disabled>Your Topic...</option>
        <option value="love">Love</option>
        <option value="help">Help</option>
        <option value="friendship">Friendship</option>
    </select>
    <button id="generate-button">Generate Story!</button>
    <div id="result-container" style="display: none;">
        <div class="result-wrapper">
            <div class="result-content">
                <textarea id="result" readonly></textarea>
            </div>
            <div class="copy-button-container">
                <button id="copy-button">Copy</button>
            </div>
        </div>
    </div>
    <div id="loading" class="loader" style="display: none;"></div>
</div>
The possibilities with AI models like ChatGPT are virtually limitless, which is why learning how to interact with these models is one of the most in-demand skills today and will continue to be in the future.
This skill is commonly known as ‘prompt engineering‘, a key aspect of effective AI utilization. If you’re interested in learning more about this topic, I encourage you to check out my comprehensive course on prompt engineering, available here.
Save Your Page!
Once you’ve pasted your code, click ‘Update’ to save your changes.
Perfect! You’ve now created a page for your AI tool and added the necessary HTML elements. The next step will involve connecting this page to our OpenAI API function.
Step 3: Connect The Page With The API Function
Now that we have our API function and our tool page set up, it’s time to connect them. This is where the JavaScript (JS) code comes in.
What does this JavaScript code do?
This JS code sets up an event listener on the ‘Generate Story!’ button so that when the button is clicked, it collects the topic selected by the user and sends it to our OpenAI API function using AJAX.
While the story is being generated, it shows a loading spinner. Once the story is returned, it hides the loading spinner and displays it in a text area in the result.
If there’s an error at any point, it shows an error message in the result text area.
The code also sets up an event listener on the ‘Copy’ button so that when clicked, it copies the generated story to the clipboard.
Adding the JavaScript Code
Here is the JavaScript code you need to add:
What you should focus on here is the prompt:
var prompt = "Generate a 3 sentence story about " + topic;
In my case, I just used a very basic prompt to help you understand the concept.
In your case, and based on your AI Tool Logic, you will add your custom prompt; for example, let’s say we are creating a Domain Name Generator Tool. You would use a prompt like this:
Generate a list of 10 domain name ideas for a website about [topic], and provide a brief explanation for each suggestion.
You can be more professional; here’s one of my premium secret Power prompts that Generates Domain Names Using AI:
Please generate 10 original and creative domain names specifically tailored for the [niche] niche, focusing on its main concepts and target audience.
Your response should prioritize domain names that effectively capture the attention of the [niche] audience and represent its key themes. For each domain name, provide a brief explanation (1-2 sentences)highlighting its relevance to the niche. Ensure that each domain name meets the following criteria:

1. Brand Relevance: Maintain a strong connection with the niche and its central concepts.
2. Memorable: Design the domain names to be captivating, easy to remember, and with familiar spellings.
3. Concise: Keep each domain name between 6-14 characters for ease of typing and recall.
4. Simplicity: Avoid using hyphens and numbers for a cleaner appearance.
5. Keyword Incorporation: Utilize relevant niche keywords for improved SEO, if possible.
6. Pronunciation: Ensure that each domain name is easily understandable when spoken or “radio-friendly.”
7. Domain Extensions: Prioritize .com, .net, .org, and .ai extensions when applicable.
8. Legality: Refrain from infringing on existing trademarks or brands.

Your response should exhibit flexibility and creativity while maintaining a focused approach on the [niche] niche, providing a solid foundation for building a brand within that market.

[niche]:
If you are interested in accessing my full Power Prompts Library, check it out here.
Anyway, the idea is to replace your Prompt with whatever your goal is, and you are done!
Add this JavaScript code to your tool page:
- Open up the Elementor editor for your tool page again.
- Drag and drop the ‘HTML’ widget onto your page the same way we did earlier.
- Paste the JavaScript code into the ‘HTML Code’ box.
- Click ‘Update’ to save your changes.
Or you can paste the code within the same HTML Code Box that we used before.
That’s it! Your tool page is now connected to the OpenAI API function, and users should be able to use the tool based on their selected topic.
Optimizing Our Tool
Once we have our tool up and running, the process doesn’t stop there. It’s time for optimization. This can range from refining the UI (User Interface) to adding security measures like captcha.
Let’s say you want to change the UI of your tool. You can ask ChatGPT to help you with that by simply feeding it with this prompt:
Hey, could you help me design a cleaner, more professional interface for my tool?
ChatGPT will provide suggestions or even an entirely new set of HTML/CSS codes tailored to your needs.
Adding a security measure like a captcha can also be a significant improvement, as it helps protect your tool from bots and ensures genuine user interactions. You can find numerous plugins and resources online to add a captcha to your WordPress site.
Lastly, remember that continuous optimization and updating your tool according to user feedback is the key to making your tool more user-friendly and successful.
Bonus: Monetize Your Tools!
Remember that WordPress doesn’t just allow you to create and share content; it also offers the possibility to turn your AI tools into a source of revenue. Whether you’ve developed a single tool or an entire suite of AI solutions, there are multiple pathways to monetization using WordPress. Here’s a detailed guide:
1. Membership Models:
You can create a members-only section on your website, providing exclusive access to your AI tools. Plugins like Promembership, MemberPress, and others are tailor-made for this purpose.
- ProMembership: Ideal for creating tiered memberships, this plugin allows you to grant different access levels based on the subscription plan, opening up opportunities for various price points.
- MemberPress: Known for its user-friendliness, MemberPress lets you restrict access to specific pages or entire categories of content. You can set up one-time payments or recurring subscriptions for access.
2. Advertisements and Affiliate Marketing:
You can monetize through ads or affiliate marketing if you prefer not to charge users directly. Collaborate with relevant industry partners, or use advertising networks that align with your audience.
3. Building Tools as a Freelance Service:
You can offer this service as a freelance gig.
Your WordPress site can host the tools and act as a portfolio, showcasing what users can expect from your services. Potential clients can interact with your tools, gaining firsthand experience of your work’s quality and capabilities. You might also consider providing case studies or testimonials to demonstrate your expertise further.
4. Creating a SaaS with WordPress:
Combining the above strategies, you can essentially build a Software as a Service (SaaS) platform with WordPress, as I did here with my tools and the points system. Utilize various plugins to create a seamless workflow, integrate payment gateways, and provide your users with a professional, polished experience.
Monetizing your AI tools through WordPress is not only feasible but can be highly rewarding. With a range of options to fit different tools and target audiences, you can choose the method that aligns best with your goals and users’ needs.
🔥You can learn step by step how I built the points system, integrated it with the tools, and got all my templates, codes, and snippets to get started fast in my course: “Turn WordPress into SaaS – Building The Points System!“
Don’t Miss my new updates ⚠️
Are you looking to stay ahead of the curve in the rapidly evolving world of AI and automation? Want to discover how you can leverage these technologies to 10x your digital marketing and business?
I’m here to help ❤️
Join My Free Weekly Newsletter: No fluff, no buzzwords — just pure value. I share free tips, tutorials, and guides on utilizing AI and automation to supercharge your digital strategy. Subscribe now, and start transforming your business today.
If you have any questions or need further guidance, I’m more than happy to assist you. Join us on our forum for free! Your success is just a click away.


Responses