Self-Managed Hosting for Solopreneurs: How I Save $700/Month with Coolify
For years, I was paying for multiple hosting services:
- $500 for WordPress sites on Kinsta
- $70 for MongoDB Atlas
- $200+ for APIs and apps
- $200+ for email marketing
That’s over $1000 every single month… just to keep my online business running.
Until one day, I said: What if I hosted everything myself?
Now, I pay around $120/month for everything—on a single powerful VPS, thanks to Coolify.
Let me show you how.
Why This Setup Changed My Business
✅ I can deploy WordPress, Python APIs, Next.js apps, databases, n8n, anything with one click.
✅ Everything runs on one server (I can scale when needed)
✅ I don’t worry about limits, pricing tiers, or restrictions.
✅ I have a clean, easy UI that feels like a managed dashboard.
What You’ll Need
- A VPS (Virtual Private Server)
- Basic command line knowledge (very basic, I promise)
- About 30 minutes of your time
Step 1: Choose a VPS Provider
There are many VPS providers out there.
I personally use Contabo for its excellent price-to-resources ratio, but you can choose any provider you’re comfortable with.
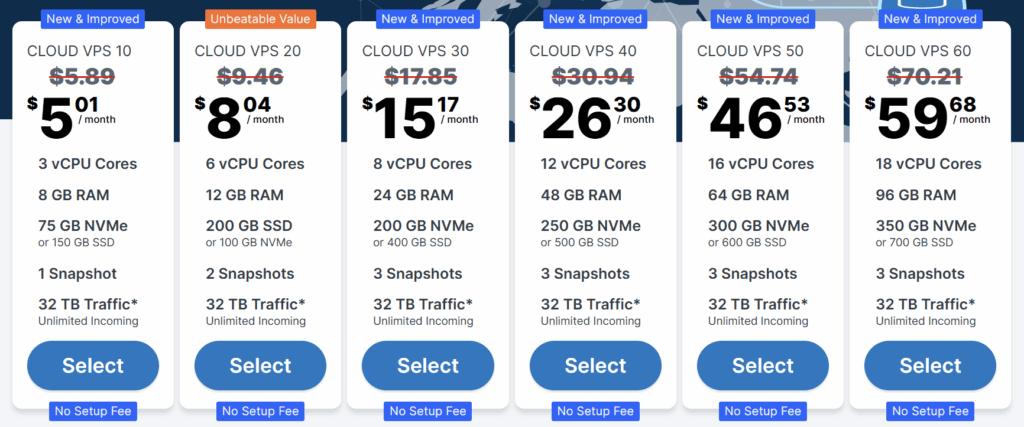
For this tutorial, I’ll use an 6 CPU/12GB RAM VPS from Contabo (~$8/month), which is more than enough for several websites, APIs, and services.
Try Before You Buy:
If you just want to test this setup, you can get free credits on Digital Ocean, or even install a virtual machine locally on your computer as a lab environment.
Get your VPS with Ubuntu as the operating system and Note down your server’s IP address, username, and password.
Step 2: Install Coolify (Your New Hosting Panel)
Why Coolify?
- Can manage multiple servers (local and remote)
- Free and open-source
- Docker-based (Docker lets you run applications in isolated containers, making it easier to deploy and manage different services)
- Scalable
- Supports virtually anything you want to host
- Hundreds of one-click installations
- Automated SSL certificates
⚡️ In short: It’s a self-hosted alternative to platforms like Vercel, Kinsta, and Railway.
Coolify is really Cool!
Connect to your server using any SSH client:
- Terminal (Mac/Linux)
- Termius
- Bitvise
- PuTTY
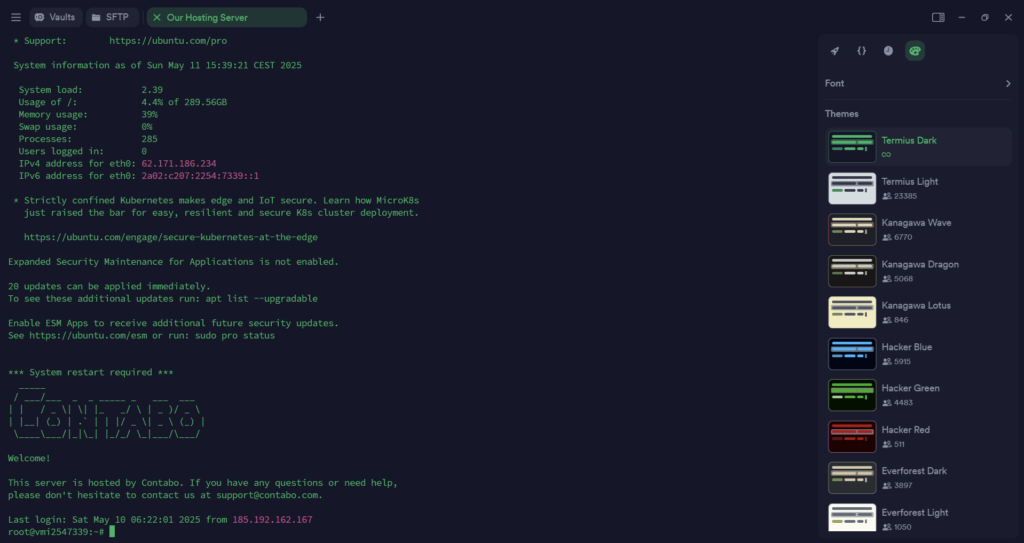
Run this command:
curl -fsSL https://cdn.coollabs.io/coolify/install.sh | sudo bashSit back and enjoy the automated installation.
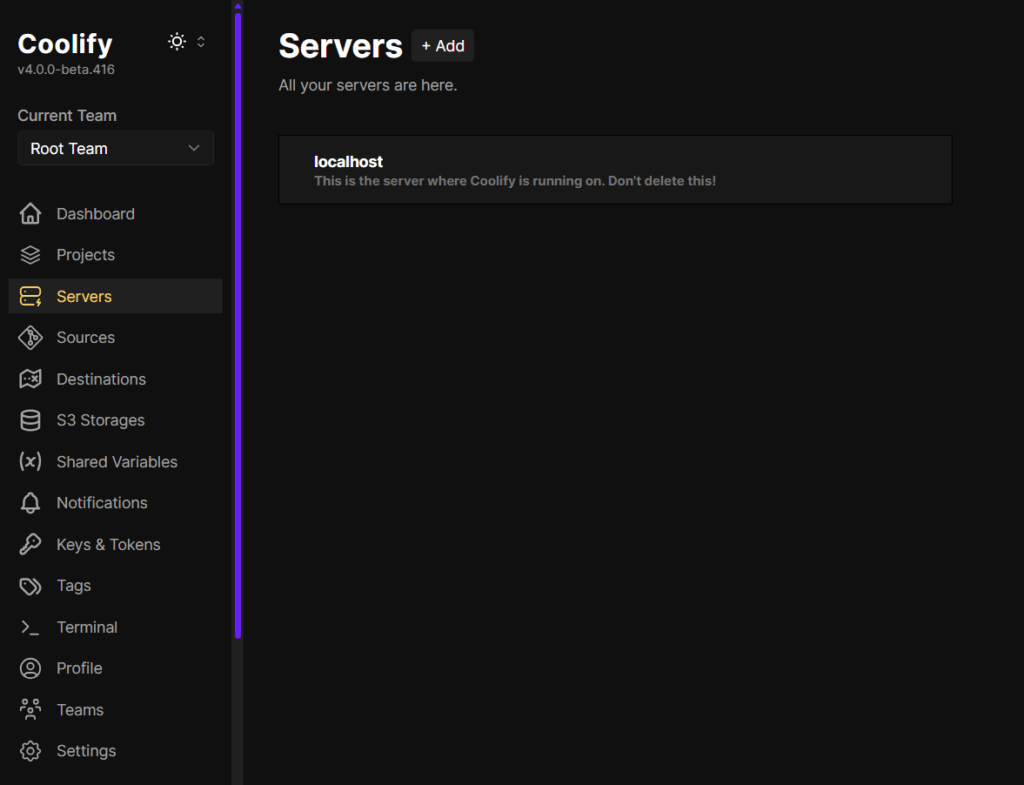
After a few moments, you’ll see a URL to access your Coolify dashboard.
Open it in your browser, sign up, and you’re in!
Step 3: Deploy Your First WordPress Site
Let’s start with something familiar – WordPress:
- In Coolify, go to “Resources” → “Create New“
- Select → “WordPress“
- Fill in the basic details:
- Name: Your site name
- Domain: yourdomain.com
- Database password: Create a secure password
- Click “Create”
Coolify will automatically:
- Create a MySQL database
- Install WordPress
- Set up automatic SSL with Let’s Encrypt
Within minutes, your WordPress site will be live!
Important Note: Don’t forget to point your domain to your VPS IP address by creating an A record in your domain registrar’s DNS settings. This typically looks like:
- Type: A
- Name: @ (or subdomain like “www”)
- Value: Your VPS IP address (e.g., 123.456.789.10)
- TTL: 3600 (or “Automatic”)

DNS changes can take anywhere from a few minutes to 48 hours to propagate globally.
Once propagation is complete and Coolify has set up your SSL certificate, your WordPress site will be live and secure!
Add Tools Like n8n, MongoDB, Redis, APIs, and More…
Coolify isn’t just for WordPress.
You can install and manage dozens of powerful tools—the same tools big companies use—right from the dashboard.
Automate Your Workflows with n8n
Want to automate tasks like sending emails, connecting APIs, or syncing data between apps?
Just search for n8n in the Coolify dashboard and deploy it with one click.
No Zapier limits. No Make.com bills. Total control.
Host Your Own Databases: MongoDB, PostgreSQL, MySQL
Need a database for your apps?
- MongoDB for document-style data (APIs, content, apps)
- PostgreSQL for relational data (e.g., user accounts, ecommerce)
- MySQL if you need compatibility with WordPress or PHP apps
All with one-click installs and web dashboards to manage them easily.
Boost Performance with Redis
Need a lightning-fast in-memory database for caching, queues, or real-time apps?
Redis is just one click away too.
🚀 Example Use Case: Speed up your APIs or WordPress Sites
Deploy Your Own APIs and Frontends
If you have:
- A Python API (FastAPI, Flask, Django)
- A Next.js or React frontend
- A custom backend in Node.js, Go, or anything Docker-based
Coolify makes deployment super easy:
- Connect your GitHub repo
- Or upload your Docker image manually
- Coolify handles SSL, reverse proxy, and health checks automatically
🎯 Example: I host 3 FastAPI apps, 2 Next.js apps, and a few microservices—all on the same server.
Works perfectly!
🛡️ Is Self-Managed Hosting Secure?
Yes — Here’s What You Need to Know
One of the first things people ask me is:
“But isn’t self-hosting risky? What if I get hacked?”
Good question. The truth is: Yes, there are risks—but they are 100% manageable.
If you follow some basic security steps (which I’ll share below), your self-managed server can be just as safe—or even safer—than a shared hosting account.
🔐 1. Allow Only the Ports You Need
By default, servers may have unnecessary ports open.
You only need:
- Port 80 (HTTP)
- Port 443 (HTTPS for SSL)
- SSH port (used for remote access)
👉 Pro Tip: Change your SSH port from the default 22 to something random like 2222 to avoid bot attacks.
🚫 2. Block Brute-Force Attacks with Fail2Ban
Fail2Ban is a simple but powerful tool that watches for failed login attempts and automatically blocks IPs that keep trying the wrong password.
It protects your SSH access and keeps bots away.
One line install:
sudo apt install fail2ban -y
Then it runs in the background like your own private guard dog.
🧯 3. Use Strong Passwords and SSH Keys
If you’re using passwords to log in, make sure they’re long and unique.
Even better? Use SSH keys instead of passwords.
Bonus: You can also enable 2FA inside Coolify for an extra layer of protection on the dashboard.
🌐 4. Use Cloudflare to Hide Your Real Server
Cloudflare acts as a protective shield in front of your server.
It hides your server’s IP address and stops things like:
- DDoS attacks
- Bots
- Suspicious countries
- Traffic spikes
It also gives you free SSL certificates and speeds up your site globally with caching.
🛠️ 5. Keep Everything Updated
This is the #1 rule in server security:
- Keep Ubuntu updated (
sudo apt update && sudo apt upgrade) - Let Coolify auto-update your apps if needed
Old software = known vulnerabilities.
Set a reminder to check once a month (or automate it with unattended upgrades).
📩 6. Setup Email Alerts for Critical Events (Optional)
You can install Netdata or other monitoring tools to:
- Monitor CPU, memory, disk usage
- Get alerts if anything goes wrong
- Detect intrusions or downtime fast
Set up email alerts or Slack notifications if you’re managing important apps.
💾 Backup Your Server — Just in Case
One thing to never skip—automated backups.
Even if your server is stable, accidents can happen:
You might delete something, break a config, or get hit by a bad update.
The good news? Backing up a self-managed server is easier than you think.
Here are a few ways to do it:
🟢 VPS Provider Snapshots
Most VPS providers (like Contabo, DigitalOcean, & Linode) let you create full system snapshots.
It’s like a restore point—one click and your server is back to normal.
- Use manual snapshots before major updates
- Or schedule automated weekly backups
🟢 Rsync or BorgBackup
If you’re a bit more hands-on, tools like rsync or BorgBackup can sync your server files to another location (even to your home PC or another VPS).
- Set it to run daily with a cron job
- Compress and encrypt backups for safety
Monitoring Your Server
One of the key advantages of self-managed hosting is the ability to see exactly what’s happening with your server resources.
Monitoring is essential to ensure optimal performance and to know when it’s time to scale up.
Setting Up Netdata
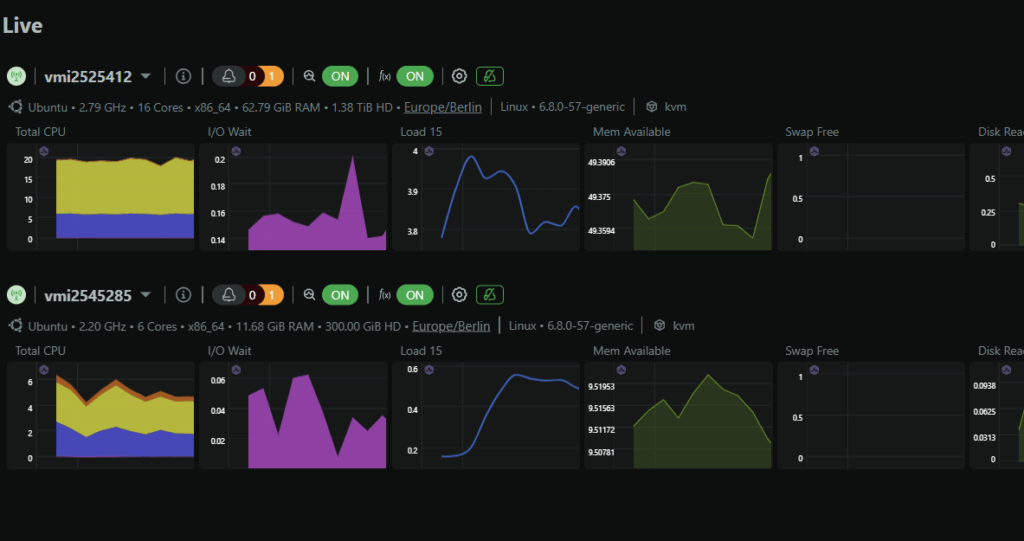
Netdata is my preferred monitoring solution because it’s free, lightweight, and provides real-time insights with a beautiful dashboard:
and what really cool, it has simple one command automated installation
- CPU usage across all cores
- RAM utilization
- Disk I/O and space usage
- Network traffic
- Docker container performance
- And much more!
Key Metrics to Watch
Pay particular attention to these metrics:
- CPU Load: If consistently above 70%, consider upgrading
- RAM Usage: If you’re regularly hitting 80%+ of capacity
- Disk Space: Keep at least 25% free space
- Swap Usage: High swap usage indicates you need more RAM
Setting Up Alerts
Netdata allows you to configure alerts so you’re not constantly checking dashboards:
- Configure email notifications in Netdata settings
- Set up Discord or Slack notifications for immediate awareness
- Create custom alert thresholds based on your applications’ needs
With proper monitoring in place, you’ll know exactly when your digital business has outgrown your current server – a good problem to have!
🧘 Final Thought: Don’t Let Fear Stop You
Most people get stuck at “what if something goes wrong?”
But trust me—you don’t need to be a DevOps engineer to keep your server safe.
Today’s tools like Coolify make it almost plug-and-play.
My own server has been running for over a year with zero incidents.
Just follow the steps above, and you’ll sleep well at night.
⚠️ Self-Hosting Isn’t for Everyone — And That’s Okay
Let’s be real for a second.
Self-managed hosting is powerful, but it’s not the perfect solution for everyone.
If you:
- Only have one simple WordPress blog
- Don’t plan to scale or launch multiple tools/services
- Prefer zero maintenance and just want to focus on publishing content
…then a traditional managed hosting provider like Hostinger, Bluehost, or even Kinsta might suit you better.
They’ll handle everything for you, and you won’t need to think about security, scaling, or updates.
But Here’s Why I Still Choose Self-Hosting (Even for a Blog)
For me personally—even if I only had one blog—I’d still go the self-hosted route.
Why?
- I enjoy having full control
- I like knowing exactly what’s running and how
- I want to keep the freedom to grow and experiment
💡 Self-Hosting Is Perfect for Builders and Experimenters
If you:
- Like to build and test product ideas quickly
- Want to host multiple services without paying for each one
- Need to spin up prototypes without blowing your budget
Then self-managed hosting is absolutely the right choice.
It gives you a low-cost lab where you can experiment, iterate, and launch—all on your own server.
And Remember: You Can Always Switch Later
One of the best parts of this approach?
You’re not locked in.
You can start with self-hosting and move to managed later—or vice versa.
What matters most is that you choose the setup that fits your current stage, goals, and skill level.
And if one day you feel like leveling up your control, saving money, and learning something cool?
You know where to find this guide 😉
FAQs
Is self-managed hosting difficult to maintain?
Not with modern tools like Coolify.
My server has been running for over a year without issues. I’ve even forgotten about it at times! The user-friendly interface makes management similar to managed hosting solutions.
What if I need more resources?
That’s the beauty of VPS hosting – you can easily scale up. Most providers allow you to upgrade with just a few clicks.
How reliable is this setup?
In my experience, extremely reliable. However, I recommend setting up regular backups.
Will domain propagation and SSL setup be immediate?
Domain propagation can take up to 48 hours (though usually much faster). Automatic SSL certificates might take a few minutes to issue and configure.
Can I host email on this setup too?
You can, but I generally recommend using dedicated VPS for Email Servers for better deliverability and less maintenance.
Have you tried self-managed hosting? What services are you running? Let me know in the comments below!
Remember: Building a successful digital business isn’t about finding shortcuts – it’s about making smart, sustainable choices that give you both control and efficiency.
Self-managed hosting is one of those choices that can transform your business economics while expanding your technical capabilities.


