
How to Self-Host Your Own S3 Storage with MinIO in 2025 (Complete Guide)

Let me share something that changed my whole approach to cloud storage.
Instead of paying for AWS S3, Google Cloud Storage, or any other cloud storage service, you can host your own S3-compatible storage.
Today? I pay $0 for storage fees.
The secret? MinIO – a self-hosted S3-compatible storage that runs on your own server.
And before you think “this sounds complicated” – I’ll show you how to deploy it in literally 10 minutes with Coolify.
What is MinIO? (30-Second Explanation)
Think of MinIO as your personal Amazon S3 that lives on your server.
It’s:
- 100% S3-compatible (any app that works with AWS S3 works with MinIO)
- High-performance object storage
- Self-hosted (you control everything)
- Free for the community edition
Any WordPress plugin, Python script, or app that connects to S3 will work with MinIO. Same API. Same commands. But on your server.
Prerequisites
Before we start, you need:
- A VPS or server (with Coolify installed)
- Docker Desktop installed on your computer (Download here)
That’s it. Let’s build.
Deploy MinIO with Coolify (One-Click Setup)
Forget complex Docker commands. With Coolify, you can deploy MinIO in one click.
Here’s how:
- Log into your Coolify dashboard
- Click “New Resource” → “Services”
- Search for “MinIO” and click it
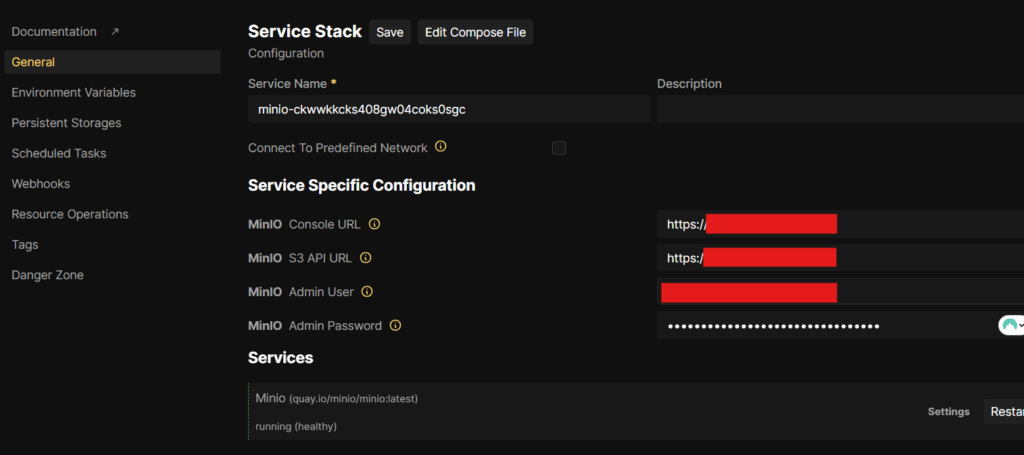
- Configure these fields:
- MinIO Console URL:
console.yourdomain.com(for web UI) - MinIO S3 API URL:
s3.yourdomain.com(for S3 API access) - MinIO Admin User:
youradminuser - MinIO Admin Password:
yoursecurepassword
- MinIO Console URL:
- Click “Deploy”
Coolify handles everything – SSL certificates, reverse proxy, Docker setup.
Note: Save your admin credentials. You’ll need them to connect.
Run mc and Set Alias (one-time setup)
MinIO uses a command-line tool called mc to manage everything. We’ll run it through Docker.
First, create a folder to store your MinIO configuration:
Windows (PowerShell):
docker run --rm -it `
  -v C:\Users\hasan\.mc:/root/.mc `
  minio/mc alias set myminio https://s3.powerkit.dev `
  2upEEmKmJXXXXfZPy Jy8QkHvZoTky9sreXXXXXXXXXCfFtaIbvJr9
Note: Replace with your User Path, URL, username and password (from Coolify Dashboard)
✅ This will:
- Create a persistent alias named
myminio - Save config to
C:\Users\hasan\.mcon your Windows machine
Use mc to Interact with MinIO
Test the connection:
docker run --rm -it `
  -v C:\Users\hasan\.mc:/root/.mc `
  minio/mc ls myminio
If you see no errors, you’re connected!
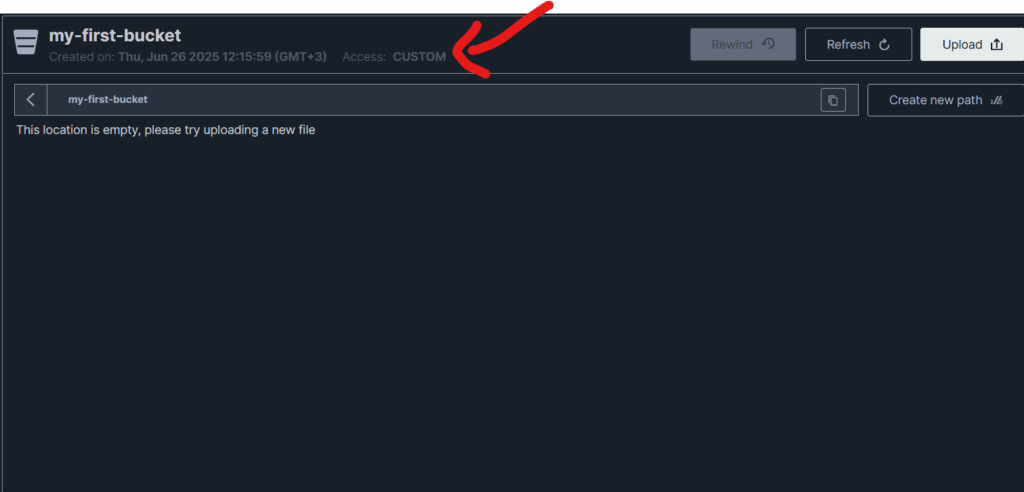
Create Your First Bucket
Creating a bucket is one command:
docker run --rm -it `
  -v ${HOME}\.mc:/root/.mc `
  minio/mc mb myminio/my-first-bucket
List all your buckets:
docker run --rm -it `
  -v ${HOME}\.mc:/root/.mc `
  minio/mc ls myminio
Create and Test Access Keys in MinIO (Community Edition)
Here’s how to create programmatic access (like AWS access keys):
1. Create a new user:
docker run --rm -it `
  -v C:\Users\hasan\.mc:/root/.mc `
  minio/mc admin user add myminio testuser123 testsecret456
2. Grant permissions:
docker run --rm -it `
  -v ${HOME}\.mc:/root/.mc `
  minio/mc admin policy attach myminio readwrite --user testuser123
Now you have:
- Access Key:
testuser123 - Secret Key:
newsecretkey
These work exactly like AWS credentials in any S3-compatible app.
Make a Bucket Public (Optional)
Want to serve images or files directly from URLs? Make your bucket public.
1. Create a public policy file (save as public-read.json on your Desktop):
{
  "Version": "2012-10-17",
  "Statement": [
    {
      "Action": ["s3:GetObject"],
      "Effect": "Allow",
      "Principal": {"AWS": ["*"]},
      "Resource": ["arn:aws:s3:::my-first-bucket/*"]
    }
  ]
}
2. Apply the policy:
# apply the policydocker run --rm -it `
-v C:\Users\hasan\.mc:/root/.mc `
-v C:\Users\hasan\OneDrive\Desktop:/data `
minio/mc admin policy create myminio public-read /data/public-read.json
✅ Next Step: Attach Anonymous Access to the Bucket
docker run –rm -it -v C:\Users\hasan\.mc:/root/.mc `
minio/mc anonymous set download myminio/my-first-bucket
That makes everything in test-bucket publicly readable via:
https://s3.yourdomain.com/my-first-bucket/filename.jpg
Test with Python (30 Seconds)
Install boto3 first:
pip install boto3Create this Python script (test_minio.py):
import boto3
from botocore.client import Config

# Your MinIO config
s3 = boto3.client(
    "s3",
    endpoint_url="https://s3.yourdomain.com",
    aws_access_key_id="newuser",
    aws_secret_access_key="newsecretkey",
    config=Config(signature_version="s3v4"),
    region_name="us-east-1"
)

# Create a test file
with open("test.txt", "w") as f:
    f.write("Hello from MinIO!")

# Upload the file
s3.upload_file("test.txt", "my-first-bucket", "uploaded-test.txt")
print("✅ File uploaded!")

# List files
response = s3.list_objects_v2(Bucket="my-first-bucket")
if 'Contents' in response:
    for obj in response['Contents']:
        print(f"📄 {obj['Key']}")
Run it:
python test_minio.pyPro Tip: Create a PowerShell Function (Windows Users)
Add this to your PowerShell profile to make commands easier:
function mcd {
    docker run --rm -it -v ${HOME}\.mc:/root/.mc minio/mc $args
}
Now you can use:
mcd ls myminio
mcd mb myminio/new-bucket
Real-World Use Cases
I use MinIO for:
- WordPress media storage (with S3 Offload plugin)
- Backup storage
- API file uploads in SaaS apps
Common Issues & Solutions
“docker: command not found”
- Install Docker Desktop first
- Restart your terminal after installation
“x509: certificate error”
- Make sure your domain has valid SSL (Coolify handles this)
- Check if you’re using https:// in your endpoint
“Access Denied”
- Verify you attached a policy to the user
- Check if the bucket name is correct
- Make sure credentials are typed correctly
“Volume mount issues on Windows”
- Use
${HOME}instead of~in PowerShell - Check if Docker Desktop has file sharing enabled
What You Just Built
You now have:
- ✅ Your own S3-compatible storage server
- ✅ Unlimited buckets and users
- ✅ Public and private file hosting
- ✅ Zero monthly storage fees
- ✅ Complete control over your data
Every file you upload, every bucket you create – it’s all on your server.
Next Steps
Now that you have your own S3 storage:
- Connect WordPress to offload media files
- Set up automated backups with Python scripts
- Build a micro-SaaS that needs file storage
- Learn more about Self Hosting in my Self Managed hosting 2.0 Course
Remember – every minute you spend learning this saves you money every month.
Start with 30 minutes today. Deploy MinIO. Create a bucket. Upload a file.
Then watch your cloud storage bills disappear!