The Complete Docker Tutorial for Solopreneurs – 2025

When you’re building apps or websites, getting them to run the same way everywhere is a constant headache. Maybe it works fine on your laptop, but it crashes on your server. One project needs Python 3.9, another needs 3.11, and suddenly your environment is a mess.
Docker fixes this by putting your entire app—code, dependencies, runtime, everything, into a single, portable unit called a container.
For solopreneurs who don’t have time to mess with server configs and version conflicts, Docker is a lifesaver.
Here’s why it matters:
- Your app runs exactly the same on your laptop, server, or teammate’s machine
- No more “it works on my machine” issues
- Each project is fully isolated — no more broken apps from dependency clashes
- You can switch hosting providers in minutes, not days
Docker simplifies the complex parts of deployment, allowing you to focus on building, not fixing.
How Docker Helps Solopreneurs
As a solopreneur, you wear many hats. You shouldn’t need to become a server administrator just to host your business apps.
Here’s why Docker is so powerful for self-hosting:
1. No More “Works on My Machine” Problems
With Docker, your app and all its dependencies run inside a container. That means it runs exactly the same whether it’s:
- On your laptop
- On your VPS
- On your teammate’s computer
You build once, run anywhere.
2. No Conflicts Between Projects
With traditional hosting, installing Python 3.9 for one app might break another that needs Python 3.11. With Docker:
- Each app has its own isolated environment
- No more dependency hell
- No more fear of breaking existing apps
3. Easy to Backup, Migrate, and Scale
Your app becomes an image. You can:
- Push it to a private registry
- Clone it to a new server
- Run multiple containers from the same image
This means easy backups, simple server migrations, and clean scalability (more containers = more power).
I’ve personally reduced my hosting costs by about $700 per month while gaining more control, keeping my data secure, and improving performance.
Getting Started: Installing Docker Desktop in Minutes
Let’s get Docker running on your computer. We’ll use Docker Desktop, which is free and handles all the complex setup automatically.
For Windows/Mac Users:
- Go to docker.com/products/docker-desktop
- Download Docker Desktop for your operating system
- Run the installer (like installing any other software)
- Restart your computer when prompted
Once installed, open your terminal/CMD and type:
docker --version
You should see something like “Docker version 27.x.x”. Congratulations! Docker is ready.
Build a Simple App With Docker
Let’s prove Docker works by running a simple web server. Open Docker Desktop, then open your terminal and run this command:
docker run -p 8080:80 nginx
What just happened?
- Docker downloaded the Nginx web server.
- Created a container running that server
- Made it available at http://localhost:8080
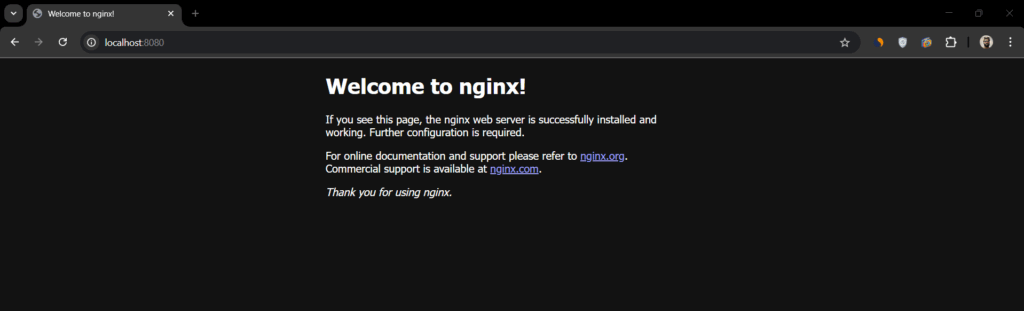
Wait for the download to finish, and once it’s done, open your browser and visit http://localhost:8080. You’ll see a “Welcome to nginx!” page.
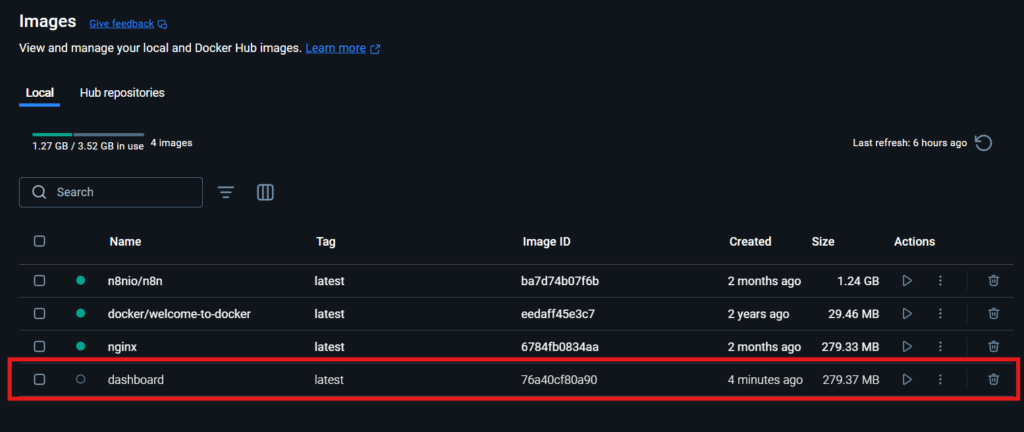
And, if you open the Docker Desktop app, you’ll see that it created a new container and it’s running from there:
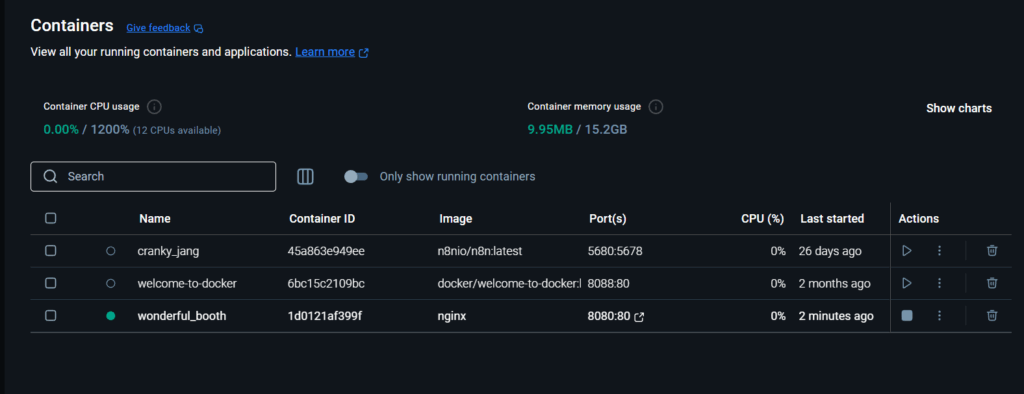
As you can see, the third one is an nginx image, and it’s running. Now, if you want to stop this container, you can either:
- Press the pause button in Docker Desktop, which is under the “Actions” column.
- Press Ctrl + C directly from your terminal
- From a new terminal/CMD, paste this
docker stop [container-name-or-id]
Congrats! You just deployed your first application with Docker!
Pro Tip – Managing Containers:
To see what containers are currently running:
docker ps
To see all containers (including stopped ones):
docker ps -a
This might seem simple, but you accomplished something powerful: you ran a professional web server without installing anything permanently on your computer.
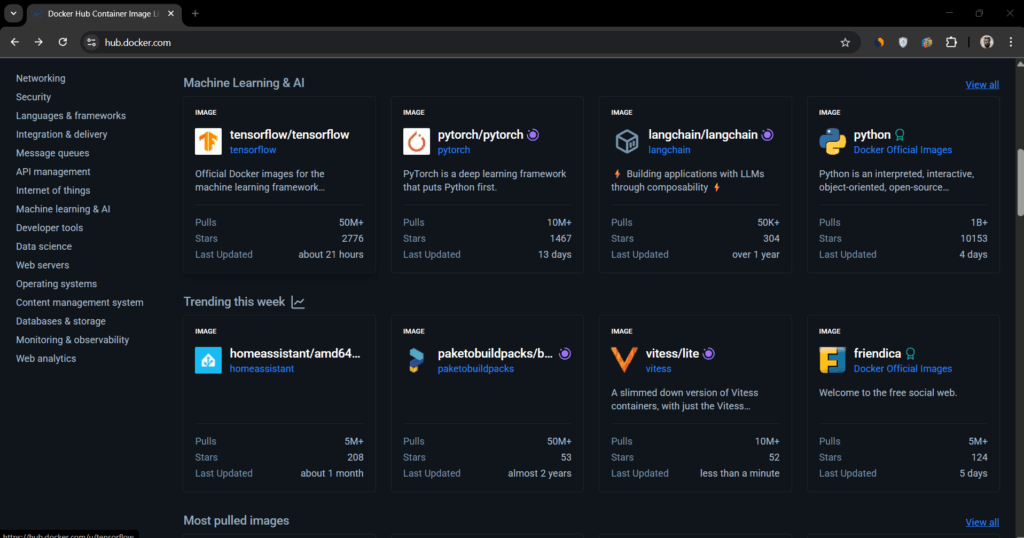
Docker Hub & Images Explained
When you ran nginx Above, Docker downloaded the Nginx image from Docker Hub, which is like an app store for containers.
Docker Hub hosts thousands of pre-built images:
- nginx: Web server
- wordpress: Complete WordPress installation
- MySQL: Database server
- Python: Python runtime environment
- Node: Node.js applications
Pulling and Pushing Docker Images
Pulling means downloading an image:
docker pull wordpress
docker pull mysql
Pushing means uploading your custom image to a registry. We’ll cover this later in the article.
To see your downloaded images:
docker images
Here’s the thing about Docker Hub: although the free plan offers unlimited public repositories (anyone can download, like nginx above), it limits you to one private repository. So, if you’re building multiple business applications, you’ll hit this limit fast. Here’s the basic concept:
Traditional Approach:
- Pay Docker Hub $5+/month for private repositories
- Limited storage and bandwidth
- Dependent on their service
Your Private Registry:
- Unlimited private images (as much as your VPS can handle)
- Full control over your data
- Costs only what you pay for server hosting
That’s why I’ll show you how to create your own unlimited private registry.
Setting Up a Private Docker Registry (Store Unlimited Apps for Free)
Instead of paying Docker for additional private repositories, let’s create your own registry. This is where Self-Managed Hosting really shines, where you can set it up easily with Coolify.
Coolify is a self-hosted platform that makes managing Docker containers as simple as clicking buttons. I personally use it to host all my WordPress websites, Redis and MongoDB databases, FastAPI APIs, N8N, and, most importantly, my Docker private registry.
Setup Using Coolify:
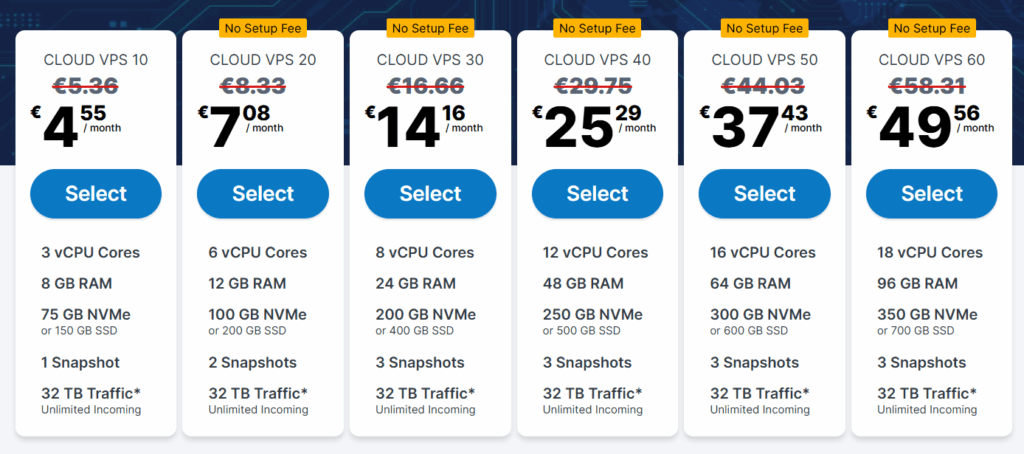
The first step is to set up a cloud server (VPS). I’ll be using Contabo for this case because it provides good infrastructure at a reasonable price.
You can start with the ~5$ plan and scale up when needed:
Once you finish, use an SSH client of your choice or even your terminal to log in to your server, then run this one-liner to install Coolify:
curl -fsSL https://cdn.coollabs.io/coolify/install.sh | sudo bash
After the download is complete, it will give you the server IP, so just click on the public IPV4; mine is this:

It will direct you to the account creation page. Create your admin account and save the credentials in a safe location. With this, your Coolify dashboard is now set up.
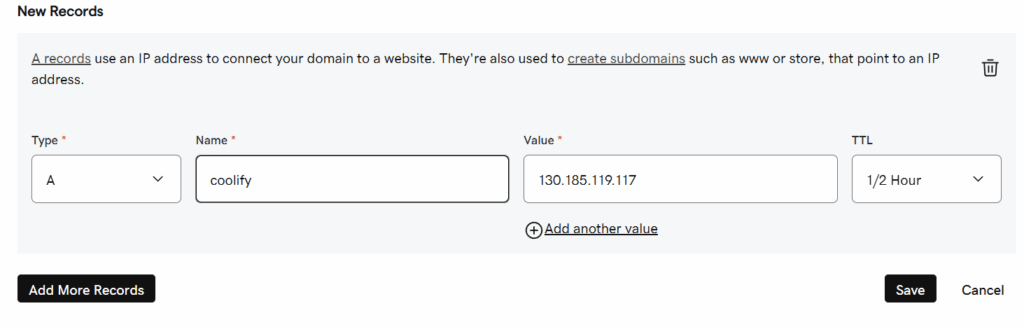
One last thing is that we have to point Coolify to a subdomain of our own, so go to your domain provider, then navigate to the DNS records, and add a new A record with the name set to coolify, which is our subdomain, and the value is the IP address of your own VPS, so you’ll get something like this, but with your own IP:
Then go to the coolify settings, and change the Instance Domain to your own subdomain; here is mine:
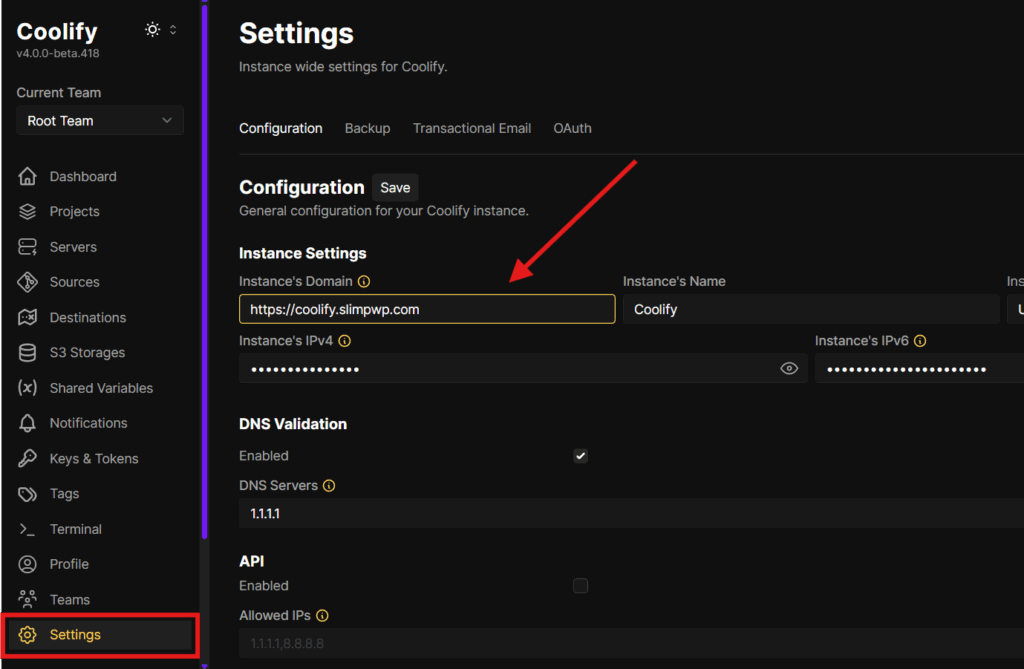
Now you should be able to open Coolify using our own custom subdomain.
Note: It may take some time for your domain provider to update and point your new subdomain correctly.
Setting Up the Docker Registry
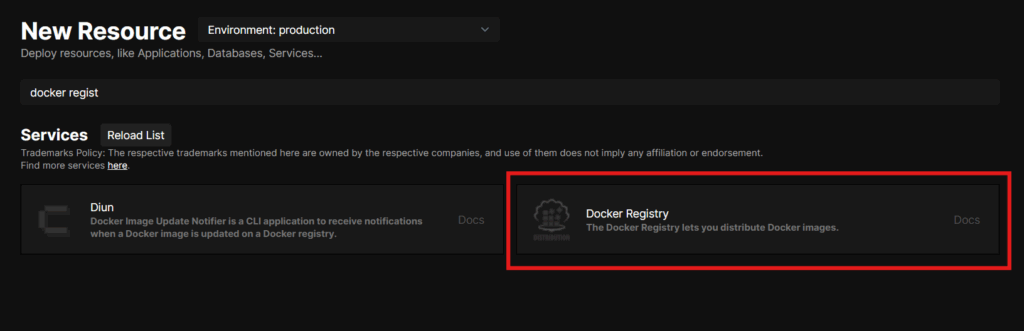
Go to resources, add Docker Registry, and deploy it:
Once deployed, you can find its link here:
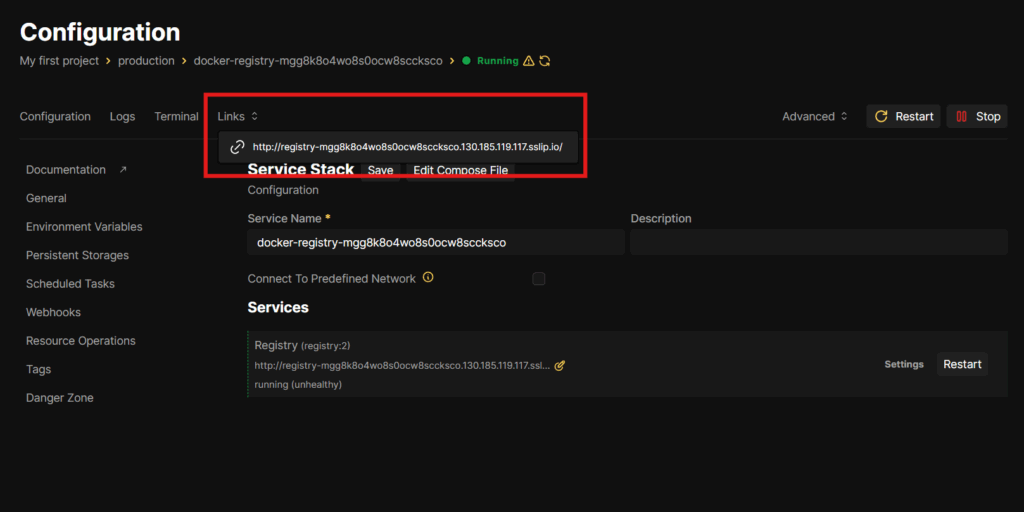
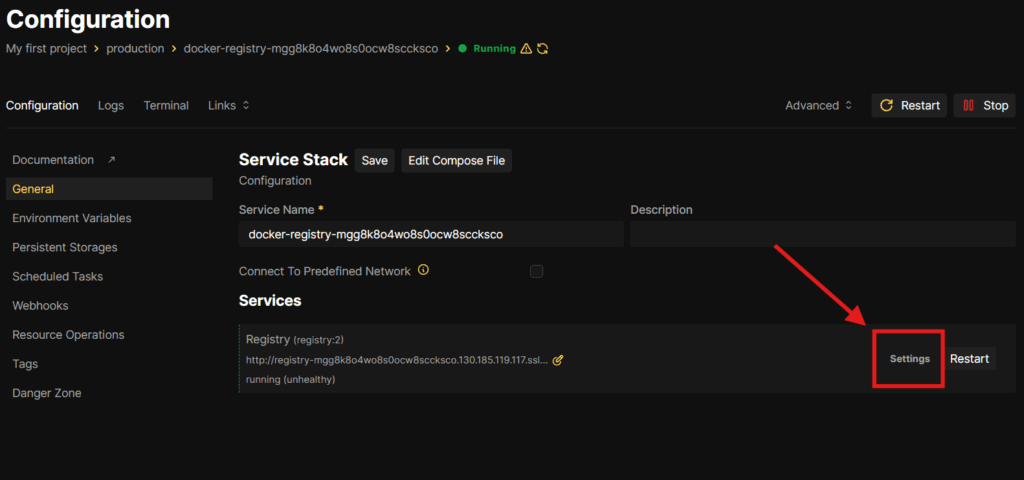
This is the default link that Coolify gives you. But, we’ll have to change it to a subdomain of our own to be able to continue, so go to the services settings:
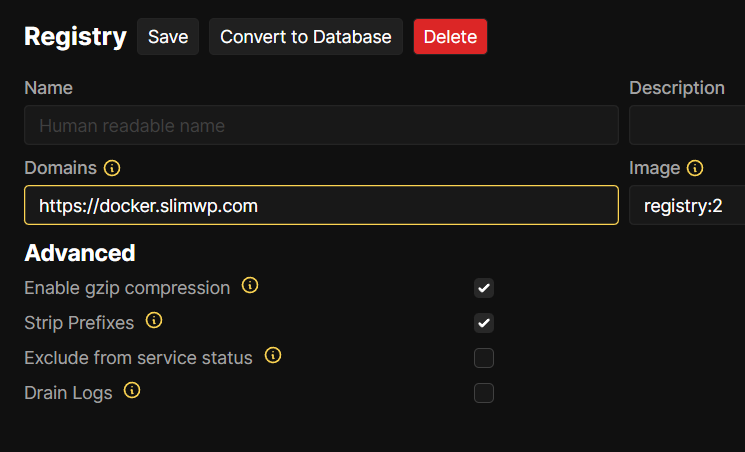
And, change it to a subdomain of your own like this:
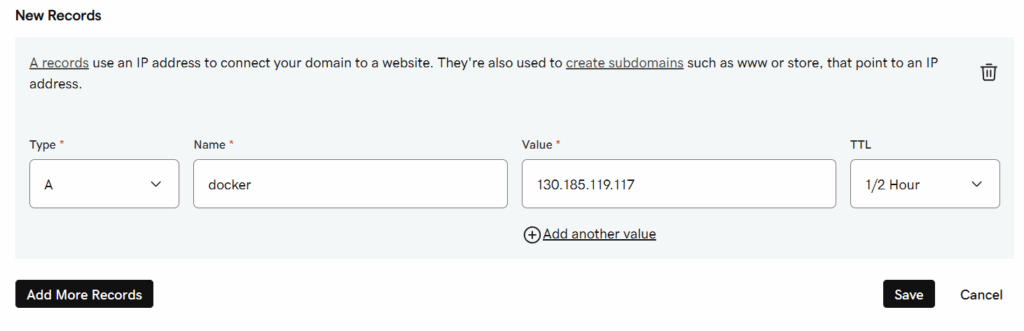
Then, we’ll have to add another A record in our domain provider as we did above, but now the name will be set to docker, and the value is the IP address of your own VPS, so you’ll get something like this, but with your own IP:
And finally, restart your Docker registry, and it’ll be ready to push our images directly to it.
Simple Example: Deploy a Custom Dashboard
Let’s create a simple Node.js project —a dashboard that displays key business metrics.
Step 1: Create Your Dashboard Files
First, open VS Code and create these files in a new folder:
package.json:
{
  "name": "business-dashboard",
  "version": "1.0.0",
  "scripts": {
    "start": "node server.js"
  },
  "dependencies": {
    "express": "^4.18.0"
  }
}
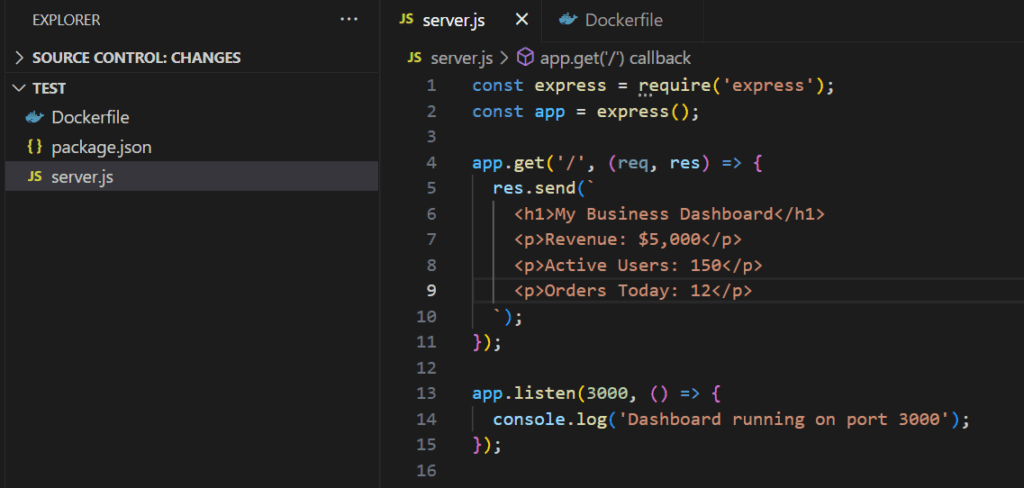
server.js:
const express = require('express');
const app = express();

app.get('/', (req, res) => {
  res.send(`
    <h1>My Business Dashboard</h1>
    <p>Revenue: $5,000</p>
    <p>Active Users: 150</p>
    <p>Orders Today: 12</p>
  `);
});

app.listen(3000, () => {
  console.log('Dashboard running on port 3000');
});
Step 2: Create Your Dockerfile
Dockerfile:
# Start from a clean Node.js base image (using latest LTS version)
FROM node:16-slim

# Set the working directory inside the container
WORKDIR /app

# Copy your local project files into the container
COPY . .

# Install required packages
RUN npm install

# Expose the port your app runs on
EXPOSE 3000

# Start your dashboard
CMD ["npm", "start"]
You will now have this structure:
Step 3: Build the Image
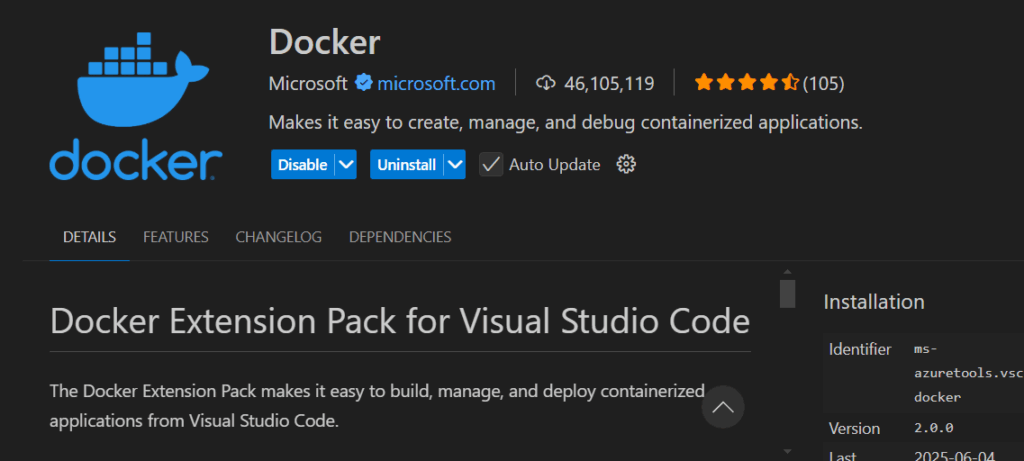
Instead of using terminal commands, let’s make it easier and use the Docker extension in VS Code:
- Make sure Docker Desktop is running on your computer
- Open your project folder in VS Code
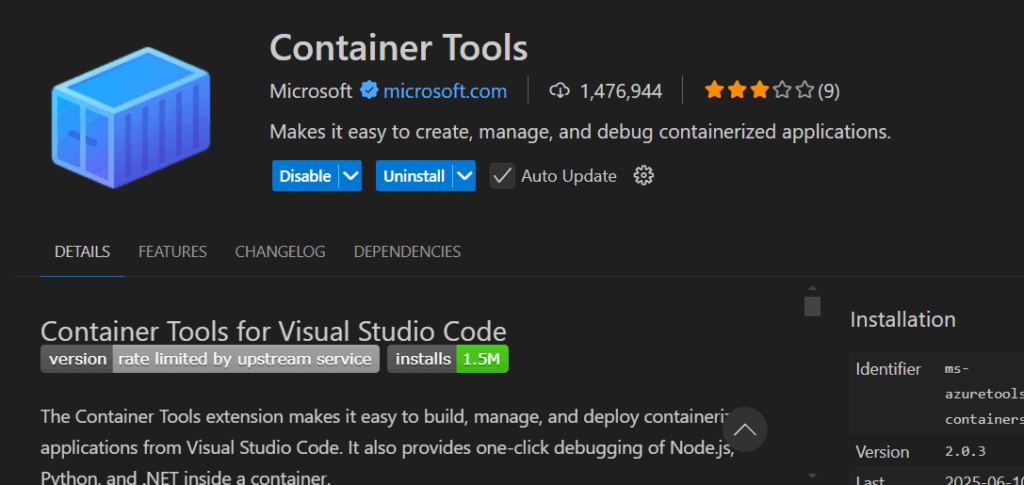
- Install the Docker & Containers extensions if you haven’t already
Now, right-click the Dockerfile in VS Code and click Build Image, and name it dashboard:latest
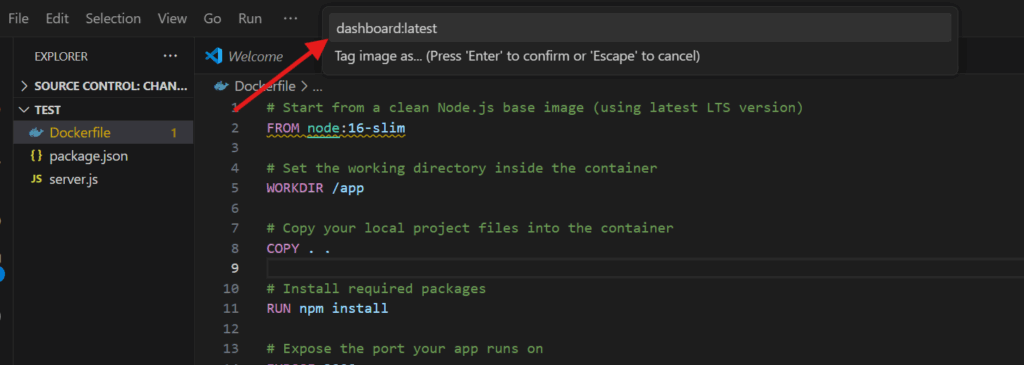
Click Enter and wait for it to create the Docker image of your dashboard; you should see it on Docker Desktop like this:
Step 4: Push to Your Private Registry
Next, we’ll connect VS Code to our self-hosted Docker registry by logging in to our registry through VS Code’s Docker Containers extension.
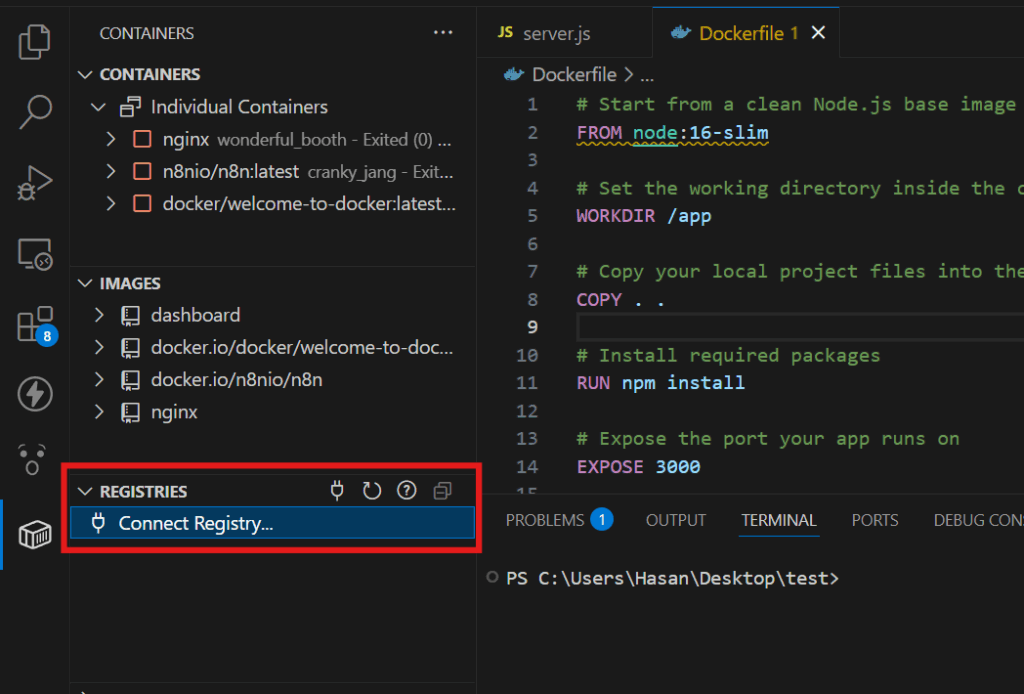
Click on it, then choose Generic Registry V2 from the options it presents and paste your Docker registry URL like this:

Then it asks for your registry’s username and password, which are by default generic for everyone:
- Username: testuser
- Password: testpassword
However, if you keep them as they are, your credentials will be exposed since they are already preset by Coolify. Therefore, we will change these credentials and use the new ones to connect VS Code to our Docker Registry.
To do that, log in to your Coolify through the SSH client as we did above, and paste this: sudo apt install apache2-utils
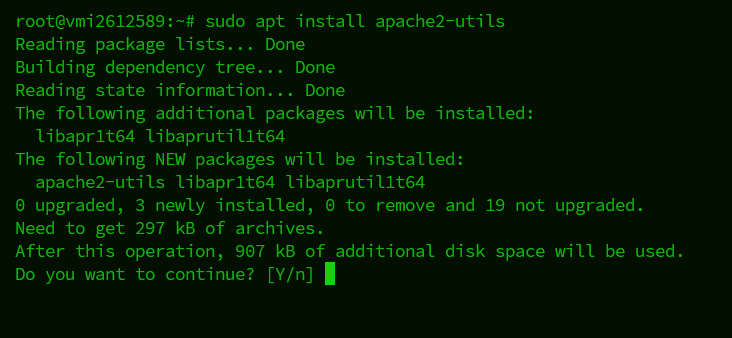
Now, enter Y, which is short for ‘yes,’ and wait for it to install. After that, we’ll have to choose our username and password. I’ll use admin and pass123456, like this:

As you can see, it worked and it gave me the new hashed password, now we’re gonna copy the whole line and paste it in Docker Registry, in the persistent storage section like this:
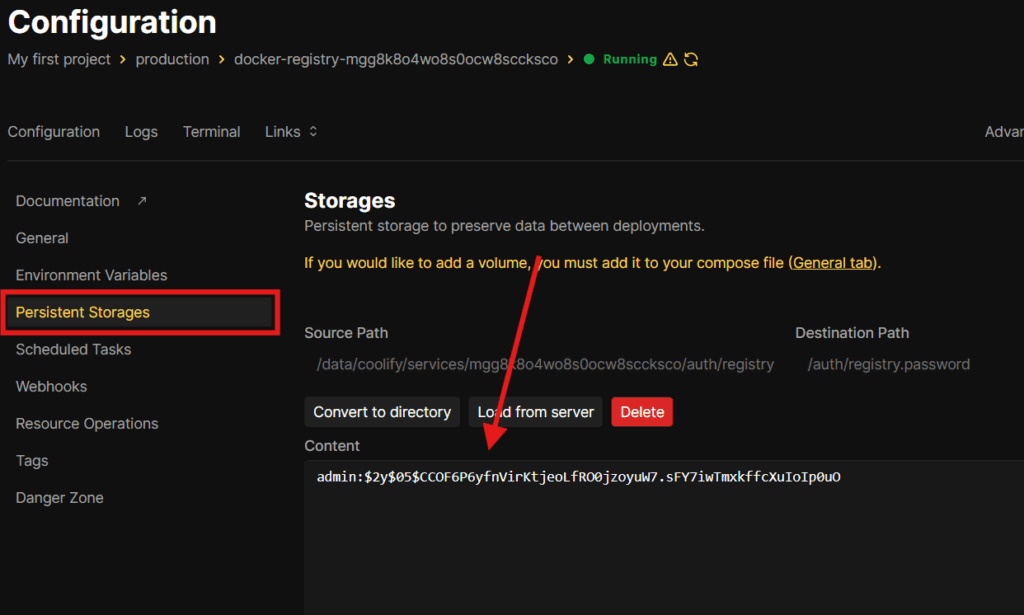
Now, restart your Docker Registry, and we are good to go!
So, back to VS Code, let’s continue authentication with our new username and password. When you do so, it should be now visible in your containers section like this:
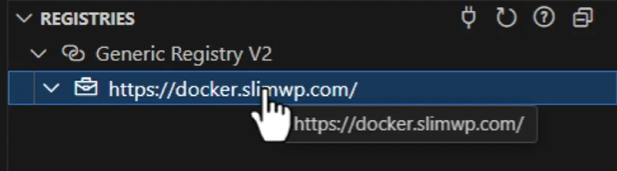
Now, since we’re connected, hover over the image we created, right-click your image → and “Push” to your private registry.
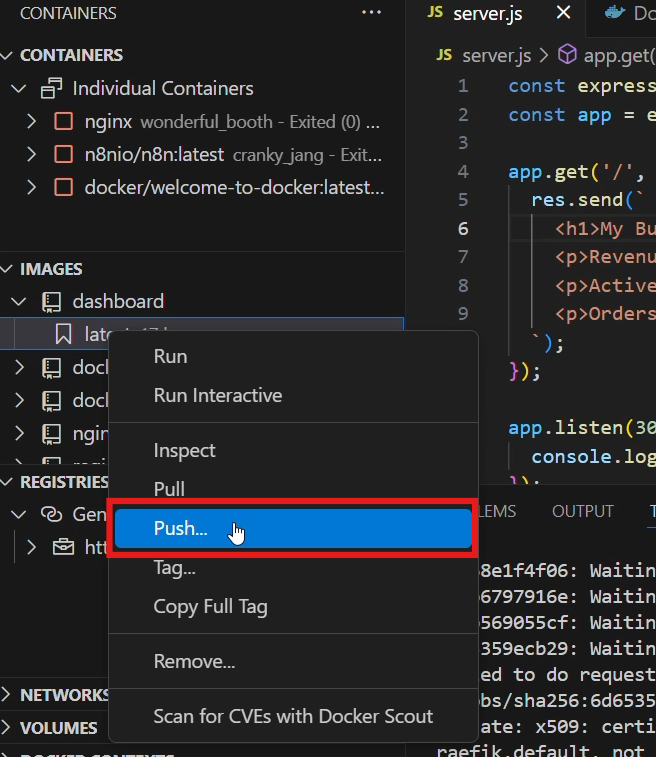
Finally, we have our Docker image pushed to our own private Docker registry with this name: docker.slimwp.com/dashboard:latest. Of course, yours would be your own subdomain, not exactly like mine.
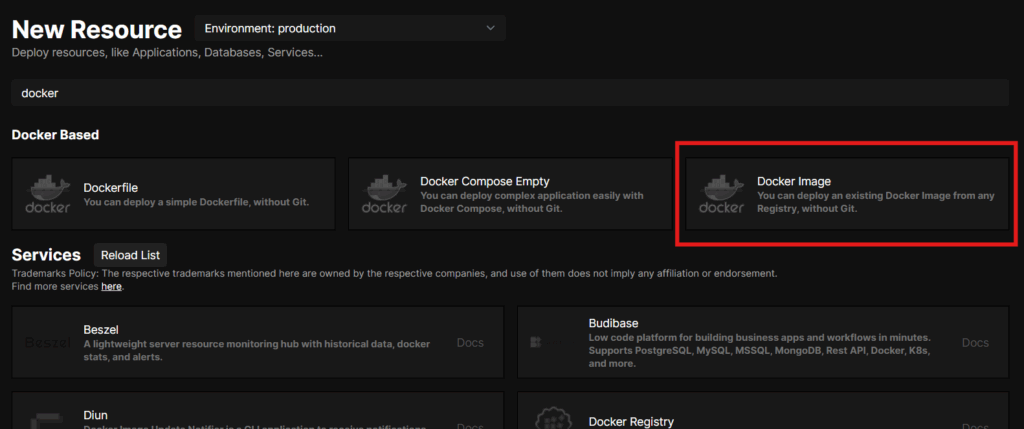
Step 5: Deploy with Coolify
Now, head back to Coolify, and create a new resource, then choose Docker image:
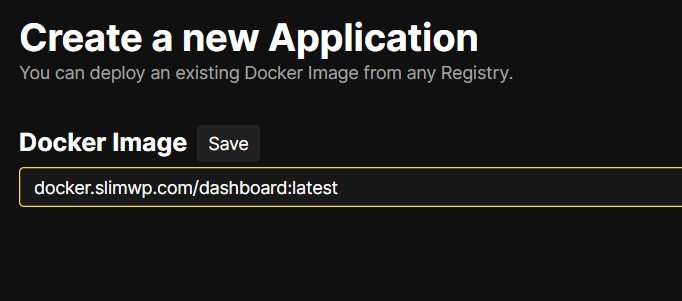
Enter the full image URL from your registry and save like this:
Now again, we’ll have to map it to a subdomain as we did above, I’ll name it in this case: https://dashboard.slimwp.com
Don’t forget to add its A record as well, where the name in this case will be ‘dashboard’ instead of ‘docker’.
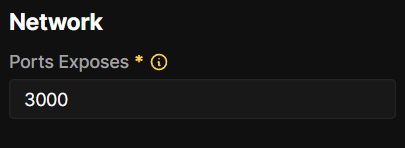
In addition, we’ll have to set the port to 3000 for this Node.js dashboard to work, so scroll to the networks section in your configuration and set the port to 3000 instead of 80 like this:
Now, if we click deploy, it will give us an error, because Coolify doesn’t have access to our Docker registry, so to give it access, we need to log in using the username and password we created above, which were admin and pass123456, like this:
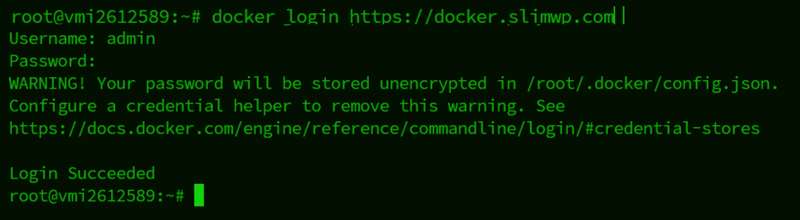
Now, click deploy, and that’s it, your custom dashboard is now live on your VPS with a professional domain and HTTPS certificate, all managed by Coolify:
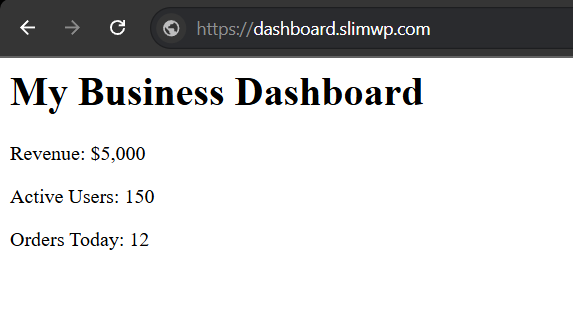
As you can see, in minutes we were able to deploy our simple Node.js application with the help of Docker and Coolify! And, now you can easily migrate it to any setup with a couple of steps instead of rewriting the whole application to fit the new setup infrastructure.
Ready to Take Control of Your Hosting?
Docker isn’t limited to such applications; it gives you the power to host anything, anywhere, without depending on expensive hosting providers or getting locked into specific platforms.
But learning all the production-ready techniques, security best practices, and advanced configurations can take months of trial and error. That’s why I created the Self-Managed Hosting course.
Inside, you’ll learn:
- How to set up and deploy projects using Coolify and VPS servers
- Security fundamentals: firewalls, SSH key access, sudo users, and 2FA
- Running your own email stack (SMTP, Mautic) and workflow automation tools like n8n
- Hosting your own databases and services (MongoDB, Redis, MinIO, WordPress)
- Docker networking, private registries, and multiple apps per IP
- Setting up automatic backups, remote storage, and restoring when needed
- Deploying production-ready apps, including your own Python APIs
And more sections are on the way.
If you’re ready to build your own hosting setup from scratch — and actually understand it — then join the Self-Managed Hosting course and build the stack you can trust.