How To Create Custom Make.com Apps and Sell Them as Mini SaaS!
Make offers a powerful feature that most people don’t know about.
You can lock your workflows with a password and sell them as API-like services building your own mini-SaaS easily.
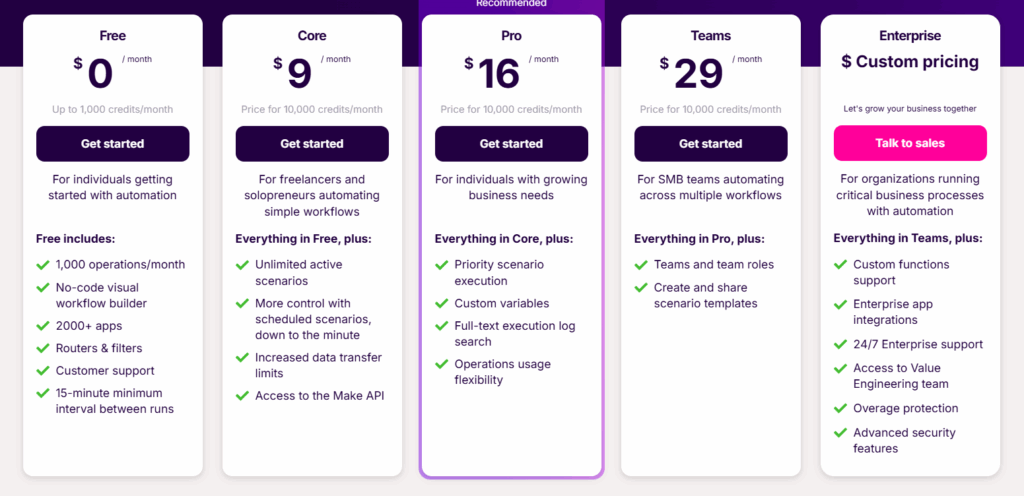
The best part? Make gives you 1,000 operations per month for free, so you can start building and testing without any upfront costs.
Why Custom Make Modules Beat Everything Else
When you create workflows using existing Make modules, anyone can replicate them. But when you build custom modules that call your own backend services, this would make your service stand out and hard to replicate.
This creates three distinct ways to make money:
- Complete Workflow Sales: Sell the entire setup as a one-time purchase with unlimited usage rights.
- Service Delivery: You run everything on your end and deliver results via email or reports.
- API Access Model: Clients pay monthly to use your custom module in their workflow.
The key is finding workflows that are hard to replicate and solve specific problems. The higher the demand and perceived value, the more you can charge.
Building Your Custom Backend
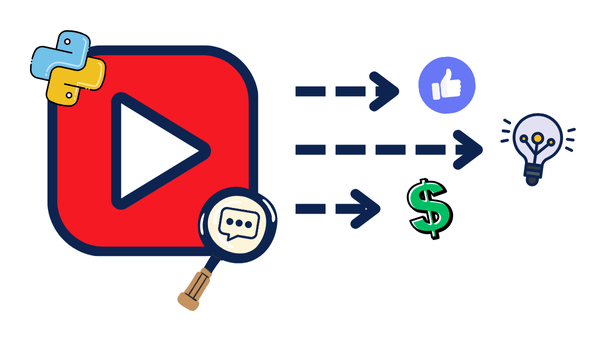
To simplify the idea, I’ll show you how to build a simple YouTube video transcript fetcher and turn it into a custom Make module. We’re using this example because there isn’t a Make module with such functionality, making it valuable and harder to replicate.
This functionality is incredibly valuable for:
- Content creators analyzing competitors
- Marketers extracting insights from videos
- Educators creating study materials
- Businesses monitoring brand mentions in videos
Creating Your Backend Service
In this case, the backend needs to:
- Receive a video ID: Takes a YouTube video ID as input.
- Process the request: Extracts the complete transcript from YouTube.
- Return structured data: Sends back the transcript text.
- Validate access: Only works with the valid API keys you provide.
You can build this backend using whatever you’re comfortable with, whether it is using traditional coding, no-code tools, cloud functions, etc. Choose what works for your skills and budget.
The important thing is creating functionality that solves a real problem and can’t be easily replicated.
Deployment: Making It Accessible
Once your backend is ready, you need to deploy it so Make (or any client) can call it via a public URL.
I deploy most of my apps, websites, and databases using Coolify on a self-hosted server. It costs me almost nothing and gives me full control. If you want to learn more, check out my complete guide on SelfHostSchool.
Here’s exactly how I deployed this FastAPI transcript service on Coolify (for a more detailed explanation check this tutorial):
- Prepare your project consisting of three files:
main.pyhandles the/transcriptendpoint that handles the functionality.requirements.txtused to download the needed libraries on deployment.Dockerfilepackage our application into a Docker image to be able to host on Coolify easily.
- Build Docker Image:
- Build and push your Docker image to Docker Hub.
- In Coolify: New Resource → Application → From Docker Image.
- Add your Docker Image.
- Set the exposed port to
8000.
- Add your API keys
- In Coolify, go to Environment Variables → New Variable and set:
- Name:
API_KEYS - Value:
HASAN2025,ANOTHER_API_KEY,THIRD_API_KEY
- Name:
- In Coolify, go to Environment Variables → New Variable and set:
- And, finally, Deploy!
- Test your endpoint
curl -H "x-api-key: HASAN2025" \ "https://<your-domain>/transcript?video_id=dQw4w9WgXcQ"
This is just a simplified version if you already have experience with deployment. However, if you want the full step-by-step tutorial, here it is.
In my case, here is the deployed app, and the one in red is the link Coolify gave me:
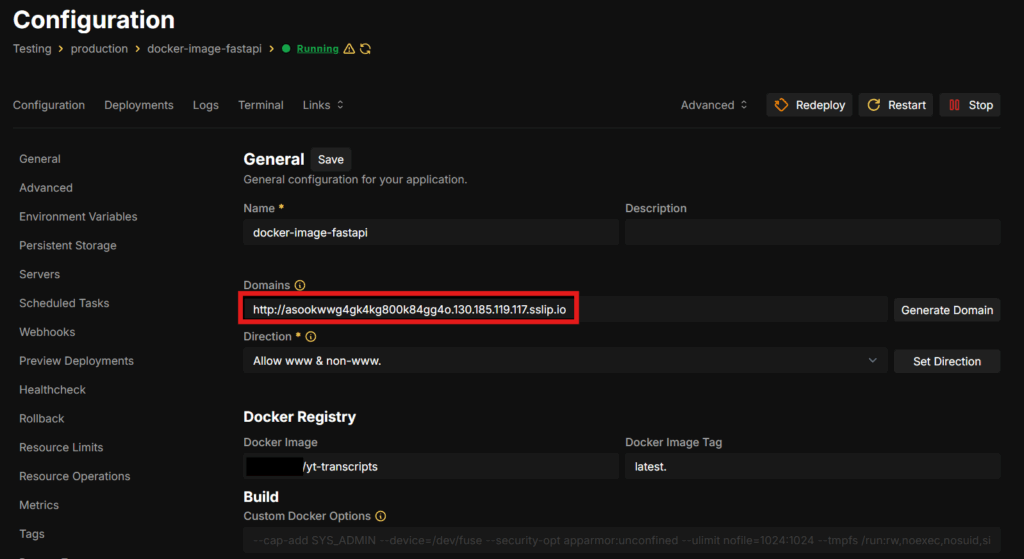
Here, let’s test it:
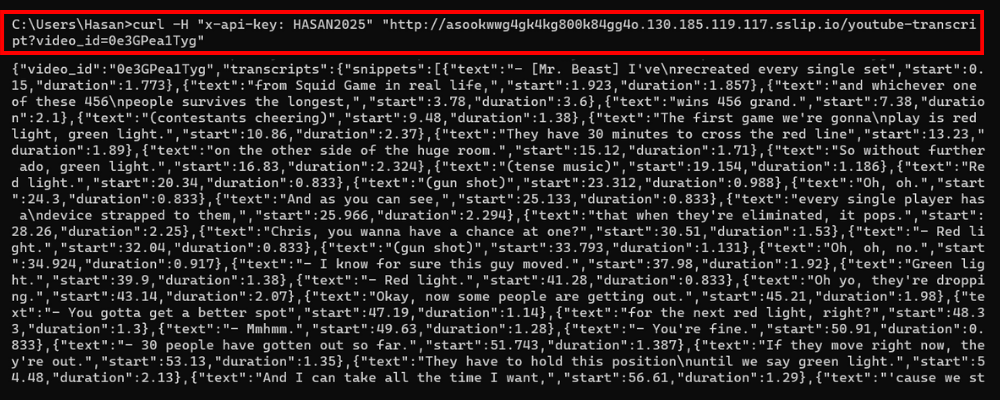
As you can see, it’s working perfectly; it returned the transcript of the YouTube video.
Creating Your Custom Make Module
Now comes the exciting part, which is turning this backend into a professional Make module that customers can install and use.
Step 1: Create Your Custom App in Make
Navigate to your Make account sidebar, click “More,” then “Custom Apps.”

Then, click “Create App” on the top right, and name it something like “YouTube Transcript Extractor”, and add an image for it if you want.
Step 2: Set Up the Base Structure
Once we’re in the app, we need to set up the base structure of our endpoint:
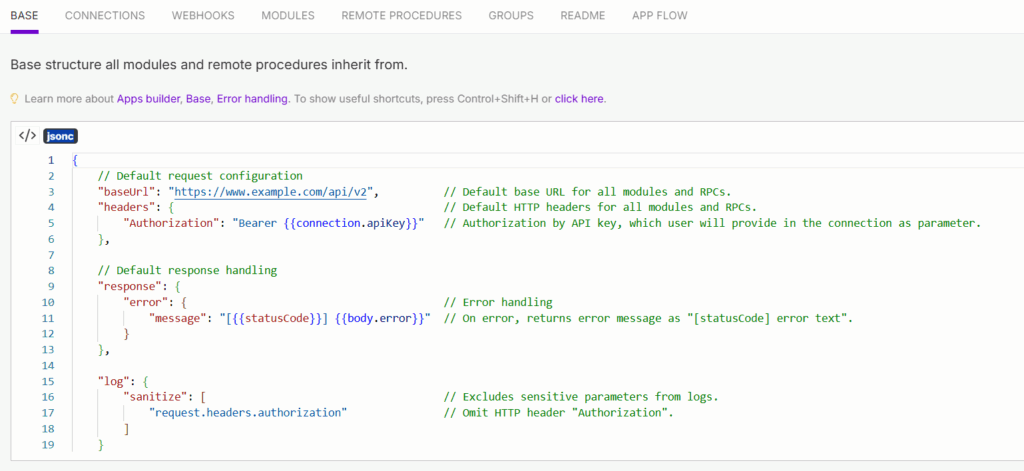
This involves setting up the baseURL and headers values to match how your API handles requests, which are, in my case, like this:

Step 3: Set Up Authentication
This is where your clients will enter the API key you provide, allowing you to track their usage and subscription efficiently from the backend.
Navigate to the Connections tab in your app and create a new connection of type API key, and let’s name it “Client Key”.

Save it, and once you’re in, we’ll have to update the communication and parameters of the connection to match our API endpoint.
The communication is the test URL Make will use to check if the client’s API key is actually valid, so this is a normal API call to the endpoint, which in my case will be like this:
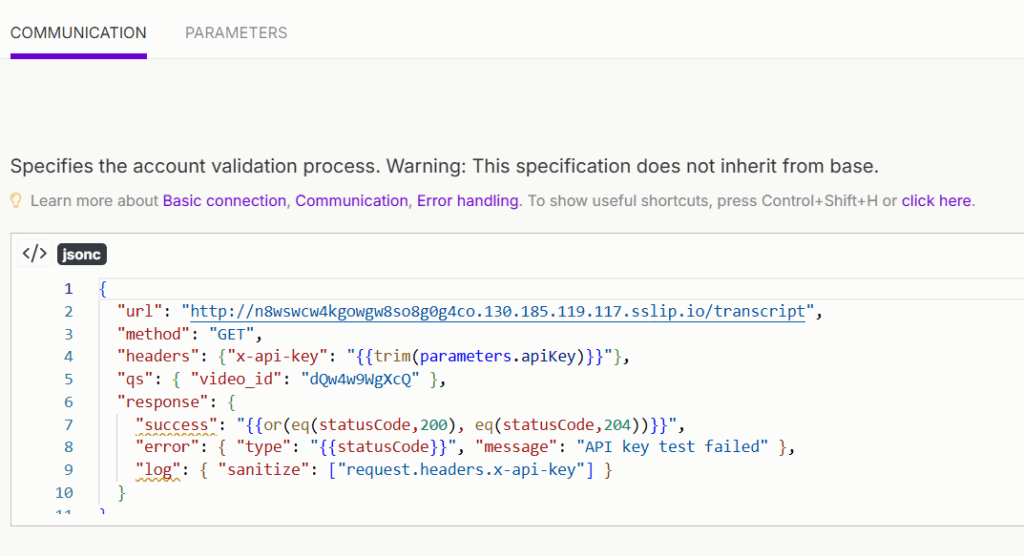
As you can see, I’m calling my API endpoint, using the API key the user enters in the headers, and adding a video_id in the qs section, which refers to the parameters needed in my endpoint. The parameters might be different in your case, and there might be more than one.
But, to be able to use the parameters.apiKey in the header, we need to initialize it in the parameters section like this:

Step 4: Build the Module
Create a Universal module with REST subtype, that uses our Client (API) Key Connection we just created above:

This module will call our endpoint and fetch the transcript using the video_id parameter.
So, once we’re in, we’ll need to set up the Communication to make a normal API call that returns the transcript, and configure the parameters section, so users can pass a video_id when using the module.
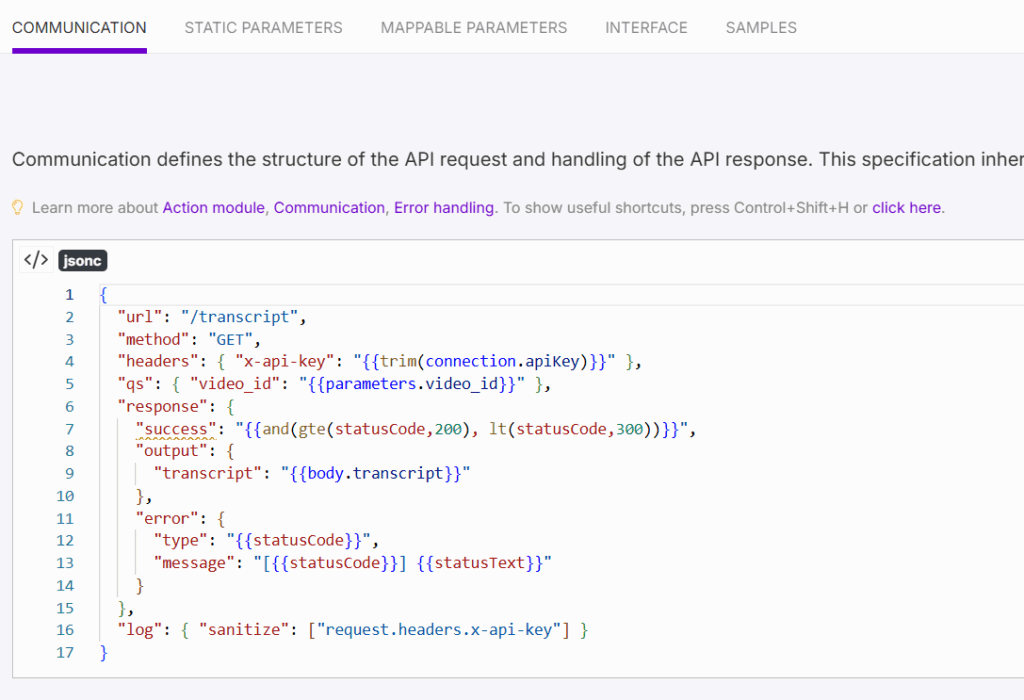
But, like this, it won’t be able to read the video_id parameter, because we still haven’t configured it. To configure it, we’ll go to the Mappable Parameters section and we’ll add this:

Once everything is configured properly, click the publish button at the top right to make your module available for testing and eventual customer use.
Testing Your Module Before Launch
Before you start selling access, you need to test everything thoroughly. Here is a simple scenario I created to validate that the module works normally:
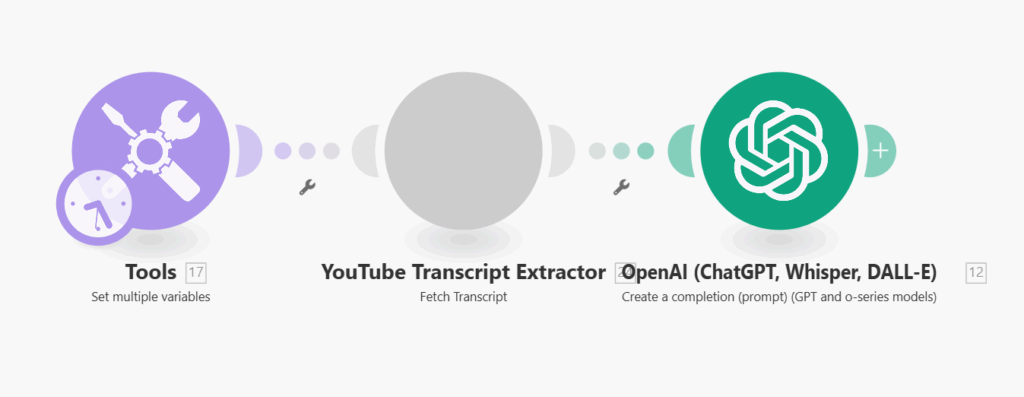
This scenario takes 3 inputs in the Set Multiple Variables module, which then passes the video_id into our module we just created, sends it to our API, gets the transcript, and then takes the transcript with 2 other inputs, which are a product description and target audience, and using AI we create a marketing email using the video’s tone and messaging as inspiration.
Module 1: Set Multiple Variables
In the set multiple variables module, I set up 3 variables, which are the video_id, product_description, and target_audience.
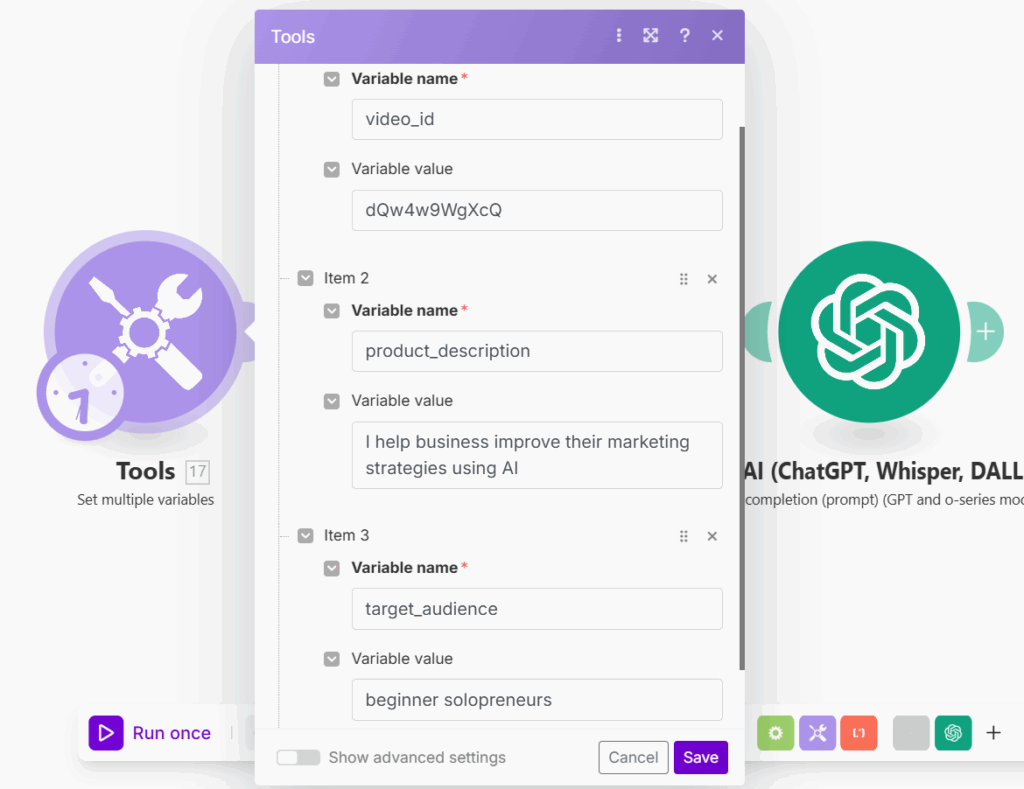
Module 2: YouTube Transcript Fetcher
Once we add it, we need to set up the connection, which is the API key, in order to authenticate to our API:
Click on Create Connection and add one of the API keys we added to our backend, and name it whatever you want. I’ll use this:
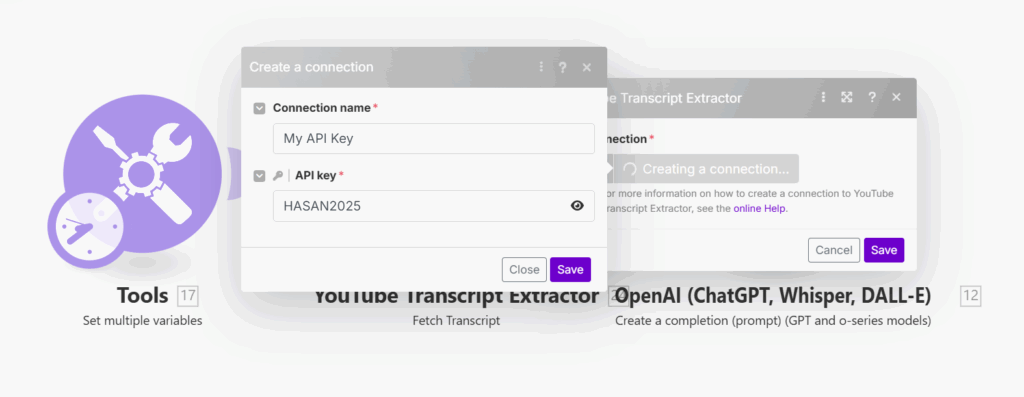
Now, save the connection and add the video_id into the module like this:

Module 3: OpenAI
Finally add the OpenAI module, give it the 3 inputs, and a good prompt like this:

And, by doing that, we have a full Make scenario dependent on our backend API, which needs authentication for people to use.
Building the Complete Customer Experience
Don’t just sell access to your module; provide complete value that justifies your pricing.
Create Ready-to-Use Blueprints
Build scenario templates that include your custom module with pre-configured mapping. Add value to it by including additional processing like AI analysis or professional formatting.
When you share the blueprint, customers can import it and only need to add their API key to start using it immediately.
The Customer Journey
Make the path from subscription to providing value as smooth as possible:
- Subscribe to your service → Get API key and blueprint link
- Import blueprint → Add API key to connection
- Start using immediately → No complex setup required
This professional experience positions you as a legitimate software provider, not someone selling simple templates.
Professional Distribution
When you publish your custom app, you have two main distribution options you can go for:
- Public Invite Link: Keep it published without submitting it for review, where you will be able to generate a link you can share directly to your clients (recommended to start with)
- Make Marketplace: Submit your app for review by the Make team for broader distribution. This is where the real money is; thousands of Make users actively browse the marketplace looking for solutions to their problems. (recommended for scaling)
You can read more about this in the App Flow section in your custom app here:
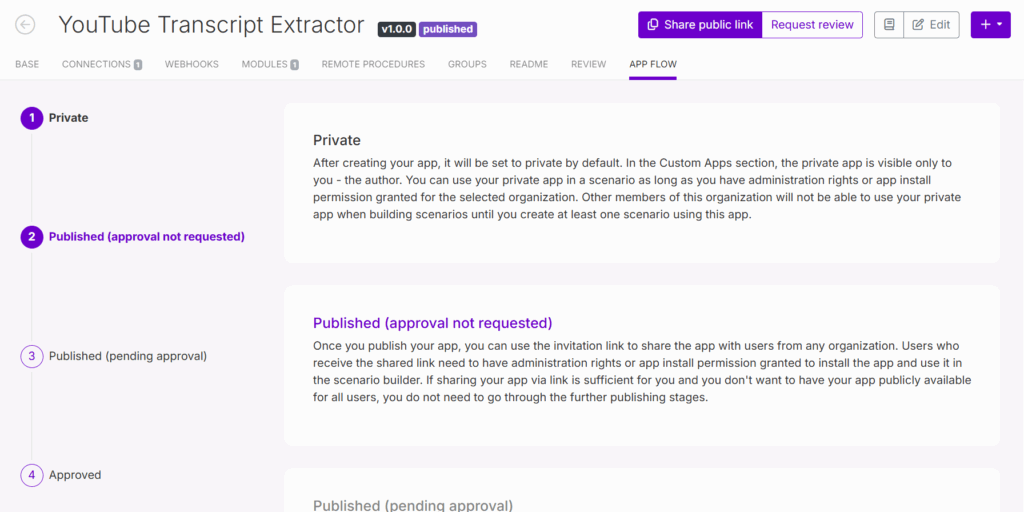
Start with the marketplace approach for maximum customer volume and revenue potential. Most successful creators focus on marketplace distribution because that’s where Make users actively go to solve their automation problems.
The approval process might take a few weeks, but the customer volume and passive discovery make it worthwhile for generating real income. You can always use invite links later for premium customers, special pricing tiers, or when you want more direct control over specific customer relationships.
Pricing Your Custom Modules
Keep your first modules simple and affordable while you build a reputation and prove value:
Pricing Models That Work
Monthly Subscription: $10-30/month for unlimited use within reasonable limits
- Start low to prove value and gather testimonials
- Increase prices as you add features and build a reputation
Per Operation: $0.02-0.20 per API call
- Great for customers with variable usage
- Scales automatically with customer success
Tiered Plans: Combine both approaches with usage limits
- Basic: $15/month for 1,000 operations
- Pro: $35/month for 5,000 operations
- Enterprise: $75/month for unlimited operations
Important Pricing Considerations
Factor in all your costs: third-party APIs (OpenAI, SearchAPI), hosting, Make operations, and your time for support. Start with pricing that covers costs plus a 50% margin, then increase as you add value.
Focus on problems that genuinely save time or make money for your customers. Price based on the value you provide, not just your costs.
Marketing Your Custom Modules
Here are some strategies you can use to market your automations:
Strategy 1: Community Engagement
Join Make.com forums, Facebook groups, Reddit, and Quora discussions where your target customers ask questions. Share valuable insights and help others solve problems before mentioning your solutions.
Build relationships first, then sell. People buy from those they trust and respect.
Strategy 2: Content Marketing
Create demos showing your modules solving real problems with measurable results. Share case studies with actual time and money savings that customers have achieved.
Post these success stories on LinkedIn, Twitter, and YouTube. Focus on outcomes, not features.
Strategy 3: Direct Outreach
Identify businesses that need your specific solution through LinkedIn, industry forums, or job postings looking for automation help. Reach out with personalized demos that show exactly how you solve their problem.
Offer free trials to prove value before asking for payment. Focus on building long-term relationships rather than quick sales.
Profitable Module Ideas That Actually Sell
Don’t limit yourself to transcript extraction. Here are some module ideas you can use as a starting point:
Google Analytics AI Reporter: Pulls key reports weekly and sends important insights and optimization recommendations that would help business owners increase their revenue.
Brand Mention Monitor: Monitors Twitter, Reddit, YouTube, and LinkedIn for any mentions of a specific brand with sentiment analysis and AI-generated action plans.
Content Idea Brainstorming: Analyzes social media posts of top creators in a niche, and generates a report of their best-performing posts with data that would’ve played a role in their success.
Want more ideas? Check out my constantly updated library of 100+ Micro SaaS Ideas for endless inspiration.
Next Steps and Resources
Ready to build your custom module empire? Here’s your action plan:
- Start Simple: Choose one workflow that solves a real problem
- Build Your Backend: Use whatever technology you’re comfortable with
- Test Thoroughly: Validate everything works before deploying
- Create Professional Experience: Build blueprints, not just modules
- Price for Value: Focus on outcomes, not features
The key is starting with workflows that are genuinely hard to find and solve real problems. When you provide exclusive access to valuable functionality, customers happily pay for that access.
Remember: Focus on delivering genuine value. Your reputation depends on creating solutions that actually help people save time or make money.


