How to Build a Chrome Extension with AI in 2025: A Complete Step-by-Step Guide - LearnWithHasan
 Hasan
Hasan
Have you ever needed a specific tool for your workflow but didn’t have the technical knowledge to build it?
That was exactly my situation. I needed a Chrome extension to organize my digital assets, but I had never built a Chrome extension before.
Yet, I managed to create a fully functional Chrome extension in approximately 60 minutes with AI.
And it is now Published on the Chrome Store.

The total cost? Just $3 in API usage.
In this guide, I’ll walk you through exactly how I used AI to build “My Assets” – a Chrome extension that helps content creators organize and access frequently used digital assets.
I’ll share the development process, explain the Chrome extension structure, provide code examples (plus the full code) and give you insights to help you build your own chrome extensions faster than you thought possible.
The Problem: Content Creation Friction
As someone who regularly creates content across multiple platforms, I found myself constantly switching between tabs and tools to grab:
Links I reference frequently
Brand colors I use in my designs
Images I include in my content
Emojis I add to my posts
This constant context-switching was disrupting my flow and wasting valuable time.
I needed a centralized tool that would:
Store my frequently used links with descriptions
Save my brand colors for easy access
Organize images I use regularly
Keep my favorite emojis handy
Work offline and respect my privacy by storing everything locally
A Chrome extension seemed like the perfect solution – I just had no idea how to build one!
Understanding Chrome Extension Structure
Before diving into how I built my extension, let’s understand the basic structure of a Chrome extension. This knowledge will help you make sense of the code examples later in this guide.
A typical Chrome extension consists of:
manifest.json: The configuration file that defines the extension’s permissions, entry points, and metadata.
Popup Interface: HTML, CSS, and JavaScript files for the user interface that appears when you click the extension icon.
Background Scripts: (Optional) JavaScript that runs in the background to handle events.
Content Scripts: (Optional) JavaScript that runs in the context of web pages.
Icons: Various sizes of icons for the extension.
Here’s a basic folder structure for a Chrome extension:
my-extension/
├── manifest.json
├── popup/
│   ├── popup.html
│   ├── popup.css
│   └── popup.js
├── background/
│   └── background.js (optional)
├── content/ (optional)
│   └── content.js
└── icons/
    ├── icon16.png
    ├── icon32.png
    ├── icon48.png
    └── icon128.png
For simple extensions like the one I built, you might not need background or content scripts, focusing mainly on the popup interface and core functionality.
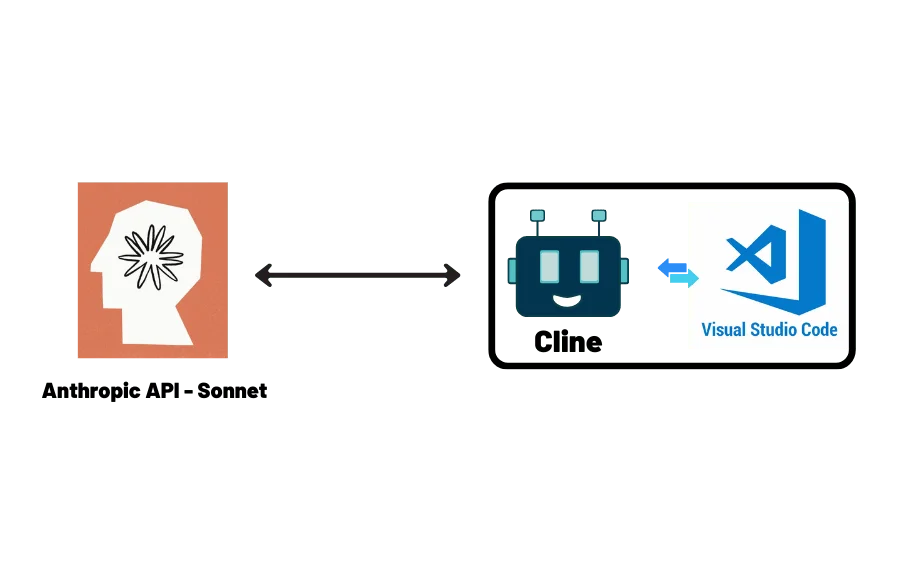
The Development Setup: Simple but Powerful
My setup was minimal:
Cline extension for VSCode (for AI assistance)
Anthropic API (for Claude access through Cline)
That’s it. No Chrome extension development courses, no tutorials, no boilerplate code!
The Development Process: Breaking It Down
After failing in my first attempt when I tried to tackle the entire project at once (which resulted in AI hallucinations), I learned an important lesson: break complex projects into tiny, manageable chunks.
Here’s the step-by-step process I followed:
1. Planning the Extension Structure
I started by asking Claude about the basic structure of a Chrome extension.
It explained that I needed:
A manifest.json file defining the extension’s configuration
HTML, CSS, and JavaScript files for the user interface
Icon files in various sizes
2. Creating the Manifest File
Claude helped me create a proper manifest file that defines the extension’s permissions and entry points:
{
  "manifest_version": 3,
  "name": "My Assets",
  "version": "1.0.0",
  "description": "Save and organize your writing assets: links, brand colors, and images. All data stored locally for privacy and quick access.",
  "author": "Hasan Aboul Hasan",
  "homepage_url": "https://learnwithhasan.com",
  "permissions": [
    "storage",
    "activeTab",
    "clipboardWrite",
    "downloads"
  ],
  "action": {
    "default_popup": "popup/popup.html"
  },
  "icons": {
    "16": "icons/icon16.png",
    "32": "icons/icon32.png",
    "48": "icons/icon48.png",
    "128": "icons/icon128.png"
  },
  "offline_enabled": true,
  "short_name": "My Assets"
}
This uses Manifest V3 (the latest standard) and requests only the necessary permissions:
storage: For saving assets locallyactiveTab: For accessing the current page when saving linksclipboardWrite: For copy functionalitydownloads: For downloading saved images
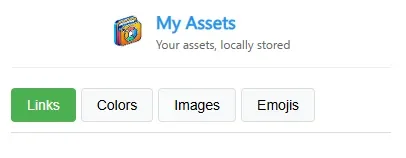
3. Designing the UI
For the user interface, I wanted a clean, tab-based layout that would separate different asset types:
<div class="tabs">
  <button class="tab-button active" data-tab="links">Links</button>
  <button class="tab-button" data-tab="colors">Colors</button>
  <button class="tab-button" data-tab="images">Images</button>
  <button class="tab-button" data-tab="emojis">Emojis</button>
</div>
<div class="tab-content active" id="links-tab">
  <!-- Links management UI -->
</div>
<div class="tab-content" id="colors-tab">
  <!-- Colors management UI -->
</div>
Claude generated the entire HTML structure based on my description of what I wanted each tab to contain, creating a simple but effective interface.
I got something like this:
4. Implementing the Functionality
I implemented each feature one by one, starting with the most important – link management:
Links Management
Here’s a snippet showing how the link saving feature works:
// Save current page as a link
saveButton.addEventListener('click', async () => {
  const tab = await getCurrentTab();
  if (!tab) return;
  const link = {
    url: tab.url,
    title: tab.title,
    favicon: tab.favIconUrl || '',
    description: descriptionInput.value.trim(),
    tags: tagsInput.value.split(',').map(tag => tag.trim()).filter(tag => tag),
    timestamp: Date.now()
  };
  // Get existing links
  const { links = [] } = await chrome.storage.local.get('links');

  // Add new link
  links.unshift(link);

  // Save to storage
  await chrome.storage.local.set({ links });

  // Reset inputs and refresh display
  descriptionInput.value = '';
  tagsInput.value = '';
  loadLinks();
  updateTagFilter();
});
This code:
Gets the current active tab
Creates a link object with URL, title, favicon, and user-provided description and tags
Retrieves existing links from Chrome’s local storage
Adds the new link to the array
Saves the updated array back to storage
Refreshes the UI
Color Management
Next, I implemented color management:
// Add a new color
addColorButton.addEventListener('click', async () => {
  const color = colorPicker.value;

  // Get existing colors
  const { colors = [] } = await chrome.storage.local.get('colors');

  // Add new color if it doesn't exist
  if (!colors.includes(color)) {
    colors.unshift(color);
    await chrome.storage.local.set({ colors });
    loadColors();
  }
});
Image Management
For managing images:
// Add a new image
addImageButton.addEventListener('click', async () => {
const url = imageUrlInput.value.trim();
if (!url) return;
// Create a temporary image to get dimensions
const img = new Image();
img.src = url;
try {
await new Promise((resolve, reject) => {
img.onload = resolve;
img.onerror = reject;
});
const imageData = {
url: url,
width: img.width,
height: img.height,
timestamp: Date.now()
};
// Get existing images
const { images = [] } = await chrome.storage.local.get('images');
// Add new image if it doesn't exist
if (!images.some(img => img.url === url)) {
images.unshift(imageData);
await chrome.storage.local.set({ images });
loadImages();
}
// Clear input
imageUrlInput.value = '';
} catch (error) {
alert('Invalid image URL or image failed to load');
}
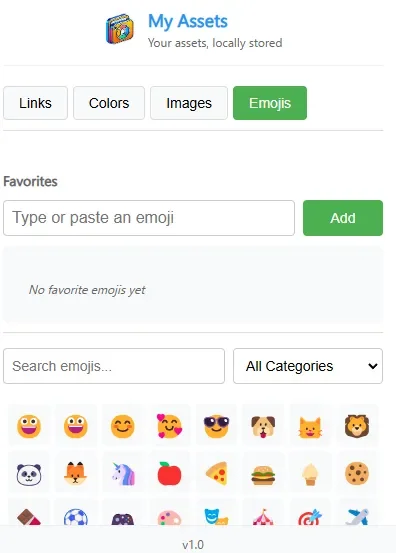
});Emoji Management
I also added an emoji management tab with categorization and favorites functionality.
You can get the full code of the extension here if you wanna play with 👇
The AI Workflow: Iterative Development
My workflow with Claude through Cline was remarkably efficient:
Request a specific feature implementation: “Implement the link saving functionality”
Review the generated code: Claude would provide a complete implementation
Ask for clarification or adjustments: “Can you modify this to include tags?”
What impressed me most was that the code worked correctly on the first try in nearly every case.
I rarely had to make manual adjustments.
Key Lessons Learned from This Project
This development process taught me several valuable insights:
1. Break Projects Into Small Chunks
When I tried to develop the entire extension at once, the AI struggled and hallucinated. By breaking it into smaller components (manifest file, UI design, individual features), I got much better results.
2. AI Excels at Well-Defined Tasks
The more specific my requirements, the better the output. Vague requests led to generic solutions. When I clearly defined what I wanted (like “implement a function to save the current tab as a link with these specific properties”), Claude delivered precise code.
3. The Power of Iterative Development
Building feature by feature allowed me to test each component thoroughly before moving on, which maintained a high quality throughout the project.
4. The Democratization of Development
Tools like this make software development more accessible to people without specialized knowledge in every framework or platform. You don’t need to be a Chrome extension expert to build a Chrome extension anymore.
The Most Surprising Part: The Cost
The entire development process cost me just $3 in Anthropic API usage. Compare that to:
The time it would have taken to learn Chrome extension development from scratch
The cost of hiring a developer
The opportunity cost of not having this tool
Conclusion: Just Start Building!
My experience building this Chrome extension demonstrates that with the right approach and tools, you can create useful software even in areas where you have no prior experience.
The key is to:
Start with a clear problem you want to solve
Break it down into manageable parts
Use AI as your development partner
Test and iterate quickly
Don’t let a lack of experience in a specific technology stop you from building tools that could save you time and make you more productive.
With AI assistance, the barrier to entry for software development is lower than ever before.
I hope this guide inspires you to tackle your own development projects, even if they’re in areas where you have little experience.
Remember, sometimes the best way to learn is by doing.
Hasan
Thats Hasan
Related Articles

The Complete Docker Tutorial for Beginners
When you’re building apps or websites, getting them to run the same way everywhere is a constant headache. Maybe it works fine on your laptop, but it crashes on your server. One project needs Python ...
Hasan
WebJSON Prompting: Build an AI Carousel Generator with Claude
TL;DR WebJSON is a prompting technique that forces AI models like Claude to search the web for real-time data, then output structured JSON you can use in applications. I used this technique to build ...
Hasan
How to Generate Motion Graphics With AI For Free – Prompts and Tools Inside
TL;DRYou can create professional motion graphics, animations, and videos using AI completely free. The trick is combining a specially crafted prompt with Remotion, an open-source video renderer. I bui...
Hasan