Building AI Tools on WordPress: Adding OpenAI, Gemini, and Claude APIs to Your Site
Want to build such a tool? 👇
AI Sentence Generator
Enter a topic, choose a provider, and format:
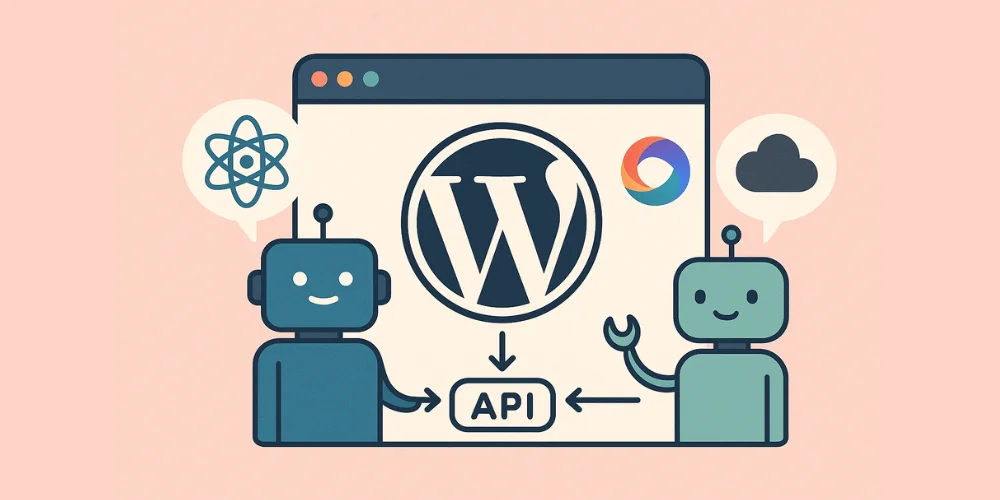
In this guide, I’ll show you how to improve your WordPress site by integrating it with the top three LLM providers’ models: OpenAI’s GPT, Google’s Gemini, and Anthropic’s Claude.
The best part? You don’t need advanced coding skills to make this happen.
All you need to do is follow this guide step by step, and you’ll be able to build your own AI tools by the end of this tutorial.
What We’re Building
We’ll create custom WordPress endpoints that connect directly to these AI services. You’ll get:
- Six custom API endpoints: three providers, each with two output formats (plain text and JSON)
- A working frontend tool: letting visitors generate AI-powered text from your site
- A clean and extendable codebase: perfect for adding more functionality later
Step 1: Install the Code Snippets Plugin
Before we dive into the code, let’s set up the Code Snippets plugin. This will allow us to add functions to WordPress without directly editing theme files, which is so much easier.
- Log in to your WordPress admin dashboard
- Go to Plugins > Add New
- Search for “Code Snippets”

4. Once you find the one above (it should be the first one), click “Install Now” and then “Activate.”
Once installed, you’ll have a new “Snippets” menu item in your WordPress admin. This is where we’ll add our code.
Step 2: Getting Your API Keys
Before we start coding, you’ll need API keys from each provider. Here’s how to get them:
OpenAI API Key
- Visit OpenAI’s platform
- Create an account or log in
- Go to the API keys section and create a new secret key
- Copy and store it securely (you won’t be able to see it again)
OpenAI offers several models, so make sure to check their pricing page for details.
Google Gemini API Key
- Go to Google AI Studio
- Sign in with your Google account
- Create an API key using the button in the top right corner.
- Copy and store it securely
See Google AI pricing for details about the pricing of each model.
Anthropic API Key
- Visit Anthropic Console
- Create an account or sign in
- Navigate to the API Keys section
- Generate a new API key
Check their pricing details for detailed pricing for each model.
Step 3: Add Code Snippets for Each LLM Provider
We’ll now register REST API endpoints in WordPress using the Code Snippets plugin. Each provider (OpenAI, Gemini, Claude) will have two endpoints:
/ai-tools/v1/[provider]→ returns plain text/ai-tools/v1/[provider]-json→ returns structured JSON
OpenAI Integration
First, go to the code snippets plugin we just downloaded, and create a new snippet named OpenAI REST Endpoint:
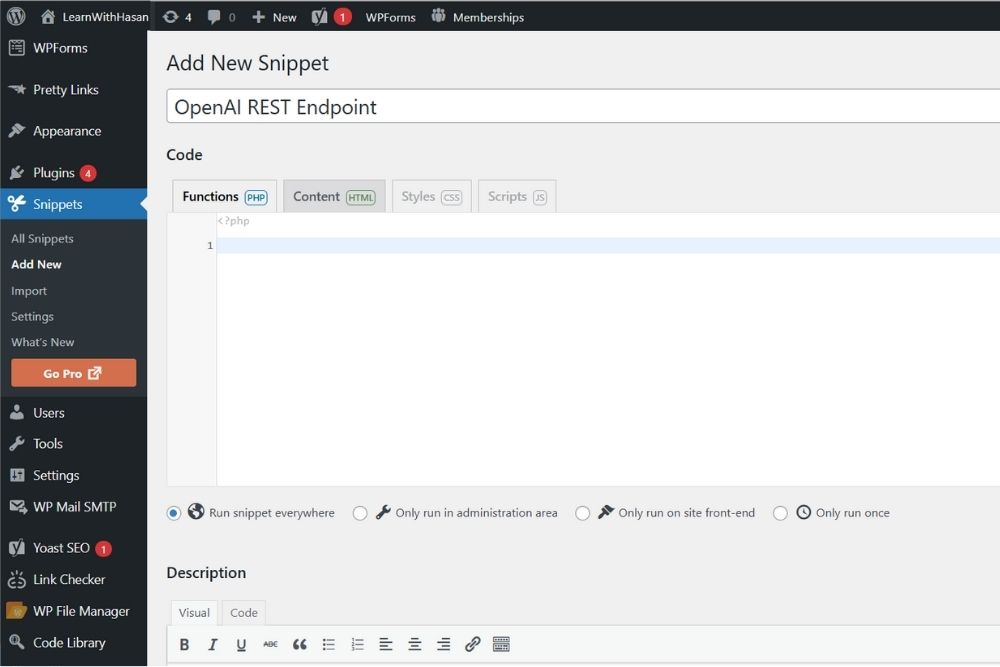
Now, paste the below code in the code section:
function blog_call_openai_api($topic, $return_json = false) {
    $prompt = "generate for me a 5 word sentence about $topic";
    $api_key = 'YOUR_API_KEY';
    $url = 'https://api.openai.com/v1/chat/completions';

    $body_data = [
        'model' => 'gpt-4o-mini',
        'messages' => [[ 'role' => 'user', 'content' => $prompt ]],
        'max_tokens' => $return_json ? 50 : 20,
        'temperature' => 0.7
    ];

    if ($return_json) {
        $body_data['response_format'] = [
            'type' => 'json_schema',
            'json_schema' => [
                'name' => 'sentence_response',
                'strict' => true,
                'schema' => [
                    'type' => 'object',
                    'properties' => [
                        'sentence' => [
                            'type' => 'string',
                            'description' => 'A 5 word sentence about the given topic'
                        ]
                    ],
                    'required' => ['sentence'],
                    'additionalProperties' => false
                ]
            ]
        ];
    }

    $response = wp_remote_post($url, [
        'headers' => [
            'Content-Type' => 'application/json',
            'Authorization' => 'Bearer ' . $api_key
        ],
        'body' => json_encode($body_data)
    ]);

    if (is_wp_error($response)) return $response;
    $body = json_decode(wp_remote_retrieve_body($response), true);

    if ($return_json) {
        return json_decode($body['choices'][0]['message']['content'], true);
    } else {
        return trim($body['choices'][0]['message']['content']);
    }
}
Make sure you add your own API key, instead of the placeholder. Now, to choose whether you want to return json or text output format, add these two functions after the function above:
function blog_generate_openai_text($request) {
    $topic = $request->get_param('topic');
    $sentence = blog_call_openai_api($topic, false);
    if (is_wp_error($sentence)) return $sentence;
    return new WP_REST_Response($sentence, 200, ['Content-Type' => 'text/plain']);
}

function blog_generate_openai_json($request) {
    $topic = $request->get_param('topic');
    $result = blog_call_openai_api($topic, true);
    if (is_wp_error($result)) return $result;
    return $result;
}
Finally, register both endpoints so we can access them easily from anywhere, by adding the below code:
add_action('rest_api_init', function () {
    register_rest_route('ai-tools/v1', '/openai', [
        'methods' => 'GET',
        'callback' => 'blog_generate_openai_text',
        'args' => [
            'topic' => [ 'required' => true, 'sanitize_callback' => 'sanitize_text_field' ]
        ],
        'permission_callback' => '__return_true'
    ]);

    register_rest_route('ai-tools/v1', '/openai-json', [
        'methods' => 'GET',
        'callback' => 'blog_generate_openai_json',
        'args' => [
            'topic' => [ 'required' => true, 'sanitize_callback' => 'sanitize_text_field' ]
        ],
        'permission_callback' => '__return_true'
    ]);
});
Google Gemini Integration
Repeat the same structure as we did with OpenAI for Gemini. Create a snippet called Gemini REST Endpoint:
function blog_call_gemini_api($topic, $return_json = false) {
    $prompt = "generate for me a 5 word sentence about $topic";
    $api_key = 'YOUR_API_KEY';
    $url = "https://generativelanguage.googleapis.com/v1beta/models/gemini-2.0-flash:generateContent?key=$api_key";

    $body_data = [
        'contents' => [[ 'parts' => [[ 'text' => $prompt ]] ]]
    ];

    if ($return_json) {
        $body_data['generationConfig'] = [
            'response_mime_type' => 'application/json',
            'response_schema' => [
                'type' => 'object',
                'properties' => [
                    'sentence' => [
                        'type' => 'string',
                        'description' => 'A 5 word sentence about the given topic'
                    ]
                ],
                'required' => ['sentence']
            ]
        ];
    }

    $response = wp_remote_post($url, [
        'headers' => ['Content-Type' => 'application/json'],
        'body' => json_encode($body_data)
    ]);

    if (is_wp_error($response)) return $response;
    $body = json_decode(wp_remote_retrieve_body($response), true);

    if ($return_json) {
        return json_decode($body['candidates'][0]['content']['parts'][0]['text'], true);
    } else {
        return trim($body['candidates'][0]['content']['parts'][0]['text']);
    }
}
Also, don’t forget to add your own API key instead of the placeholder. Then, add these two endpoints:
function blog_generate_gemini_text($request) {
    $topic = $request->get_param('topic');
    $sentence = blog_call_gemini_api($topic, false);
    if (is_wp_error($sentence)) return $sentence;
    return new WP_REST_Response($sentence, 200, ['Content-Type' => 'text/plain']);
}

function blog_generate_gemini_json($request) {
    $topic = $request->get_param('topic');
    $result = blog_call_gemini_api($topic, true);
    if (is_wp_error($result)) return $result;
    return $result;
}

add_action('rest_api_init', function () {
    register_rest_route('ai-tools/v1', '/gemini', [
        'methods' => 'GET',
        'callback' => 'blog_generate_gemini_text',
        'args' => [
            'topic' => [ 'required' => true, 'sanitize_callback' => 'sanitize_text_field' ]
        ],
        'permission_callback' => '__return_true'
    ]);

    register_rest_route('ai-tools/v1', '/gemini-json', [
        'methods' => 'GET',
        'callback' => 'blog_generate_gemini_json',
        'args' => [
            'topic' => [ 'required' => true, 'sanitize_callback' => 'sanitize_text_field' ]
        ],
        'permission_callback' => '__return_true'
    ]);
});
Claude (Anthropic) Integration
Claude works similarly, but with a slightly different structure. Create a snippet Claude REST Endpoint:
function blog_call_claude_api($topic, $return_json = false) {
    $prompt = "generate for me a 5 word sentence about $topic";
    $api_key = 'YOUR_API_KEY';

    $body_data = [
        'model' => 'claude-3-sonnet-20240229',
        'max_tokens' => 100,
        'messages' => [[ 'role' => 'user', 'content' => $prompt ]]
    ];

    if ($return_json) {
        $body_data['system'] = 'You must always respond with valid JSON only. Return your response in this exact format: {"sentence": "your response here"}. Do not include any other text, explanations, or formatting.';
    }

    $response = wp_remote_post('https://api.anthropic.com/v1/messages', [
        'headers' => [
            'Content-Type' => 'application/json',
            'x-api-key' => $api_key,
            'anthropic-version' => '2023-06-01'
        ],
        'body' => json_encode($body_data)
    ]);

    if (is_wp_error($response)) return $response;
    $body = json_decode(wp_remote_retrieve_body($response), true);

    if ($return_json) {
        return json_decode($body['content'][0]['text'], true);
    } else {
        return trim($body['content'][0]['text']);
    }
}
Add your own API key, then after it, add these corresponding routes:
function blog_generate_claude_text($request) {
    $topic = $request->get_param('topic');
    $sentence = blog_call_claude_api($topic, false);
    if (is_wp_error($sentence)) return $sentence;
    return new WP_REST_Response($sentence, 200, ['Content-Type' => 'text/plain']);
}

function blog_generate_claude_json($request) {
    $topic = $request->get_param('topic');
    $result = blog_call_claude_api($topic, true);
    if (is_wp_error($result)) return $result;
    return $result;
}

add_action('rest_api_init', function () {
    register_rest_route('ai-tools/v1', '/claude', [
        'methods' => 'GET',
        'callback' => 'blog_generate_claude_text',
        'args' => [
            'topic' => [ 'required' => true, 'sanitize_callback' => 'sanitize_text_field' ]
        ],
        'permission_callback' => '__return_true'
    ]);

    register_rest_route('ai-tools/v1', '/claude-json', [
        'methods' => 'GET',
        'callback' => 'blog_generate_claude_json',
        'args' => [
            'topic' => [ 'required' => true, 'sanitize_callback' => 'sanitize_text_field' ]
        ],
        'permission_callback' => '__return_true'
    ]);
});
Each of these handlers isolates the logic and provides both human-friendly and developer-friendly outputs depending on the endpoint and the output structure you are looking for.
Step 4: Understanding What We Just Built
Let’s break down the code we just created:
- Each provider has a core API function (
blog_call_openai_api(),blog_call_gemini_api()blog_call_claude_api() - We define two REST endpoints per provider — one returns plain text (for human consumption), and the other returns JSON (for programmatic use).
- All endpoints accept a single input (query parameter):
?topic=...
Step 5: Test Your Endpoints with Postman
Before building the frontend, let’s test if our endpoints are working properly. So, download Postman, which will help us easily test the endpoints:
- Open Postman
- Set the request method to
GET - Use a URL like:
https://YOURDOMAIN.com/wp-json/ai-tools/v1/openai?topic=flowers - Click Send
Here’s an example from my case:
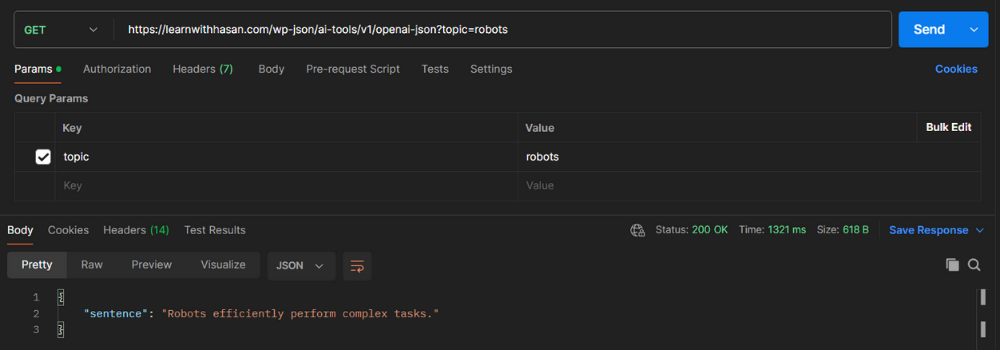
As you can see, since I chose the JSON-formatted output, I got: {"sentence": "Robots eddiciently perform complex tasks"}
If I choose the normal output, here is how the test will look:
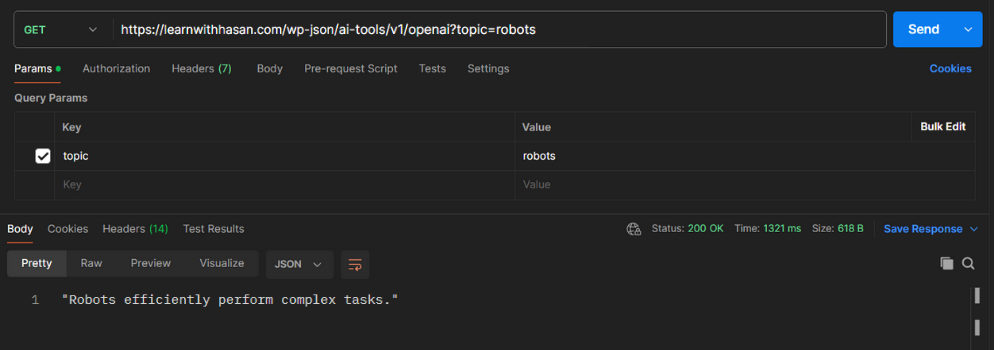
Do this for each of the six endpoints; don’t move on to the next step unless all of them work properly.
If something doesn’t work, check the API key and URL. If you can’t find what’s wrong, feel free to add your questions to the free public forum.
Step 5: Building a Simple Frontend Tool
Now let’s create a simple tool that users can interact with.
First, create a new page on your website and add an HTML block to it like this:
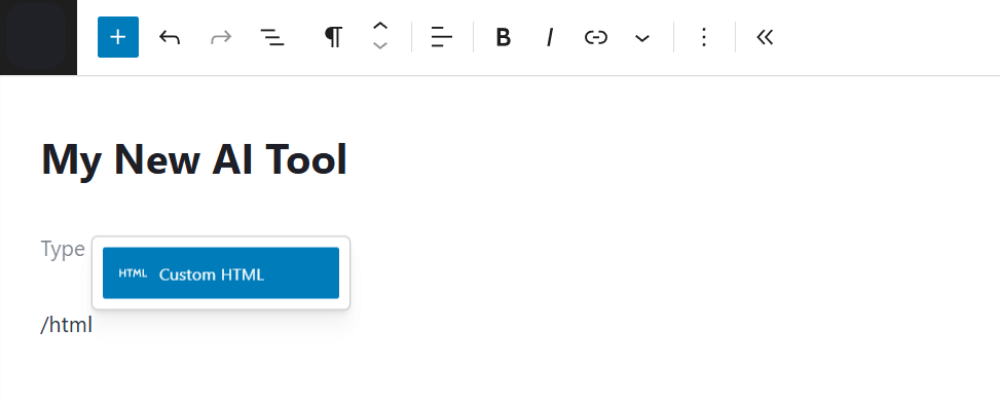
Choose it, and paste the following code inside it:
<div id="ai-tool" style="max-width: 600px; margin: auto; font-family: sans-serif;">
  <h2>AI Sentence Generator</h2>
  <p>Enter a topic, choose a provider, and format:</p>
  <input type="text" id="topic" placeholder="Enter topic..." style="width: 100%; padding: 10px; margin-bottom: 10px;">

  <div style="display: flex; gap: 10px; margin-bottom: 10px;">
    <select id="provider" style="flex: 1; padding: 10px;">
      <option value="gemini">Gemini</option>
      <option value="claude">Claude</option>
      <option value="openai">OpenAI</option>
    </select>
    <select id="format" style="flex: 1; padding: 10px;">
      <option value="">Text</option>
      <option value="-json">JSON</option>
    </select>
  </div>

  <button onclick="generateSentence()" style="padding: 10px 20px; background: #2271b1; color: white; border: none; border-radius: 4px; cursor: pointer;">Generate</button>

  <pre id="result" style="margin-top: 20px; background: #f1f1f1; padding: 15px; border-radius: 4px; min-height: 60px;"></pre>
</div>

<script>
function generateSentence() {
  const topic = document.getElementById('topic').value;
  const provider = document.getElementById('provider').value;
  const format = document.getElementById('format').value;
  const result = document.getElementById('result');

  if (!topic) {
    result.textContent = 'Please enter a topic.';
    return;
  }

  result.textContent = 'Loading...';

  fetch(`/wp-json/ai-tools/v1/${provider}${format}?topic=${encodeURIComponent(topic)}`)
    .then(res => res.ok ? res.text() : Promise.reject(res.statusText))
    .then(text => {
      try {
        const json = JSON.parse(text);
        result.textContent = JSON.stringify(json, null, 2);
      } catch (e) {
        result.textContent = text;
      }
    })
    .catch(err => {
      result.textContent = 'Error: ' + err;
    });
}
</script>
After adding the code, you’ll have something like this:
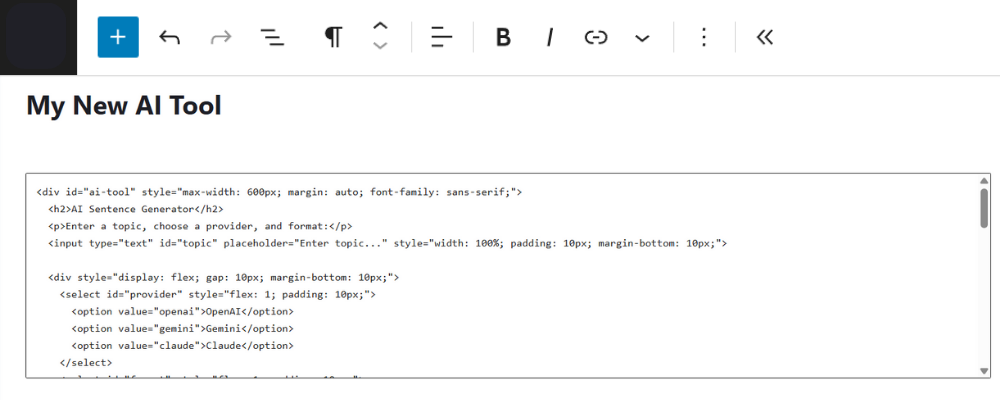
After that, publish it, and let’s visit the page to test it:
Keep Building: What’s Next?
With this setup, you’ve built a foundational AI layer for WordPress. You can:
- Add support for more models or languages
- Track usage per user or session
- Turn this into a micro-SaaS or member-only tool
And if you’re ready to go even deeper into AI-powered WordPress development, check out my SAAS 2.0 course, where we take this from a simple API integration to a full-blown business platform.
Let me know what you build next. Share it in the comments section or on the forum 🚀


