WordPress Media Offloading With MinIO: Full Guide for Beginners
Your WordPress site is getting slower by the day.
Every image, video, and PDF you upload weighs down your server, which impacts the user experience. I’ve been there, and I know exactly how it feels when your hosting bills keep increasing while your site performance keeps decreasing.
Today, I’ll show you how to transform your WordPress performance using media offloading with MinIO completely, a self-hosted solution that’ll cut your costs and dramatically speed up your site.
What you’ll learn:
- Why media offloading is important for WordPress performance
- How to combine this with Redis caching for maximum speed
- Setting up MinIO storage on Coolify (easier than you think)
- Connecting WordPress to MinIO with a simple plugin
- Managing your storage with my open-source UI tool
Why Your WordPress Site Needs Media Offloading
Let me paint you a picture. Every time someone visits your WordPress site, your server has to:
- Process the PHP code
- Query the database
- Serve all your media files (images, videos, documents)
- Handle multiple simultaneous visitors doing the same thing
Your server is handling the workload of three different services. No wonder it’s struggling.
Here’s what happens when you offload media:
- Server Load Drops: Your main server focuses only on PHP and database operations
- Faster Loading: Media files are served from optimized storage with better bandwidth
- Scalability: Handle thousands of visitors without server crashes
- Cost Reduction: Pay less for hosting since you need fewer server resources
- Global Performance: Serve media from locations closer to your visitors
I’ve seen WordPress sites reduce their load times from 8 seconds to under 2 seconds simply by implementing proper media offloading and caching strategies.
The Performance Power Combo: Redis + Media Offloading
Before we dive into MinIO setup, let me quickly share with you another performance technique I’ve also used before.
In my complete Redis guide, I showed you how to speed up your WordPress site by 10 times using Redis caching. It covers database query caching, object caching, and full-page caching, providing complete code snippets and configuration details.
Here’s the thing: Redis handles your database and processing speed, while media offloading handles your file serving speed. Combined, they create a performance powerhouse that can handle massive traffic easily!
What is MinIO, and Why Self-Host Your Storage?
MinIO is an open-source, high-performance object storage system.
Instead of paying AWS or other cloud providers for storage, you can run your own S3-compatible storage Minio server.
Why I recommend MinIO over cloud storage:
- Cost Control: No surprise bills from cloud providers
- Data Ownership: Your files stay on your infrastructure
- Performance: Direct control over storage performance and location
- Privacy: No third-party access to your media file
Instead of paying various cloud providers for storage, let’s create your own S3-compatible storage. This is where Self-Managed Hosting really shines, as you can easily set it up with Coolify.
Coolify is a self-hosted platform that makes managing Docker containers as simple as clicking buttons. I personally use it to host all my WordPress websites, Redis and MongoDB databases, FastAPI APIs, and most importantly, my MinIO storage servers.
If you want to dive deeper into self-managed hosting, I have a complete course on this topic that covers everything from server setup to advanced deployments.
Setup Using Coolify:
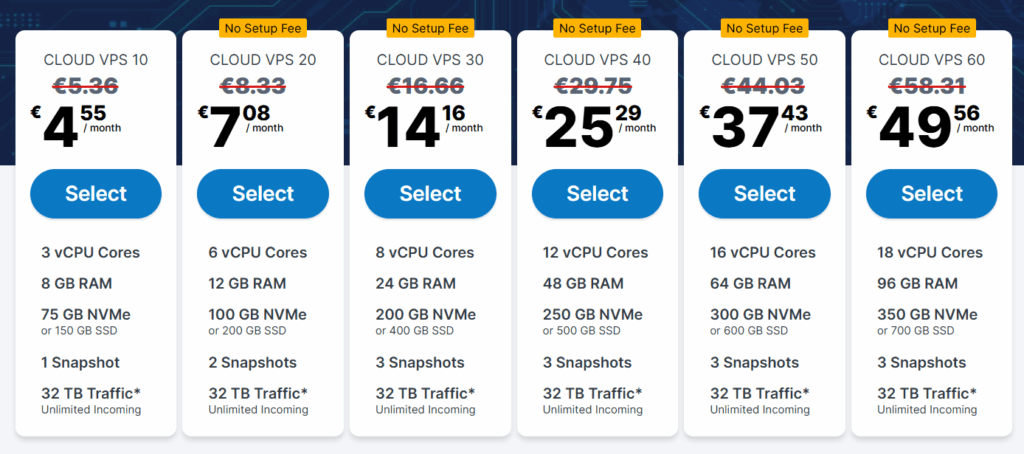
The first step is to set up a virtual private server (VPS) on a cloud server. I’ll be using Contabo for this case because it provides good infrastructure at a reasonable price.
You can start with the ~5$ plan and scale up when needed:
Once you finish, use an SSH client of your choice or even your terminal to log in to your server, then run this one-liner to install Coolify:
curl -fsSL https://cdn.coollabs.io/coolify/install.sh | sudo bash
After the download is complete, it will give you the server IP, so just click on the public IPV4; mine is this:

It will direct you to the account creation page.
Create your admin account and save the credentials in a safe location.
With this, your Coolify dashboard is now set up.
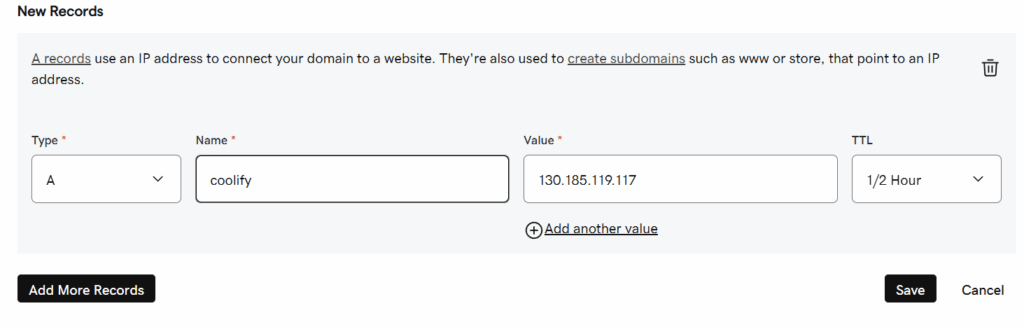
One last thing is that we have to point Coolify to a subdomain of our own, so go to your domain provider, then navigate to the DNS records, and add a new A record with the name set to coolify, which is our subdomain, and the value is the IP address of your own VPS, so you’ll get something like this, but with your own IP:
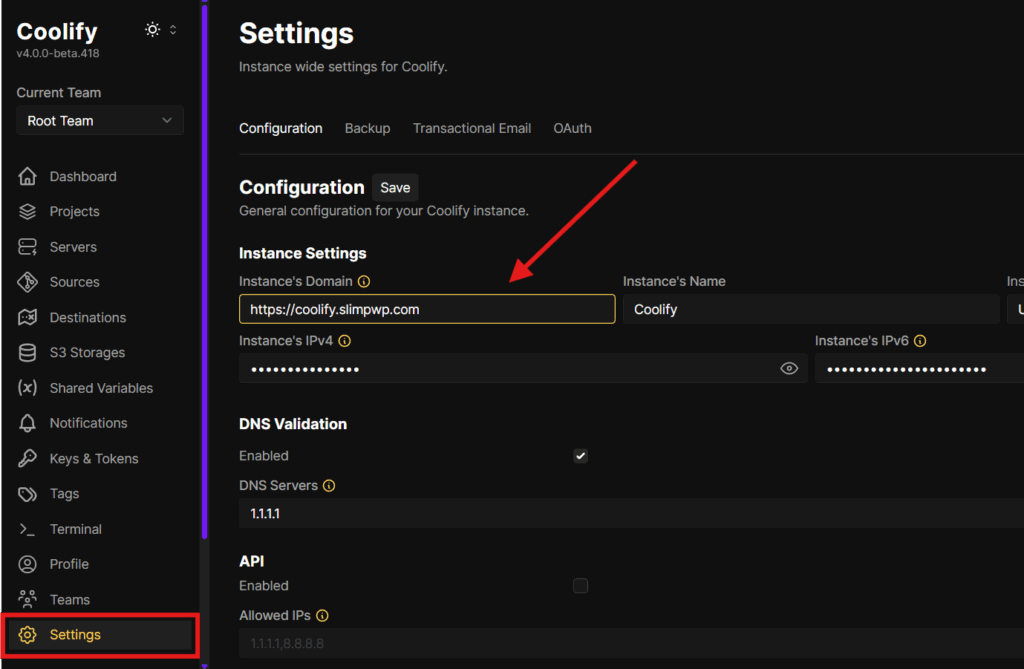
Then go to the coolify settings, and change the Instance Domain to your own subdomain; here is mine:
You should now be able to open Coolify using our custom subdomain.
Note: It may take some time for your domain provider to update and point your new subdomain correctly.
Setting Up MinIO
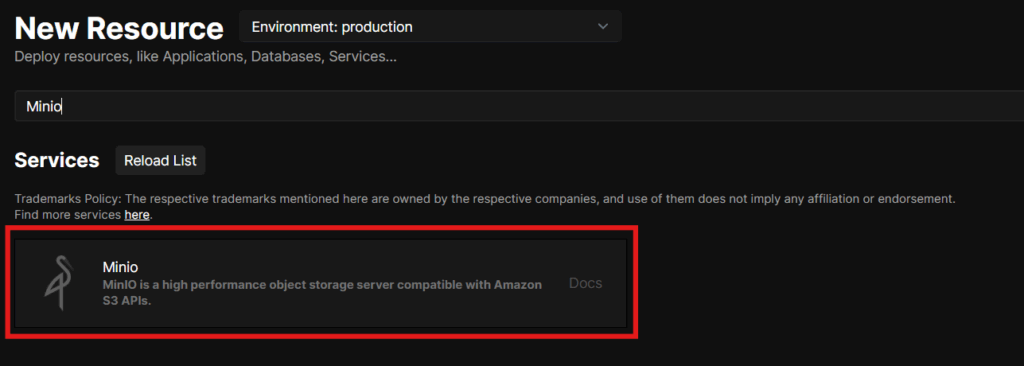
Go to resources, add MinIO, and deploy it:
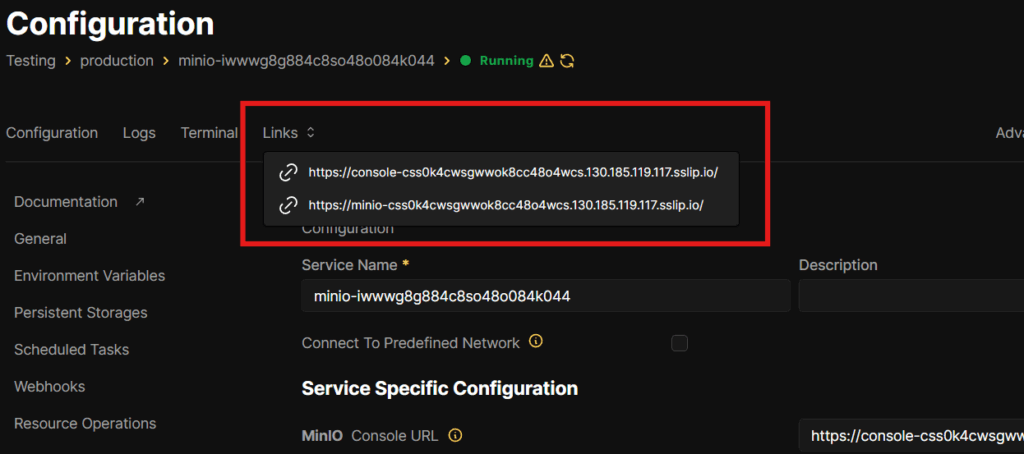
Once deployed, you will find the console and api urls here:
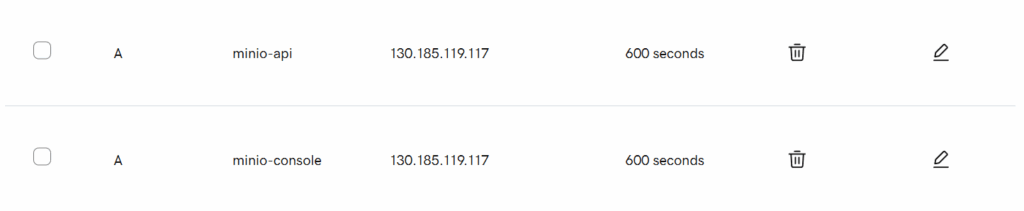
These are the default links that Coolify gives you. To change the links, we’ll do as we did above for Coolify, but now for each of the console and the API URL, we’ll have a different A record, like this in my case:
And don’t forget to point the URLs in the configuration too, like this:
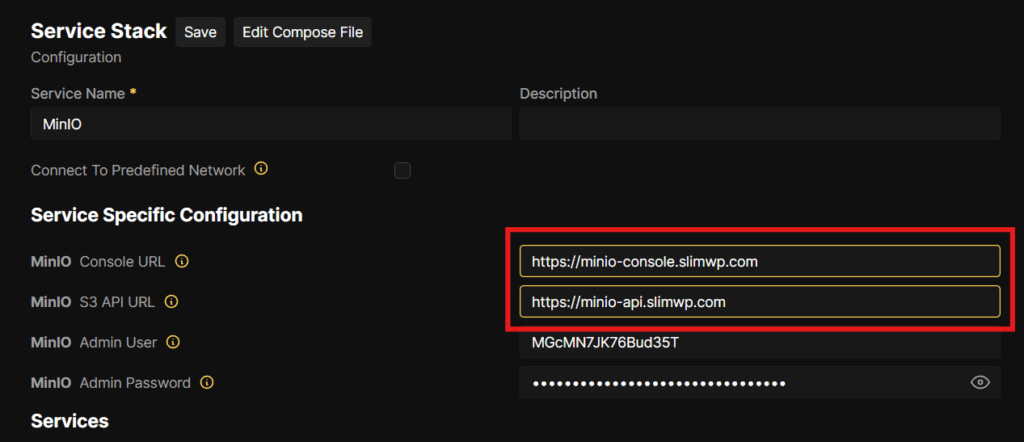
Now, restart MinIO, and in a couple of minutes, you should be able to open your console using the new subdomain we added. However, it will prompt you for a username and password, which are directly under the URLs, as shown above.
And like this you have MinIO successfully deployed in Coolify, and you can create buckets directly from the console:
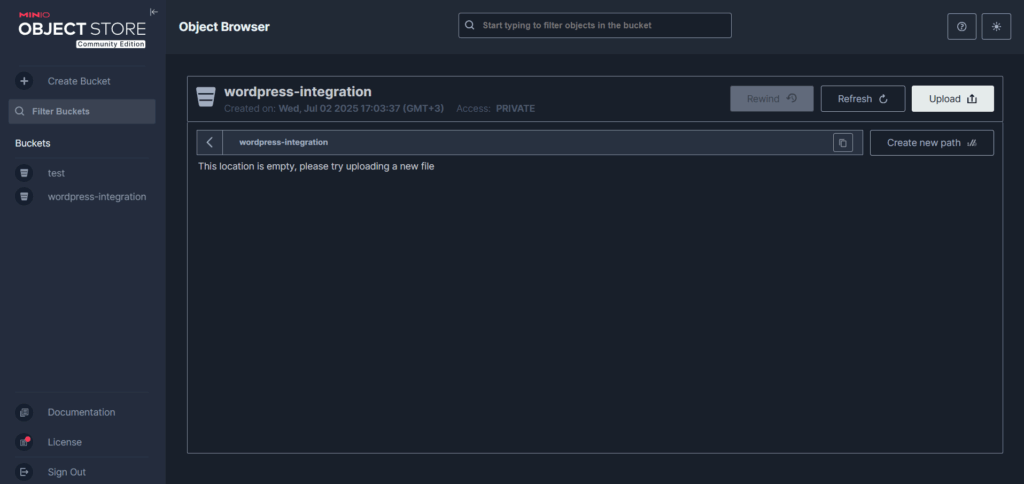
As you can see I created a bucket called wordpress-integration which we’ll be using to offload our media.
But there’s a problem!
MinIO has recently removed the web-based admin UI from its free Community Edition. So, management features like account and policy control, bucket configuration, and replication are now only available in their paid product, AIStor.
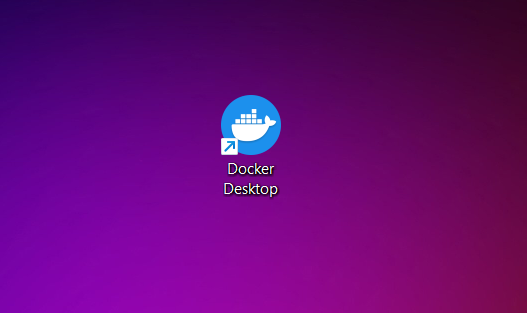
In order to setup the features we need, we’re gonna have to use the mc
We’ll use Docker Desktop, which is free and handles all the complex setup automatically.
For Windows/Mac Users:
- Go to docker.com/products/docker-desktop
- Download Docker Desktop for your operating system
- Run the installer (like installing any other software)
- Restart your computer when prompted
Once installed, open your terminal/CMD and type:
docker --version
You should see something like “Docker version 27.x.x”. Congratulations! Docker is ready.
Now, we’re gonna need to create a folder to store your MinIO configuration, so open cmd or powershell and paste this command:
docker run --rm -it -v C:\Users\[YourUsername]\.mc:/root/.mc minio/mc alias set myminio https://[s3-api-url] your_admin_username your_admin_password
Make sure to replace:
[YourUsername]with your Windows usernameyour-s3-domainwith your actual S3 API URL you get from Coolifyyour_admin_usernameandyour_admin_passwordwith your MinIO credentials from Coolify
Here’s an example from my case:
docker run --rm -it -v C:\Users\hasan\.mc:/root/.mc minio/mc alias set myminio https://minio-api.slimwp.com MGcMN7JK76Bud35T XXEd7X1YXXXXXXXXkxKsT7n6
This will:
- Save config to
C:\Users\hasan\.mcon your Windows machine - Create a persistent alias named
myminio
To test that we successfully set it, run this command:
docker run --rm -it -v C:\Users\hasan\.mc:/root/.mc minio/mc ls myminio
If you see no errors, you’re connected, and you are able to interact with MinIO using this mc.
Now, for WordPress media to load properly, we have to make our bucket publicly accessible by running this:
docker run --rm -it -v C:\Users\[YourUsername]\.mc:/root/.mc minio/mc anonymous set download myminio/wordpress-integration
This allows anyone to download files from your bucket (which is what you want for website images).
Connecting WordPress to MinIO with Media Offloading
Now comes the exciting part – connecting your WordPress site to our self-hosted MinIO storage.
Install the WP Offload Media Plugin
I recommend the WP Offload Media plugin, because it’s the most reliable and feature-rich option for media offloading.
Plugin Installation:
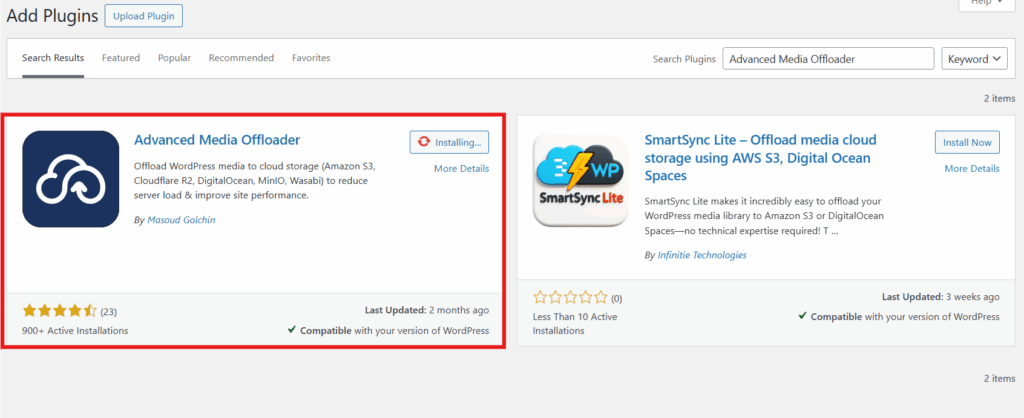
- Install from WordPress Admin
- Go to Plugins → Add New
- Search for “Advanced Media Offloader”
- Install and activate the plugin
Now, to configure this plugin we’ll have to add our credentials to the WordPress functions file, which is super easy using this plugin:
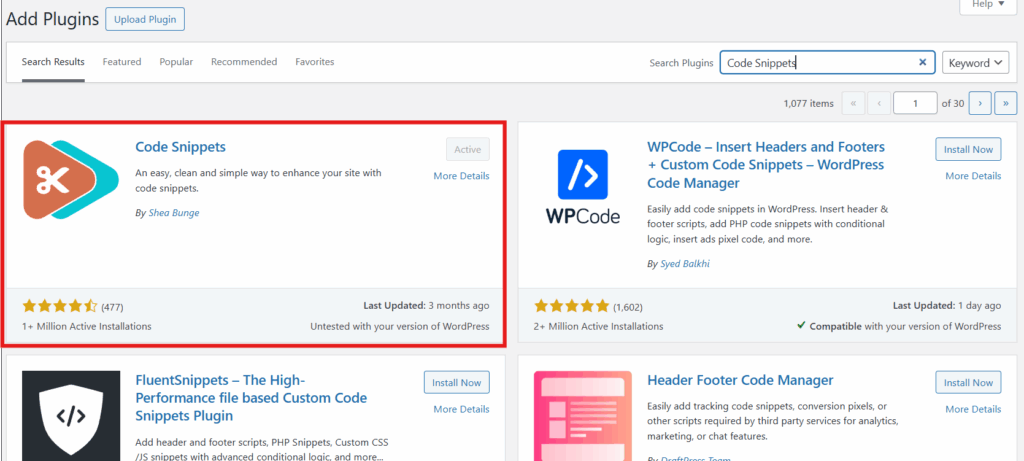
After you install it, navigate to the plugin, create a new code snippet, and paste the following inside it:
define('ADVMO_MINIO_KEY', 'your-minio-access-key');
define('ADVMO_MINIO_SECRET', 'your-minio-secret-key');
define('ADVMO_MINIO_ENDPOINT', 'your-minio-s3-endpoint-url');
define('ADVMO_MINIO_BUCKET', 'your-minio-bucket-name');
define('ADVMO_MINIO_DOMAIN', 'your-custom-domain');
define('ADVMO_MINIO_PATH_STYLE_ENDPOINT', true);
By now you should know what each variable refers to, so add your own credentials to it and you should get something like this (but with your own inputs ofcourse):
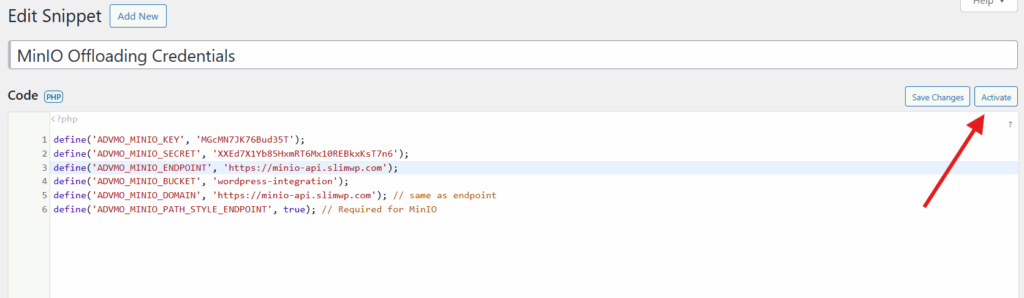
When done click the activate button and your credentials are all set!
Now it’s time to test if the connection to our MinIO storage, so navigate to the “Media Offloader” in your WordPress dashboard, and once you’re in the General Settings Page, choose MinIO as your cloud provider, then scroll a bit a press the test connection button, you should get something like this:
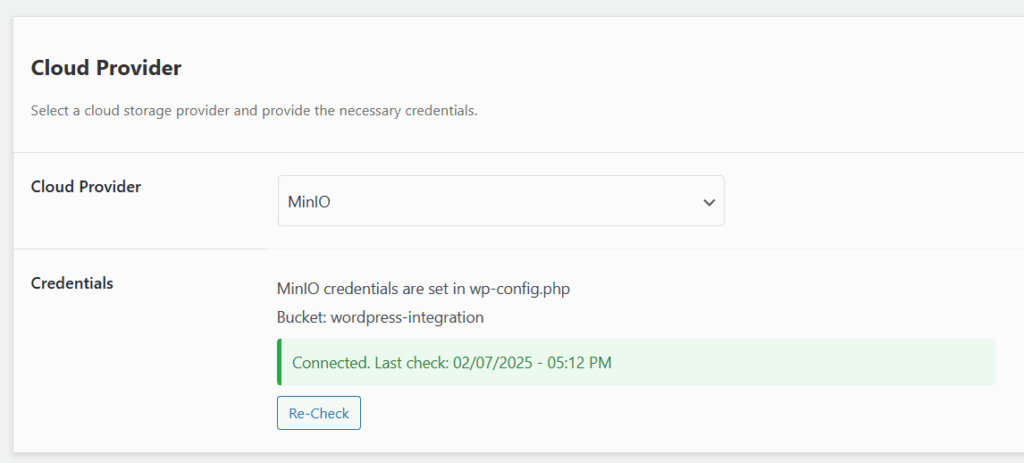
As you can see now our connection to MinIO is successful, now it’s time to offload all our media to the cloud.
So, inside the plugin navigate to media overview, and scroll down till the end, and press “Offload Now” button:
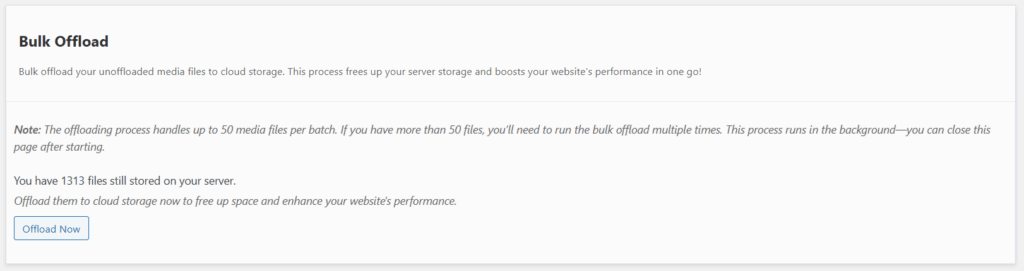
This will offload all the media on your WordPress site on to your MinIO self-hosted S3 cloud storage!
Important Tip:
Since MinIO removed their free web interface, I built a free open-source desktop application that brings back the user-friendly experience you’d expect.
My MinIO Windows Client: https://github.com/hassancs91/minio-windows-client
The Next Steps
We’ve just implemented a professional-grade media offloading solution that costs a fraction of cloud alternatives while giving you complete control over your data.
Next Steps to Maximize Performance:
- Implement Redis Caching: If you haven’t already, follow my Redis guide to cache database queries and dramatically speed up your site
- Monitor Performance: Set up monitoring to track the improvements
- Scale When Needed: Add more MinIO servers or implement clustering as you grow
Want to Learn More?
If you’re serious about taking control of your hosting infrastructure, check out my Self-Managed Hosting course. I’ll teach you everything from server setup to advanced deployments, helping you build a robust, cost-effective hosting solution.
For detailed MinIO setup and advanced configurations, you can also refer to my complete MinIO self-hosted S3 storage guide.
Questions or Issues? Join our community forum where you can ask questions, share your setup, and learn from other developers who’ve implemented similar solutions.