Speed Up Your WordPress Site by 10X Using Redis (+ Real Code Snippets)


If your WordPress site feels sluggish with loading times over 2-3 seconds, especially when running multiple plugins and dynamic content, Redis might be the missing piece.
I’ve implemented Redis on multiple WordPress sites & projects like PromoterKit and PowerKit, and the performance improvements have been game-changing.
What is Redis and Why Your Site Needs It
WordPress, by default, performs database queries for almost everything—loading posts, menus, widgets, and plugin data.
Each page request can trigger 20- 50+ database queries, and that adds up quickly.
Common WordPress Performance Bottlenecks:
- Heavy database queries: Loading posts, comments, metadata
- Plugin overhead: Each plugin adds more queries
- Dynamic content: Sidebar widgets, recent posts, related content
- User sessions: Authentication and personalization
- Theme complexity: Custom fields, page builders
Redis is an in-memory data store that acts as a lightning-fast cache for your WordPress database.
Instead of hitting MySQL for every request, WordPress gets data directly from Memory (Which is Super Fast)
What Redis Caches in WordPress:
- Database query results
- Post and page content
- Menu structures and widgets
- Plugin outputs and metadata
- User sessions and authentication data
- Custom field values
You might ask now, then, how is Redis different from normal databases?
While databases store everything permanently on disk, Redis keeps data in Memory temporarily, which makes data access instant.
Choose Your Redis Setup: Cloud vs Self-Hosting
To use Redis, you have two main paths: using Redis Cloud or self-managed hosting.
Redis Cloud offers a free tier that’s perfect for testing and small startup projects.
However, once you scale to production with thousands of monthly users, the costs add up quickly. What starts as free can easily become around $200 monthly ($0.274/hour) for production workloads.
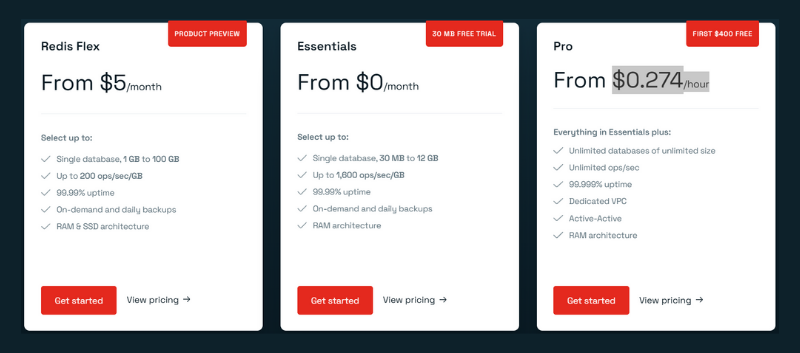
Self-hosting becomes a better choice for production applications.
While you still pay for the VPS/server, which would be around $10-50/month, depending on what you choose, you’ll get:
- Better cost control: No extra hourly charges
- Full data control: All your data is only available to you and not in Redis database
- Multiple projects: Run several Redis instances on one server
In my case, I self-hosted using Coolify, which makes deployment a 3-click process. The cost difference is dramatic: Redis Cloud can cost $200 monthly for what runs perfectly on a $20 VPS.
Self-Hosting Redis with Coolify in Minutes
You can easily deploy Redis using Coolify, a self-hostable platform.
Here’s how to get Redis running on Coolify:
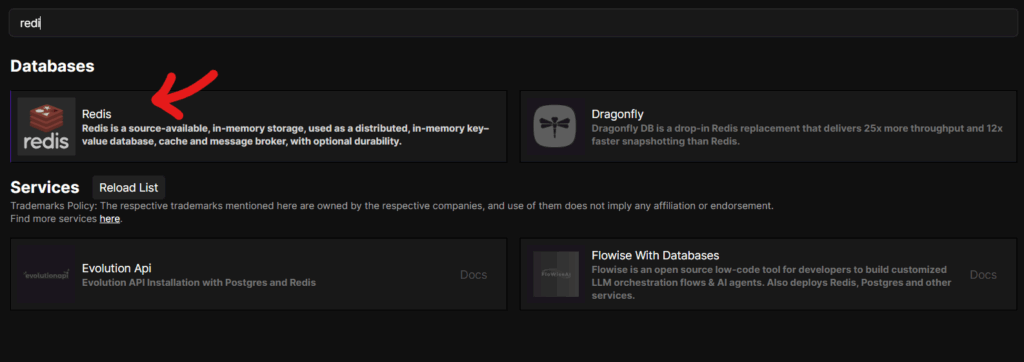
- Open Coolify and go to your project
- Navigate to the “Databases” section
- Search for Redis and click on it
- Click “Start” to deploy Redis – it’s a one-click deployment
- Make it public (optional but required for external access):
- Scroll down and enable Publicly Available
- Assign a unique public port (e.g.,
5433)
- Copy the Public URL – you’ll need this for WordPress configuration
That’s it!
Your Redis instance is now running and accessible.
Coolify handles all the Docker containers, networking, and service management behind the scenes. If you want more detailed tutorials on how to use Coolify and install other instances easily, check out my self-managed hosting course 2.0.
Connecting Redis to WordPress
Now let’s configure WordPress to use our new Redis cache:
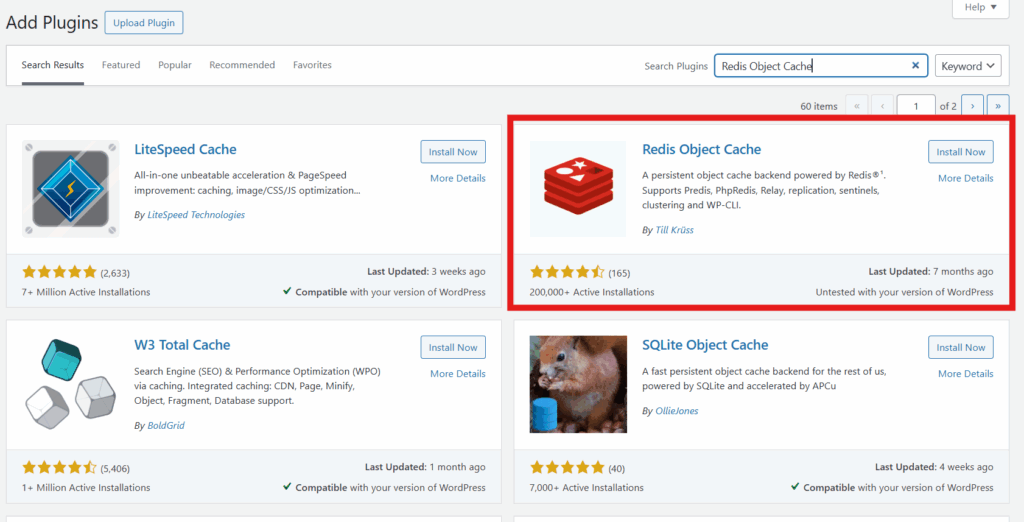
Step 1: Install the Redis Object Cache Plugin:
- Go to WordPress Admin → Plugins → Add New
- Search for “Redis Object Cache”, install, and activate it.
Step 2: Configure the wp-config.php file
Navigate to your WordPress files, and you’ll find the wp-config.php file in the public_html folder.
Open the file, search for the line containing /* That’s all, stop editing! Happy publishing! */, and add the following directly above it:
// Redis Configuration
define('WP_REDIS_HOST', 'your-coolify-server-ip');
define('WP_REDIS_PORT', 5433); // Your assigned port
define('WP_REDIS_DATABASE', 0);
define('WP_REDIS_PASSWORD', 'your-redis-password'); // if assigned

// Optional: Set a custom prefix for easier identification in RedisInsight
define('WP_REDIS_PREFIX', 'mysite:');
Step 3: Enable Redis Cache
- Go to WordPress Admin → Settings → Redis
- Click “Enable Object Cache.”
- You should see the “Connected” status

Testing WordPress Redis Performance
Let’s create a real test to see Redis in action. I’ll show you how to build a custom WordPress endpoint that simulates heavy database operations.
Here is a Test Endpoint in functions.php:
// Add this to your theme's functions.php
add_action('rest_api_init', function () {
    register_rest_route('custom/v1', '/redis-testing/(?P<id>\d+)', array(
        'methods' => 'GET',
        'callback' => 'redis_testing',
        'args' => array(
            'id' => array(
                'validate_callback' => function($param, $request, $key) {
                    return is_numeric($param);
                }
            ),
        ),
    ));
});

function redis_testing($request) {
    $start_time = microtime(true);
    $id = $request['id'];
    $cache_key = "redis_test_$id";

    // Check if Redis object cache is actually enabled
    $using_redis = wp_cache_supports('flush_runtime');

    // Check if data exists in object cache (Redis)
    $cached_result = wp_cache_get($cache_key);

    if ($cached_result !== false) {
        $end_time = microtime(true);
        $execution_time = round(($end_time - $start_time) * 1000, 2); // Convert to milliseconds

        return new WP_REST_Response(array(
            'result' => $cached_result,
            'cached' => true,
            'execution_time_ms' => $execution_time,
            'redis_enabled' => $using_redis,
            'timestamp' => current_time('mysql')
        ), 200);
    }

    // Simulate heavy database operation or API call
    error_log("Starting heavy calculation for ID: $id");
    sleep(3); // 3-second delay to simulate slow operation

    // Simulate a complex calculation
    $result = array(
        'calculation_id' => $id,
        'complex_result' => "Heavy calculation for ID $id: " . md5($id . time()),
        'processing_time' => '~3 seconds',
        'generated_at' => current_time('mysql'),
        'random_data' => array(
            'value1' => rand(1000, 9999),
            'value2' => rand(1000, 9999),
            'computed' => rand(1000, 9999) * rand(100, 999)
        )
    );

    // Cache the result for 5 minutes
    wp_cache_set($cache_key, $result, '', 300);

    $end_time = microtime(true);
    $execution_time = round(($end_time - $start_time) * 1000, 2); // Convert to milliseconds

    return new WP_REST_Response(array(
        'result' => $result,
        'cached' => false,
        'execution_time_ms' => $execution_time,
        'redis_enabled' => $using_redis,
        'timestamp' => current_time('mysql')
    ), 200);
}
While the above example uses a dummy function with sleep() just to simulate time-consuming operations, this exact workflow is how you can build real SaaS applications on WordPress.
In my WordPress SaaS Course 2.0, I teach you to create these same REST API endpoints for actual applications with the exact business logic of handling user subscriptions and payments. The frontend of your SaaS tool calls these endpoints, and Redis ensures your users get lightning-fast responses.
Testing the Performance Difference:
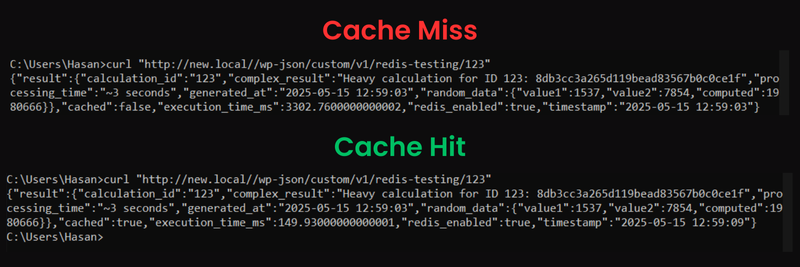
Now, open your cmd and let’s test our endpoint using this command:
curl "https://yoursite.com/wp-json/custom/v1/redis-testing/123"
Real Performance Results:
- First call: 3,307ms (≈3.3 seconds) – Had to perform heavy calculation
- Second call: 152.5ms (≈0.15 seconds) – Served from Redis cache
- Performance improvement: 95.4% faster with Redis!
Without Redis (Object Cache disabled):
- Call 1: 3.1 seconds
- Call 2: 3.2 seconds
- Call 3: 3.1 seconds
- Total: 9.4 seconds
With Redis (Object Cache enabled):
- Call 1 (miss): 3.1 seconds
- Call 2 (hit): 68ms
- Call 3 (hit): 52ms
- Total: 3.22 seconds (71% improvement)
This is just one endpoint. Imagine this improvement across your entire WordPress site—posts, pages, widgets, plugins all loading from Redis instead of hitting the database repeatedly.
Monitoring Redis Performance with RedisInsight
To see what’s happening inside your Redis cache, use RedisInsight, the official Redis management tool.
It helps you see all the data you cached, for example here is the cached data from the previous example:
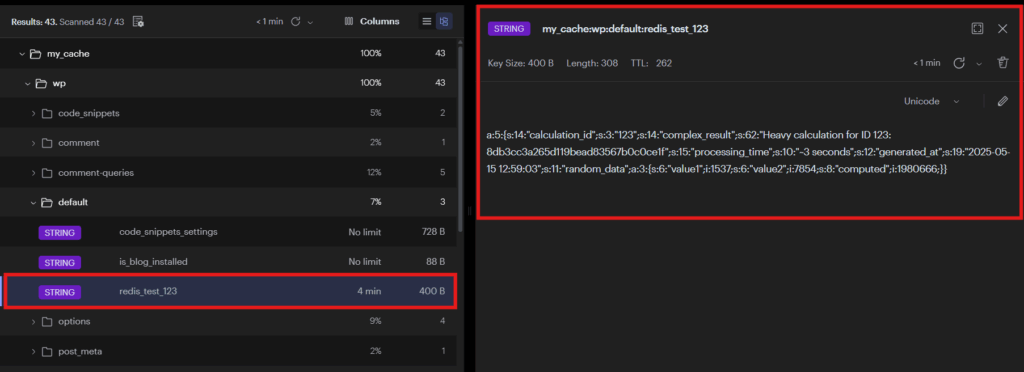
Setting up RedisInsight:
- Download RedisInsight from Redis
- Add your Coolify Redis URL as a new database
- Connect and explore your WordPress cache data
What You’ll See:
- WordPress object cache keys (posts, queries, etc.)
- Memory usage and hit/miss ratios
- Real-time monitoring of cache operations
- TTL (time to live) for cached objects
You can watch in real-time as WordPress stores and retrieves data from Redis.
It’s important to see how and what Redis is doing behind the scenes.
Real-World WordPress Performance Improvements
After implementing Redis on my WordPress sites, I consistently see:
- Page load times: 2-4 seconds → 400-800ms
- Database queries: Reduced by 60-80%
- Server load: Significantly lower during traffic spikes
- Plugin performance: Faster widgets, search, related posts
- Admin dashboard: Noticeably snappier interface
Best Practices for WordPress + Redis:
- Monitor cache hit ratios: Should be 80%+ for good performance
- Set appropriate TTL: Balance freshness vs performance
- Flush cache when needed: After content updates, plugin changes
- Use persistent object cache: Survives individual page loads
- Regular monitoring: Keep an eye on memory usage
The 95% performance improvement we demonstrated is just the beginning—every database query, post load, and plugin operation benefits from Redis caching.
Self-hosting Redis through Coolify gives you enterprise-level performance without enterprise costs, making it accessible for any WordPress site looking to deliver a better user experience.
Frequently Asked Questions
Q: When should I use Redis Cloud instead of self-hosting?
A: Redis Cloud’s free tier (30MB) is perfect for testing and small personal blogs. The $5/month plan (250MB) works well for small business sites with moderate traffic. However, for production sites with significant traffic or multiple projects, self-hosting becomes more cost-effective. Use cloud hosting if you prefer zero maintenance and don’t mind the recurring costs.
Q: What happens if my Redis server crashes?
A: WordPress automatically falls back to the database. Your site stays online, but reverts to slower performance until Redis is restored. This fail-safe mechanism ensures Redis never becomes a single point of failure.
Q: Can I easily turn off Redis Cache if I want?
A: Yes, it’s a 1-click process. All you have to do is go to WordPress Admin → Settings → Redis, and click “Disable Object Cache”, and if you want to turn it back on, do the same and click “Enable Object Cache.”
Q: How much server memory does Redis typically use for WordPress?
A: For most WordPress sites, Redis uses 50-200MB of RAM. A typical blog with 1000 posts uses around 100MB, while larger sites with many plugins might use 300-500MB. This is a tiny fraction of your server’s memory for massive performance gains.
Q: How can I clear all the Redis cache?
A: The Redis Object Cache plugin provides a simple “Flush Cache” button when needed, you can find it when you go to WordPress Admin → Settings → Redis.


